The Thanksgiving turkey has been served with all its trimmings, the kitchen has been cleaned, your holiday guests have all returned home and now it's time to deck your halls! Have you seen those inexpensive plaster molded holiday ornaments and wondered what can I do with them? I have a crafty solution that takes no time at all! Check it out ...

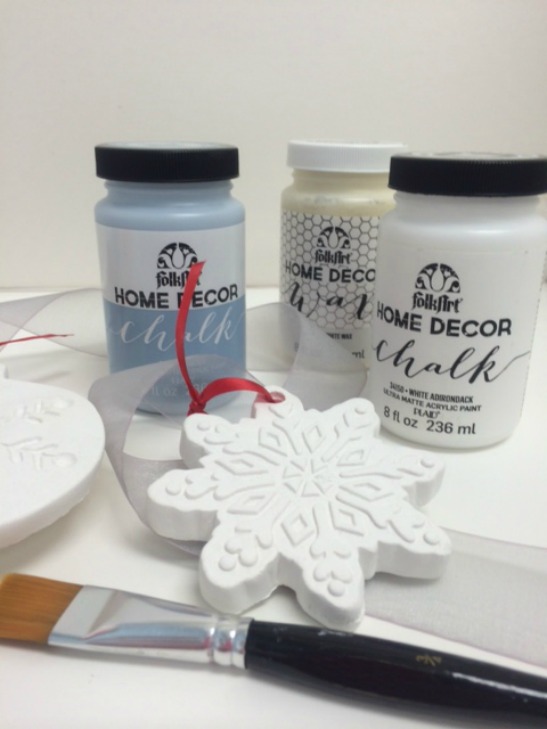
Let's begin by gathering all the necessary supplies ....
Plaster Molded Ornaments
Miscellaneous Supplies: Brush Basin for water, 3/4" Flat Brush, Fine Grit Sandpaper, Clean Lint-free Cotton Cloth, Organza Ribbon (optional)
To begin, I removed the price tag sticker from the back or each snowflake ornament. I then checked each of the sides for sharp edges or bumps because I wanted my ornaments to have smooth-to-the-touch edges. To remove any sharp edges, ridges or bumps, lightly sand the rough spots with fine grit sandpaper.
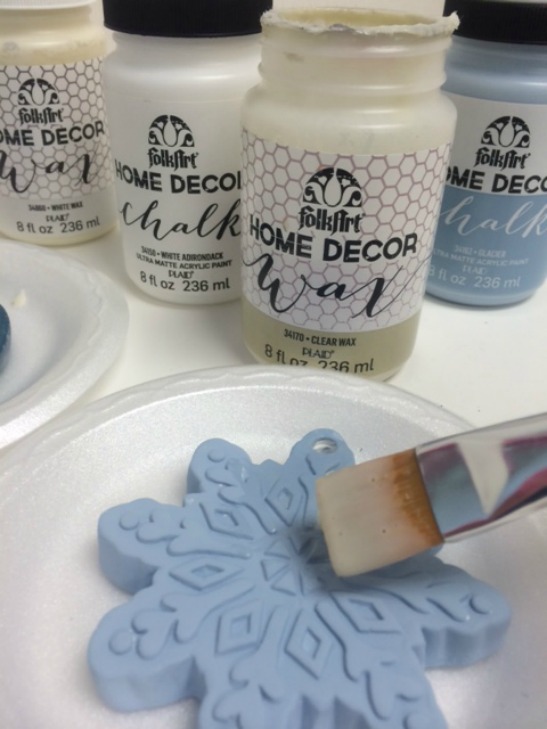
The next step of course, is to begin painting. TIP: These plaster ornaments are very porous and absorbent so when I basecoated each ornament I actually applied two coats of each base color allowing drying time between applications. One ornament was basecoated Glacier and the second ornament was painted Turkish Tile. Because these surfaces were smaller than normal FolkArt Home Decor Chalk style projects, I used a 3/4" flat paintbrush.
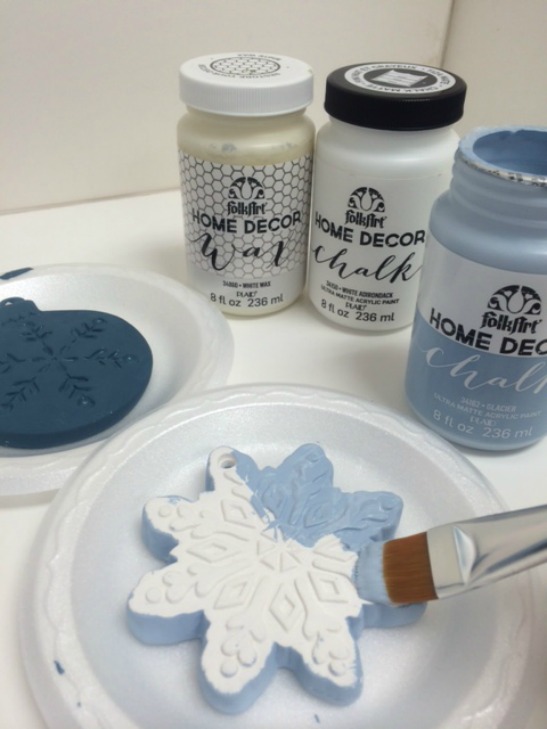
The trick when working with plaster is that it will sand to a fine powder in no time at all. When I decided to create vintage looking ornaments using FolkArt Home Decor Chalk and the classic dry distressed look, I knew I would need to protect the basecoat colors. So I then brushed on a coat of FolkArt Home Decor Clear Wax directly over the base colors and allowed it to dry. TIP: The protective layer of Clear Wax between the basecoat and topcoat allowed me to sand to distress without sanding completely down to the plaster.
Once the Clear Wax was dry, I used a clean, lint-free, cotton cloth to buff the waxed surfaces of each ornament.
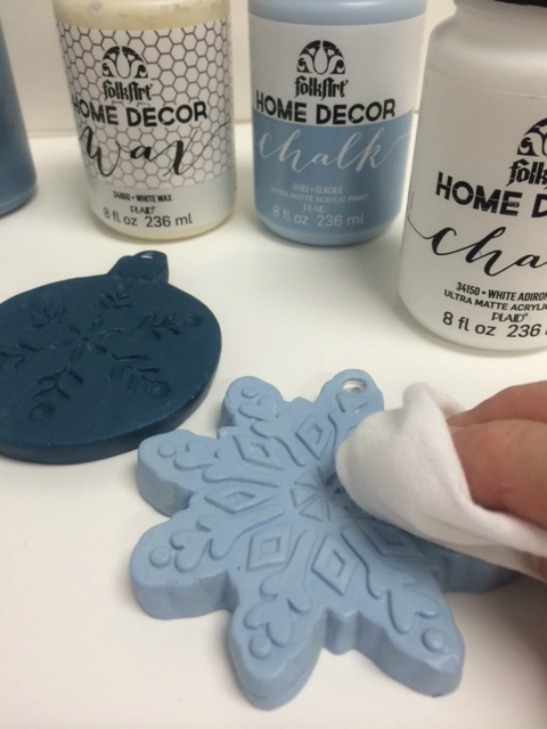
I then applied the topcoat of White Adirondack paint and allowed it to dry. TIP: If your ornaments are heavily embellished with dimensional designs like mine, be sure to paint around all the details.

Once dry, the classic dry distressing was achieved. TIP: For this surface, I was very careful to use a very fine grit sandpaper (#400 - #600) as well as very light pressure. Sand areas that you want to highlight the design embellishments and remember to sand the edges and backs.
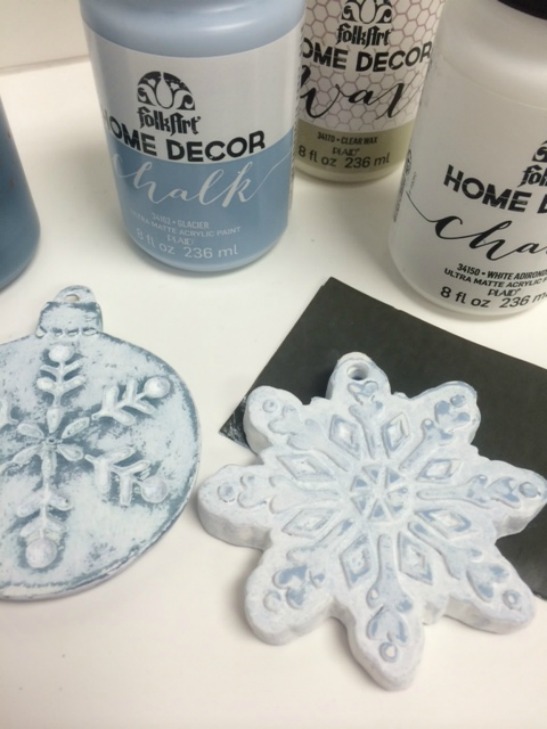
Once happy with the distressed look I achieved, I applied one more coat of FolkArt Home Decor Clear Wax to the entire ornament surface, allowed the wax to dry and then I buffed each ornament to a sheen so that they would slightly glisten on the tree!
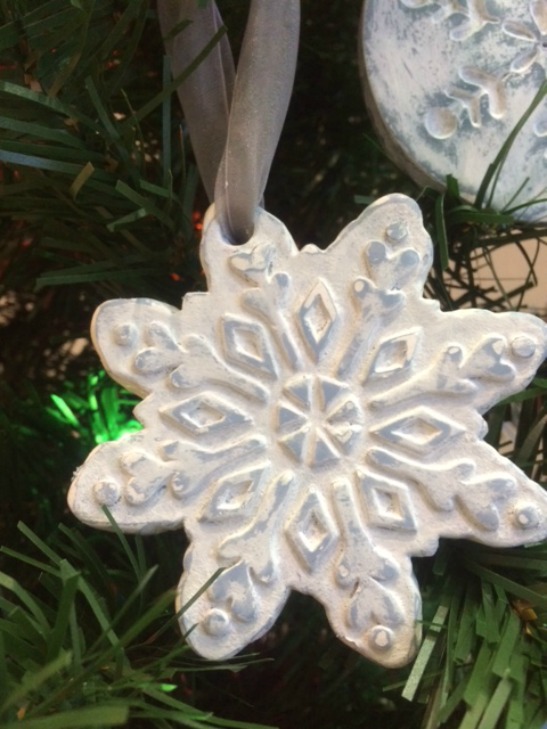
Earlier, I had removed the inexpensive red ribbon that came with the ornaments and tossed it because I knew I would replace it with a nice wide, silvery-white organza ribbon. What do you think? I love the look and feel of these vintage inspired ornaments, don't you?
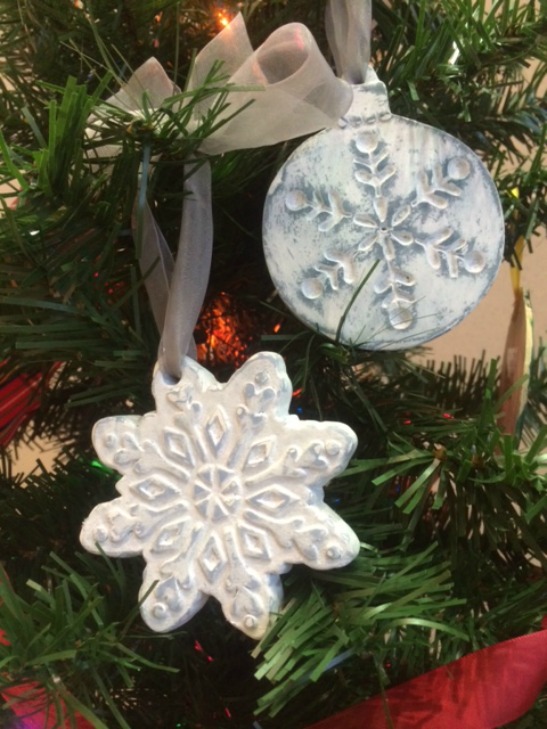
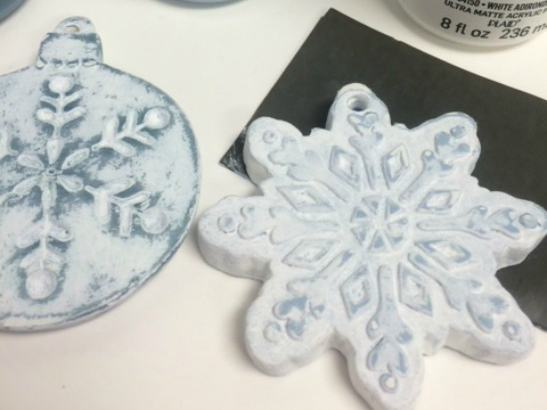
Here's a close up of one ornament painted Turkish Tile and White Adirondack ...
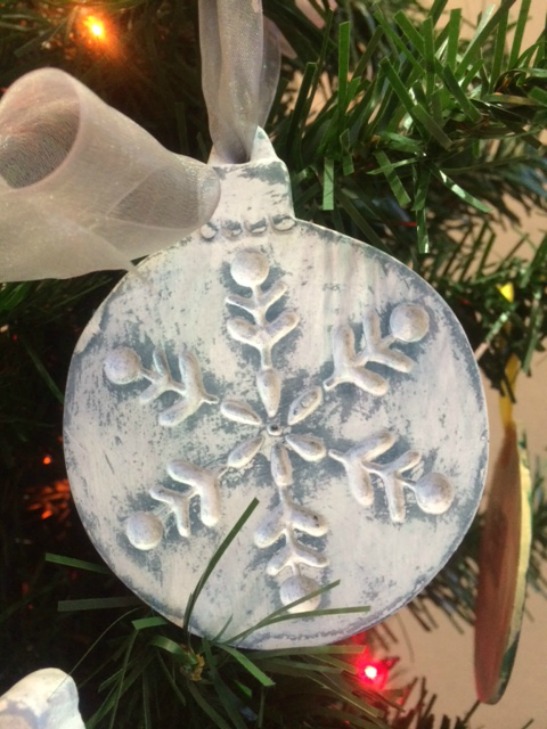
This winning paint combo is Glacier and White Adirondack!
Let me know what you think, would love to hear from you! And don't forget to personalize on the back of each of your ornaments with "Christmas 2014" or perhaps add a family name! If desired, personalization can be added by painting using a liner brush, or a fine tip marker!
These ornaments will add a vintage feel to my tree this year!