This how-to post is for all quilters out there who love to decoupage OR maybe it is for those who love decoupage and are interested in quilting!
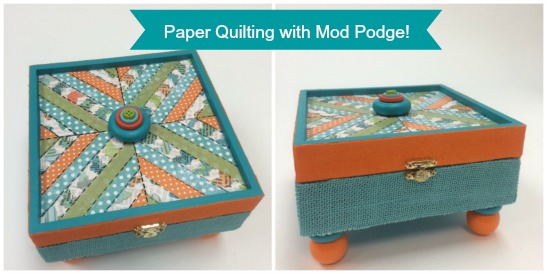
Have you ever thought of paper quilting? Well today, I am going to share with you one way to paper piece a quilt top to decorate a box lid. It is so much fun to do and so easy when your design resembles string quilting.
So let's begin by gathering all the necessary supplies ....
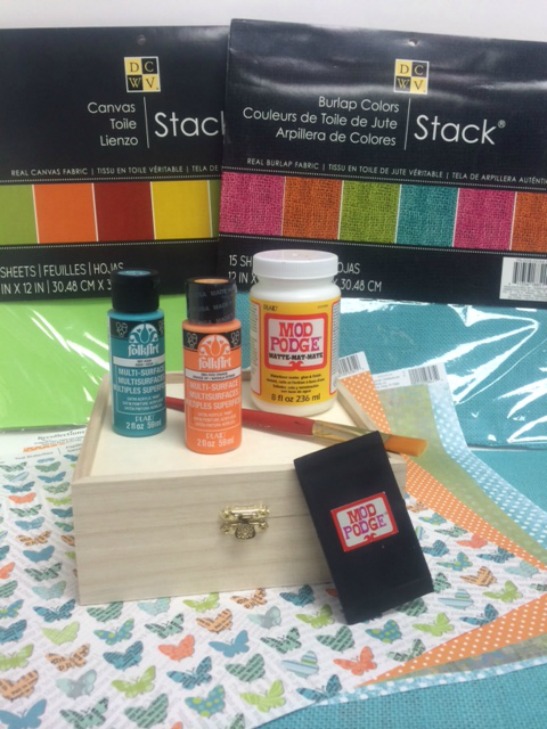
Supplies:
- CS11302 Mod Podge Matte
- CS25135 Mod Podge Wonder Glue
- 25141 Mod Podge Silicon Craft Mat
- 2904 FolkArt Multi-Surface Paints - Vivid Orange
- 2921 FolkArt Multi-Surface Paints - Aqua
- 2934 FolkArt Multi-Surface Paints - Licorice
- Square Box with inset on lid
- 1 1/2" Wood Wheel - qty. 1
- 1 1/4" Wood Wheels - qty. 4
- 1" Wood Balls (with flat bottom) - qty. 4
- DCWV Burlap Colors Stack - Turquoise
- DCWV Canvas Colors Stack - Orange
- Four Assorted Coordinating Scrapbook Papers - 1 12" x 12" sheet
- Miscellaneous Supplies: Brush Basin or container for water, Paper Towels, Foam Plate, 3/4" Flat Brush, One large Orange Button, One medium Turquoise Button, One small Green Button, Scissors, Waxed Paper, Mod Podge Squeegee, Small Phillips Screwdriver, Fine to Medium Grit Sandpaper
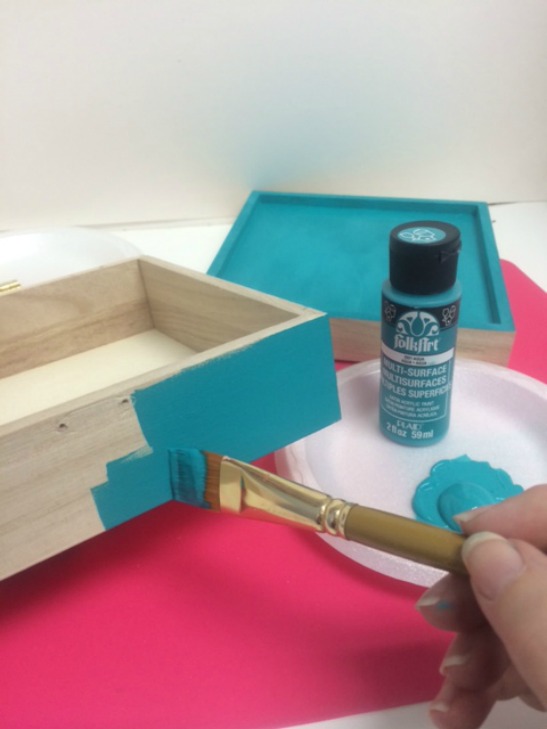
In preparation for basecoating, I like to remove the hardware, so I use a small head Phillip's screwdriver to remove the opening clasp as well as the two hinges to the box. Carefully save all the tiny screws, clasps and hinges in a small bowl and set aside.
Using a 3/4" flat brush, begin basecoating the box bottom with FolkArt Multi-Surface paint - Aqua. Allow to dry. Check out the coverage I got with only one coat of Aqua! If desired, you can sand smooth using fine to medium grit sandpaper and reapply the color. Using this same technique, prepare the box lid painting Vivid Orange around the sides of the lid and Aqua on the box lid inset. If desired, paint the interior of the box as well.
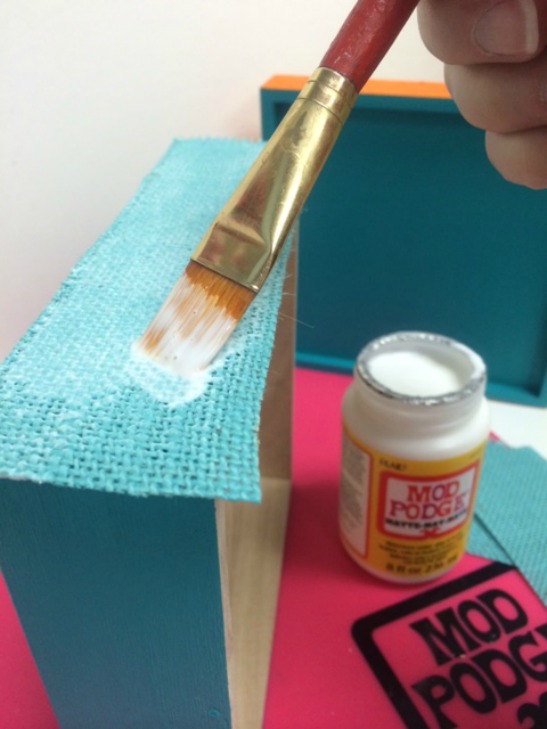
Once the basecoating preparation is complete and thoroughly dry, cut four sections of turquoise burlap. Cut the burlap the size of one box bottom side. Working one side of the box at a time, decoupage the burlap sections by brushing a liberal coat of Mod Podge Matte onto the Aqua basecoat.
Position the burlap over the wet Mod Podge and smooth in place. TIP: Sometimes, fabric may stretch as you work with it wet. Don't worry if your burlap section is slightly larger than the side of the box, it can be trimmed after it is in place. Continue working on the same section and apply a liberal coat of Mod Podge over the burlap to seal in place. Repeat this step to decoupage the burlap sections to the remaining three sides. Once all sides are dry, trim away excess burlap.
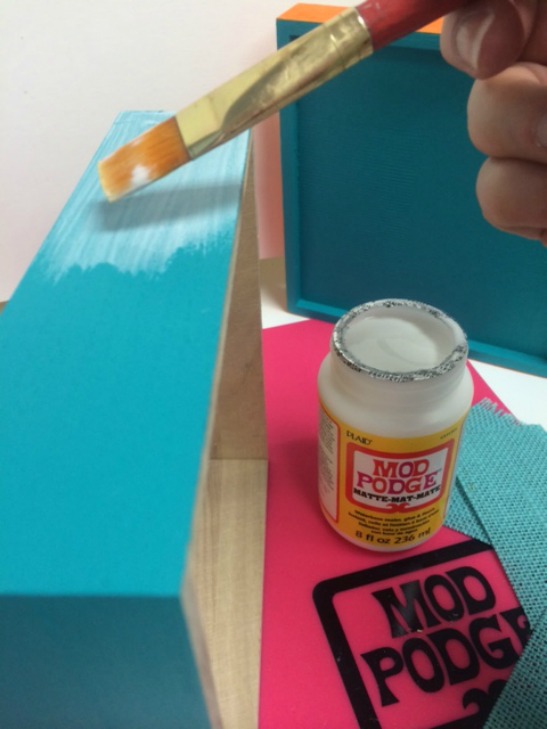
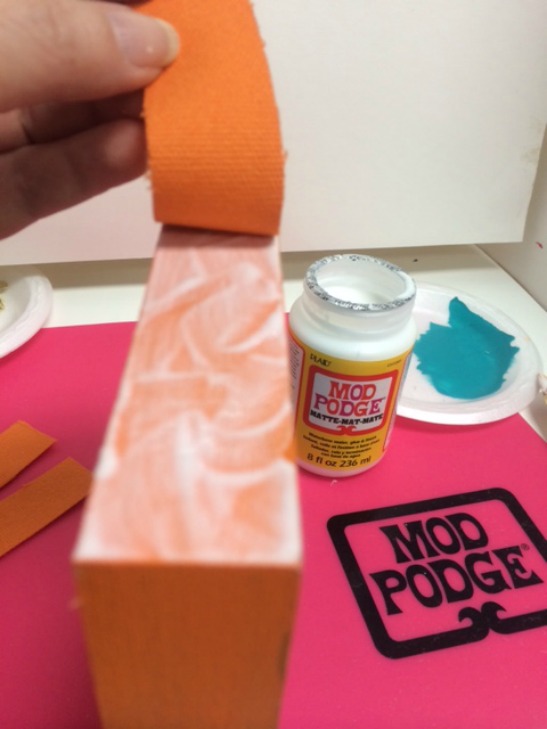
Using the same techniques, apply Mod Podge Matte to the Vivid Orange box lid sides and adhere the orange canvas fabric. Remember to trim away excess fabric if needed.
And now comes the super fun part .... paper piecing! Using the box lid inset as my guide for the size of my string quilt, I created a paper pattern of the inset and then divided it into four quarters. Using that pattern, I then cut four paper squares that would fit perfectly in the box lid. I also cut several 1/2" strips of the chosen four coordinating scrapbook papers. TIP: Looking at the paper design, be creative as the paper strips can be cut diagonally or straight across depending on how the design looks.
Next, position one quarter square on your work surface, brush Mod Podge Matte over the center of the square working on a diagonal.
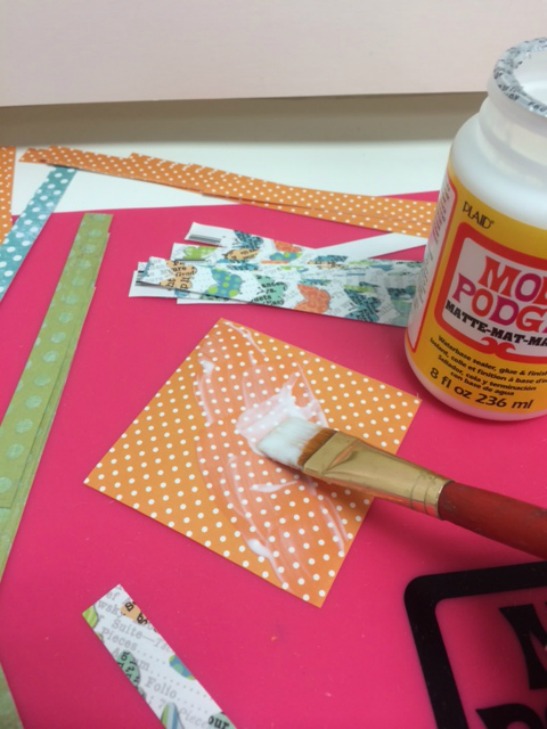
Quickly, while the Mod Podge is wet, begin "sewing" your paper quilt by piecing the paper strips on the diagonal. Keep adding Mod Podge and paper strips enough to fill the square. Allow to dry.
TIP: It's OK to allow the paper strips to extend beyond the size of the quarter square as they will be trimmed when dry. Finish this paper string quilt section with a top coat of Mod Podge Matte.

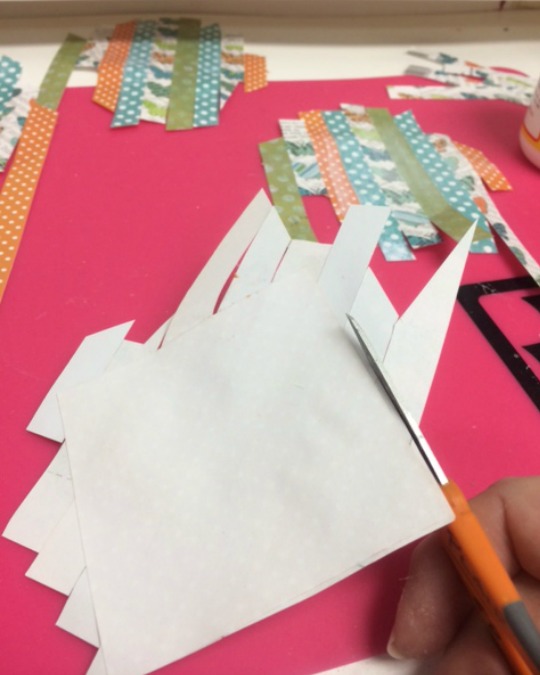
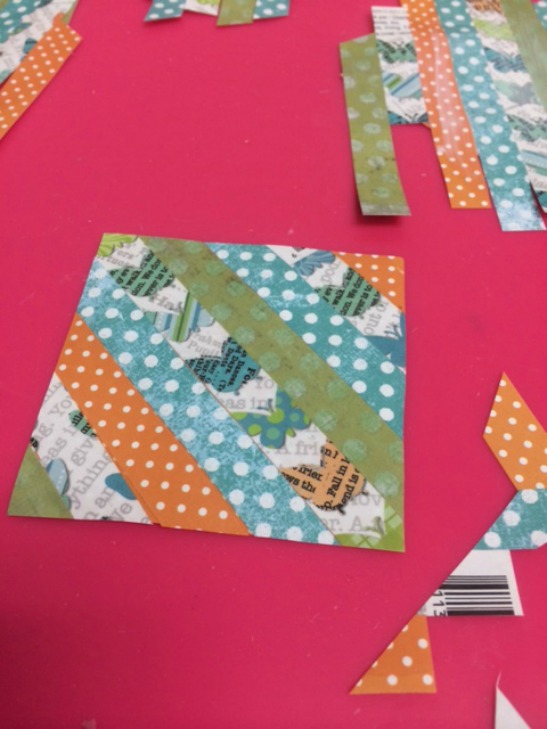
Repeat to create the three remaining string quilt quarters. Allow to dry. Once thoroughly dry, flip each square over to reveal the original square and trim away the excess strips.
And here is one square completed! Isn't it cute? Looks like a real string quilt section, doesn't it?
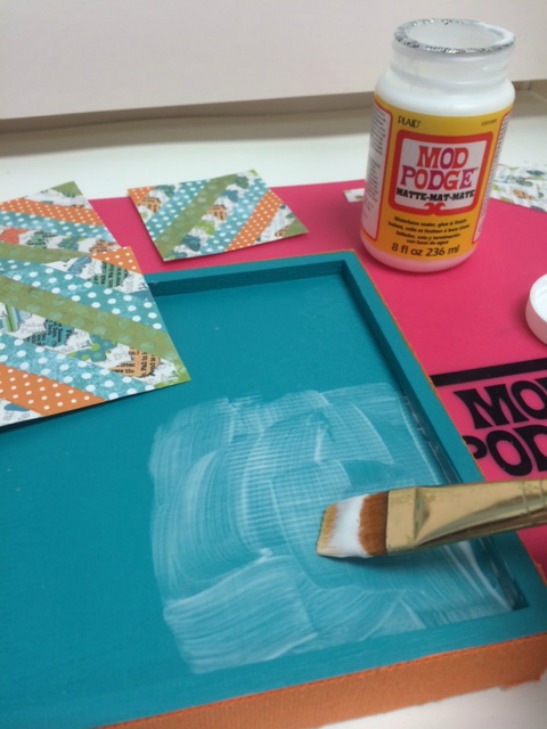
Next, assemble the quilt squares within the box lid inset. Working one quarter at a time, brush a coat of Mod Podge Matte onto the box lid as well as the backside of one square.
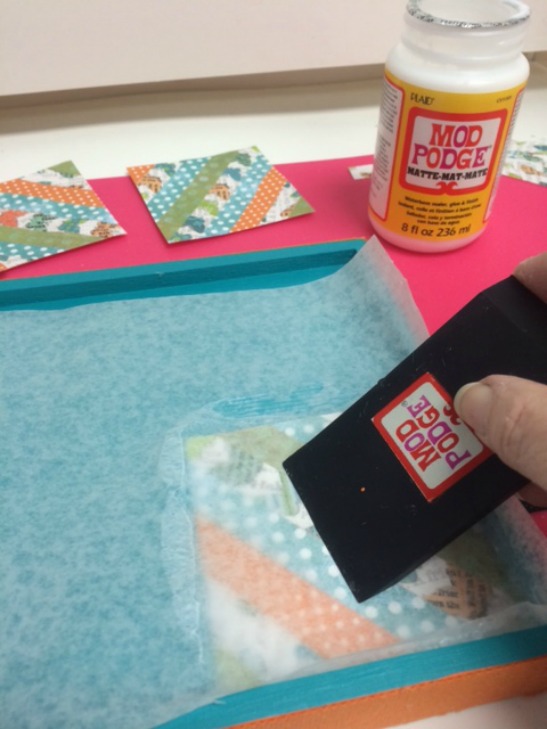
Press in place and layer with a section of waxed paper. Smooth out wrinkles or possible air bubbles using a Mod Podge squeegee. TIP: Using waxed paper between the scrapbook paper and the Mod Podge squeegee will protect your tool and keep your area neat and tidy as the excess Mod Podge squeezed out will cling to the wax paper when removed!
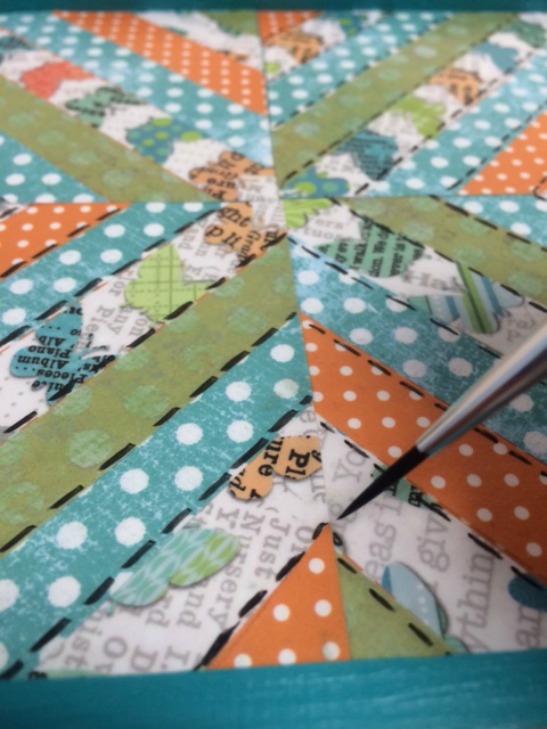
Repeat to decoupage the remaining three sections. Here is a close up of the box lid. Cool, eh? To seal and protect it all, apply one more coat of Mod Podge Matte to the pieced paper quilt.

Of course, you can call it quits here, however, I thought the "sewing" detail was missing. So I thinned FolkArt Multi-Surface Licorice with water to an ink-like consistency and loaded my liner brush. I then painted a running stitch along each strip of paper. I chose Licorice as an accent to the type on one of the patterned papers, of course, you can choose "basic white thread" - Wicker White or an other complementary color. TIP: If you prefer "stitch" lines can be added using a fine point permanent ink marker.
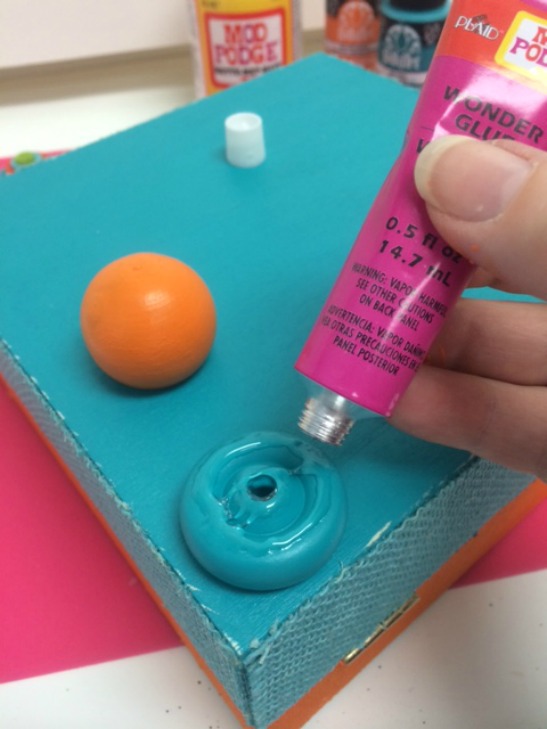
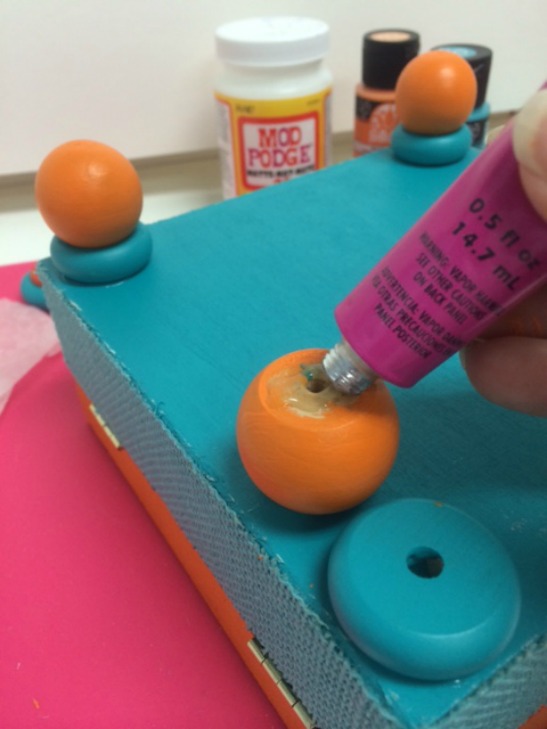
Next, I reassembled the box adding the two hinges and the front closure clasp. I painted all the wood wheels FolkArt Multi-Surface Aqua and the wood knobs Vivid Orange. When dry, I assembled the box legs. Using Mod Podge Wonder Glue which is a very strong adhesive, I glued the wood wheels to the box corners, keeping the flat side up; (this photo shows the Mod Podge Wonder Glue being added to the wheel).
I then added the ball feet to the wood wheels, keeping the flat side of the wood ball to the flat side of the wheel. TIP: Allow the glue to set before moving around.
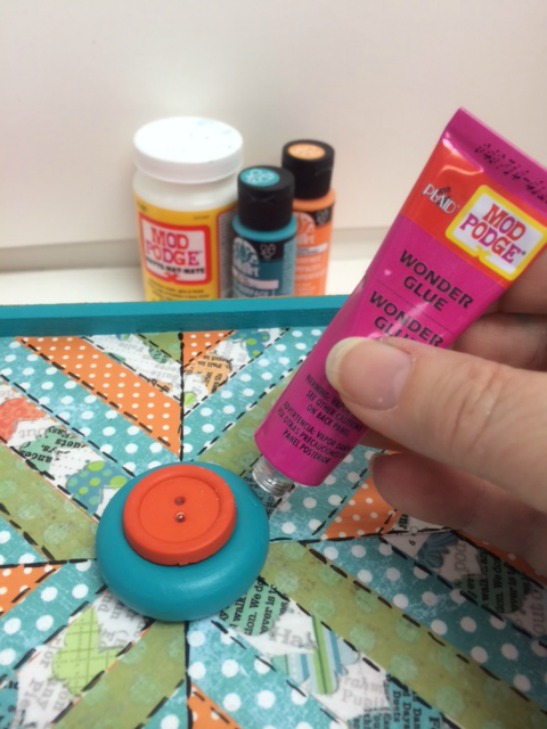
The center of the paper pieced string quilt needed a little trim, so I adhered the larger wood wheel in the center and then stacked the large orange button on top of that. Again, I used Mod Podge Wonder Glue to hold it all in place.
I then added to the stack a medium sized turquoise button and a tiny green button! Charming, right? I think it added a little pizzazz to the box lid!
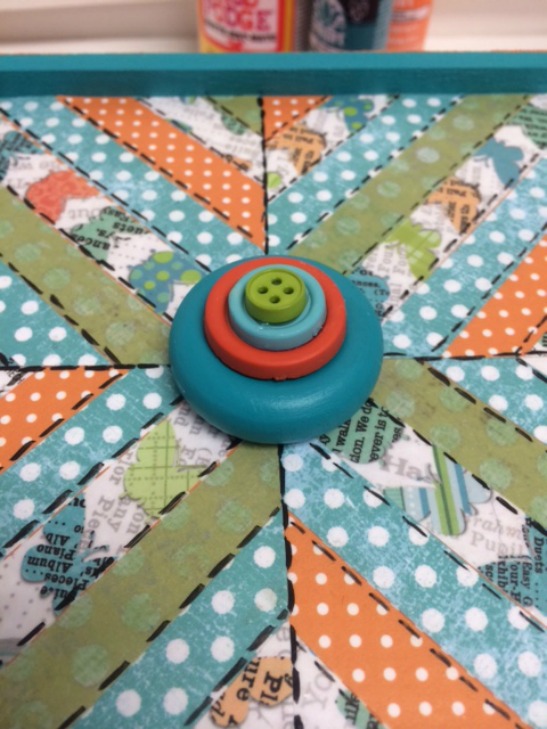
Here is one more look at the completed paper pieced string quilt! Don't you love it? Let me know what you think. And if you love quilting or the quilted look, just think of the thousands of quilting patterns you can replicate in paper! So many, so much inspiration!