Continuing our National Craft Month celebrations, I thought today's lesson would involve sharing with you a hot trend combined with a new very fun-to-use tool!
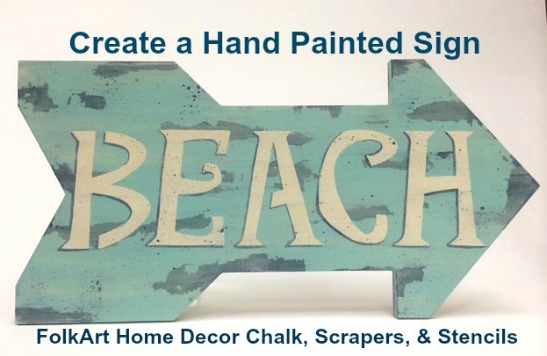
The trend? Hand painted or lettered signs! If you look through all decorating magazines, inspiration sites such as Pinterest or selling sites such as Etsy, you will find many, many signs for sale. In today's how-to post I will share with you step-by-step how I created this hand painted sign using stencils and FolkArt Home Decor Chalk. I am also happy to share with you one of the new FolkArt Home Decor tools, the set of Scrapers! They're easy to use and allow you to create a very time-worn, vintage look!
So, let's get our supplies gathered together and have some fun!
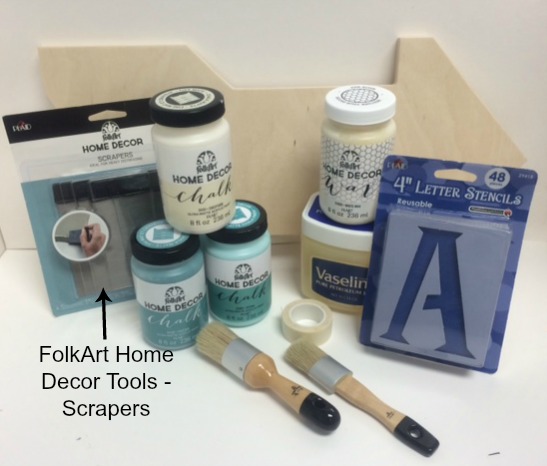
34803 FolkArt Home Decor Chalk - Patina OR
34159 FolkArt Home Decor Chalk - Cascade
34151 FolkArt Home Decor Chalk - Sheepskin
36021 FolkArt Home Decor Chalk - Turkish Tile
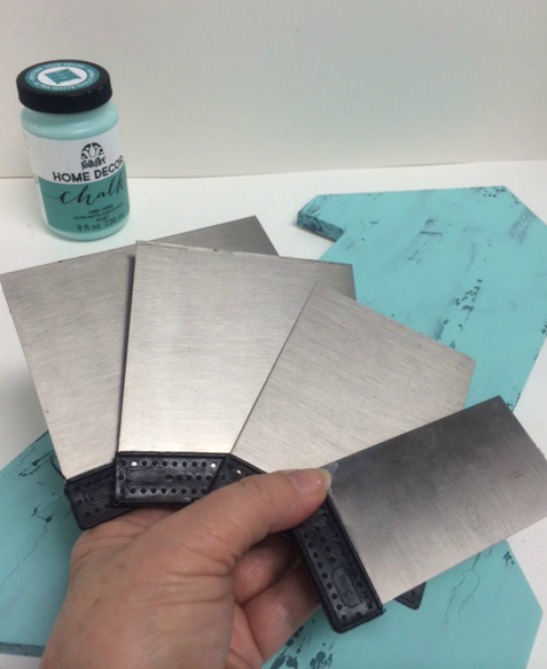
34913 FolkArt Home Decor Tools - Scrapers
34860 FolkArt Home Decor White Wax
29418 Plaid Simply Letter Stencils - 4" Genie
34002 Stencil Decor Stencil Tape
Miscellaneous Supplies: Container for water, Paper towels, Petroleum jelly, No. 1 Liner brush, Old toothbrush, Soft lint-free cloth
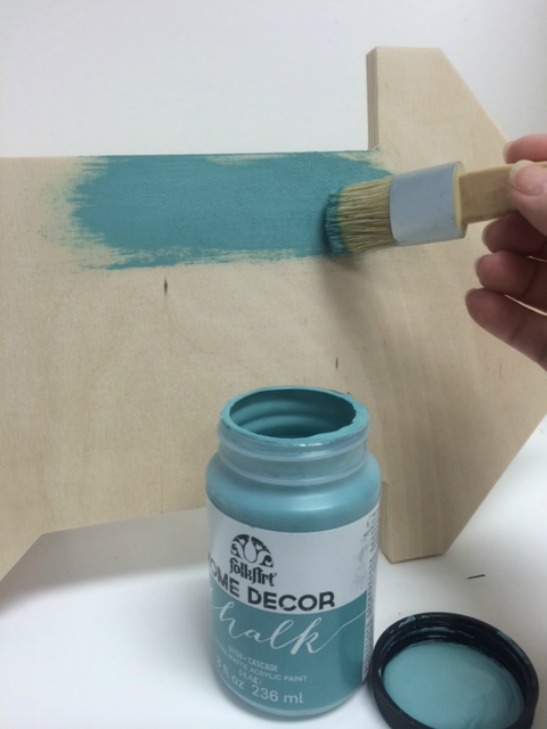
First, load the small chalk brush with Cascade and begin applying a basecoat smoothly to the unfinished wood arrow. This arrow sign plaque is beautifully manufactured with two keyhole hangers on the backside. The wood surface and all edges come with a sanded smooth finished which allowed me to jump right into my project without any of prep work!
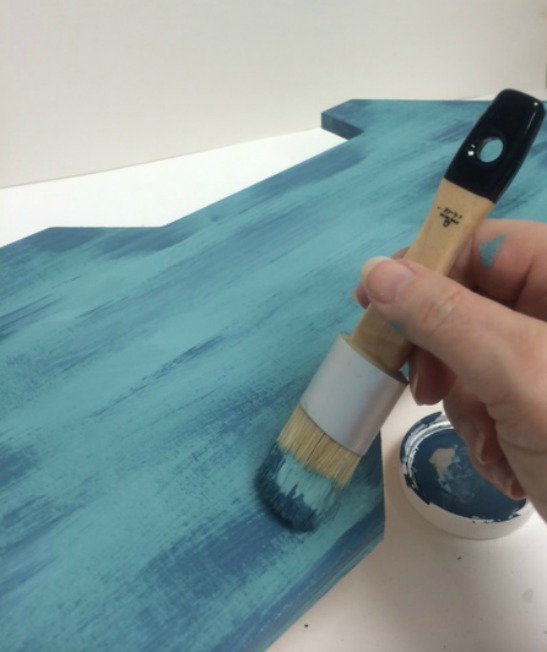
Once the top surface and sides of the arrow had been painted with Cascade, I immediately dipped my brush into a small puddle of Turkish Tile. I then off loaded a bit of the darker color and while using this dry brush and light pressure, I began applying horizontal streaks. Next, I cleaned my brush with soap and water and then allowed the base colors to thoroughly dry.
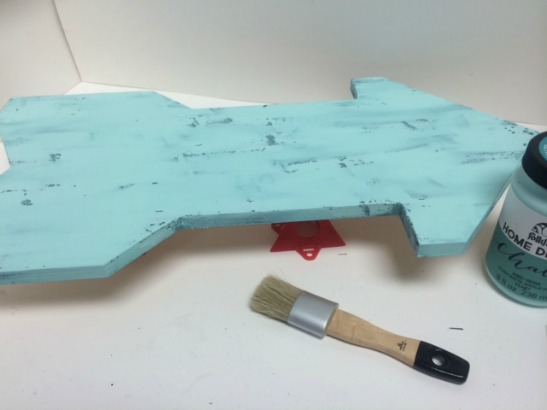
Once dry, the next step was to prepare my surface before applying the topcoat of Patina. The look achieved when using FolkArt Home Decor Scrapers is definitely a distressed look, however, there is no sanding involved! The technique is literally to scrap away the top layer of paint, however, you are not scraping dried paint immediately over dried paint.
When using FolkArt Home Decor Scrapers, the project surface should be prepped using petroleum jelly or paraffin wax where you want the paint scrapped away. Like all distressing techniques, areas usually distressed are worn areas such as edges, around knobs, leg spindles and lightly here and there.
So to prepare, I rubbed a light layer of petroleum jelly over the surface using my finger as shown below.
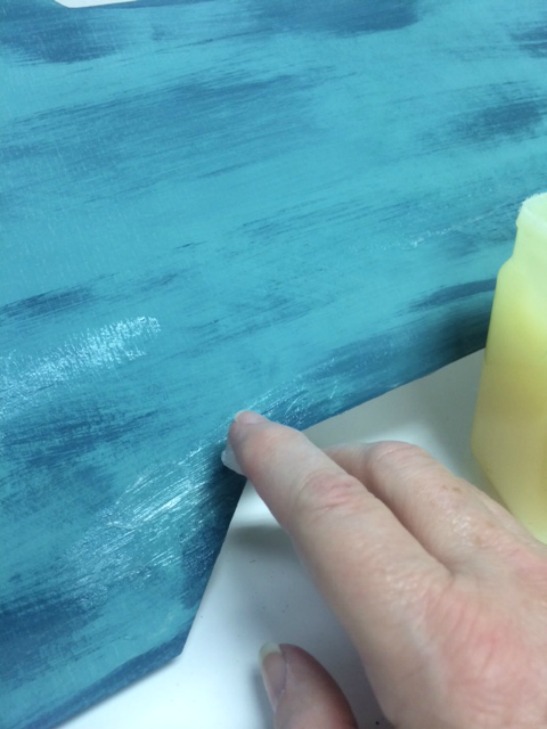
Here's a look at the arrow prepped with petroleum jelly both on the top surface and along some of the edges.
Of course the petroleum jelly is not going to dry like a paint would so I immediately began brushing Patina over the entire surface being careful to brush lightly over the petroleum jelly areas. TIP: Brushing over the petroleum jelly with a heavy hand will only smear or spread the petroleum jelly further.
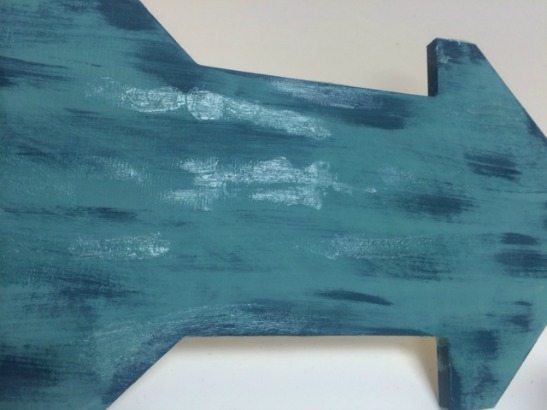
Next step is to allow the Patina to completely dry. You can see in the pic below the areas where the petroleum jelly had been applied as the Patina is not showing solid or strong.
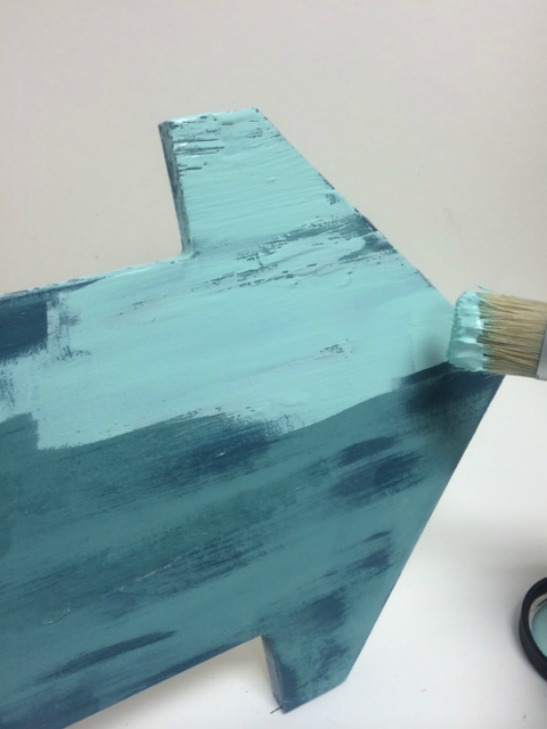
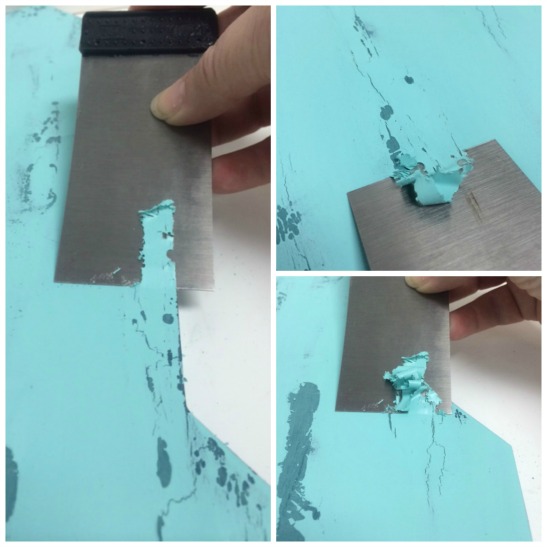
And now comes the fun part of using the FolkArt Home Decor Scrapers. You will receive four metal scrapers in a variety of widths in one package. Obviously the largest one is perfect for larger furniture projects and the smallest is awesome for craft projects.
On this wood arrow project I chose to use the smallest size scraper. TIP: I have used the scraper both in a "scraping towards me" and a "scraping away from me" direction and both ways will work achieving the same goal of scraping away the top coat of paint where petroleum jelly had been applied revealing the undercoat. To use the FolkArt Home Decor Scrapers ..... I find it best to hold the scraper at a 45 degree angle to the surface and apply light to medium pressure as I scrape across the surface. It is pretty cool to watch the top layer just crinkle up and peel away!
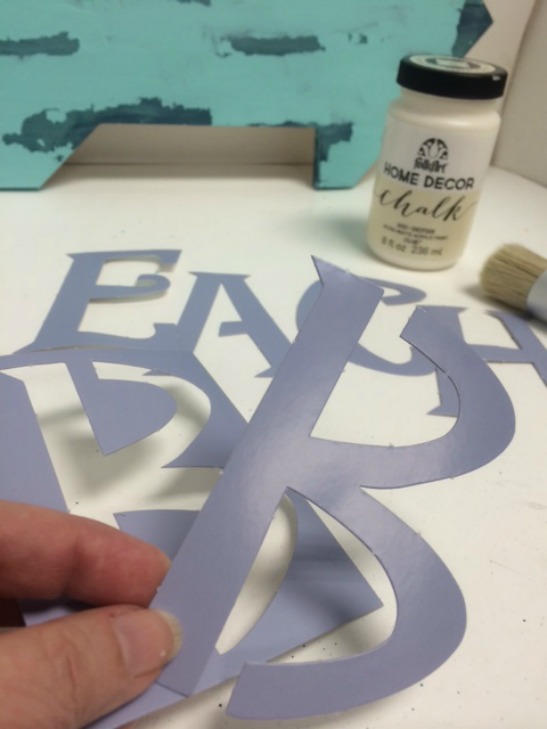
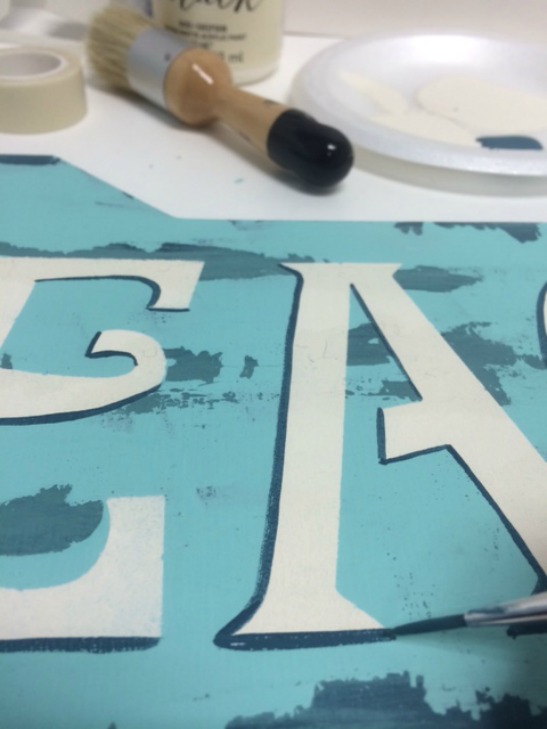
My arrow sign is really looking worn and is quite charming at this stage. Next steps are to stencil the "B E A C H " lettering. First I removed the letters from the 4" Genie stencils.
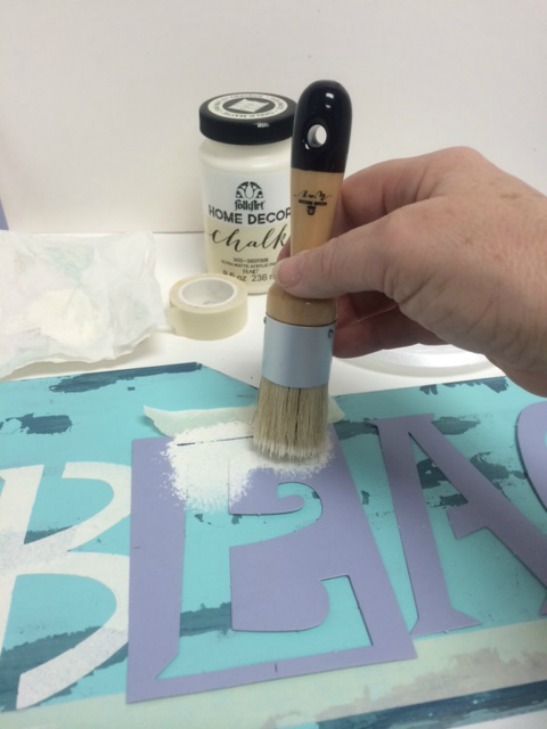
Using stencil tape to hold my stencil in place, I then loaded the small FolkArt Home Decor Wax brush (which is an AWESOME stencil brush too!) with Sheepskin.
TIP: To properly load a stencil brush, dip the bottom flat bristles into a puddle of paint, then dab up and down on a paper towel to "off-load" paint creating an almost dry brush. Stenciling can be achieved by either dabbing up and down OR by using a flat-to-the-surface circular clockwise / counter-clockwise motion over the cut openings of the stencil. Below you can see I chose to use the dabbing or stippling motion to stencil the letters.
To create a little pizzazz and shading to the letters, I loaded a No. 1 liner brush with thinned Turkish Tile and painted a line to the left and bottom of each letter. TIP: To thin the paint, add a dime size puddle to a foam plate and thin with water to an ink-like consistency.
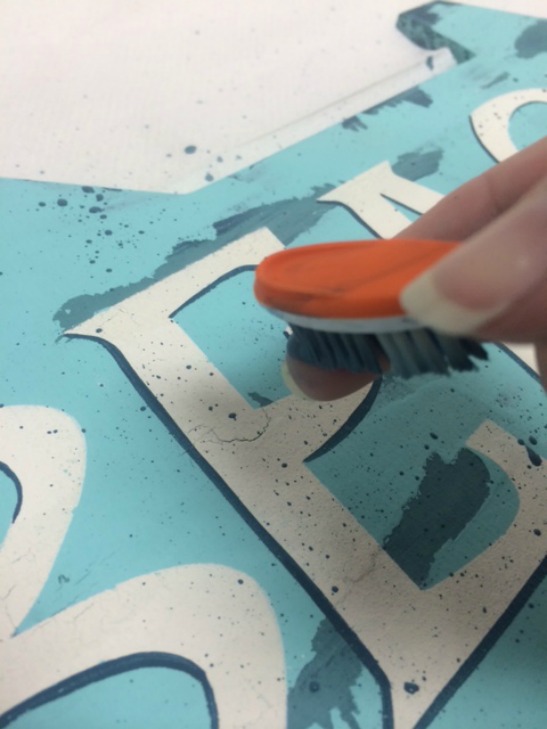
Once all the letters are stencils and outlined, add a touch of splatter painting to the sign to give it a little more age and wear. To accomplish this, load an old toothbrush with the same thinned Turkish Tile. While holding the brush with the bristle down facing the surface, carefully run a finger over the bristles and VOILA ... tiny splatters of paint will fall onto the surface. The wetter or thinner the paint the larger the splatters. I suggest practicing on a piece of paper toweling first before splatter painting your project. TIP: Don't want to dirty your fingers with paint? ... try rubbing the wet bristles across a palette knife or a brush handle.
I then allow my BEACH arrow sign to completely dry. But it was not completely finished yet. I chose to seal and protect it using FolkArt Home Decor White Wax. Using the small wax brush, I applied a coat of White Wax to the entire surface and quickly wiped away the excess. TIP: Wiping away excess wax can be completed with a soft, lint-free cloth.

Wasn't that a fun project? And my mission was accomplished ... highlighting the "hand painted sign" trend and showing you how to use a new tool! Want to see more? Here is another personalizing project created using FolkArt Home Decor Java and Imperial as well as the use of the FolkArt Home Decor Scrapers.
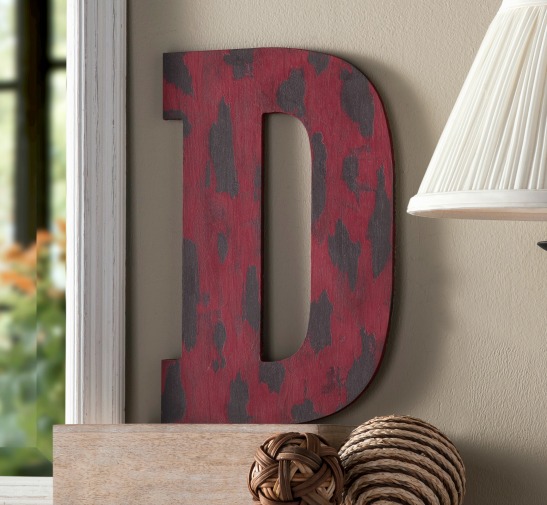
Want to watch a video on how-to-use the FolkArt Home Decor Scrapers? Check it out as Donna Dewberry shares with you how to create the fun letter "D" project shown above ....