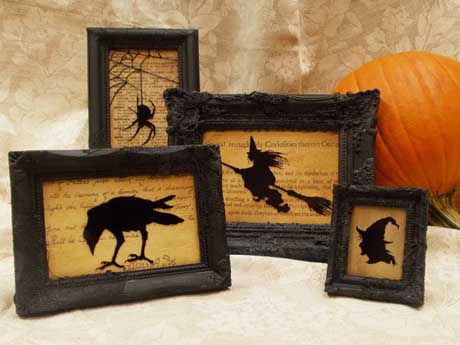
This week's "how-to" post will continue with a touch of spooky Halloween fun! I am thrilled to share Edgar Allan Crow, Witch Hazel, Spidey, and Broomful of Witch created by my long-time friend and now co-worker, Andy Jones! Andy is a very talented decorative artist and designer whom I have known since we were almost kids.
Andy used a fabulous assortment of Plaid products to create these fun, spooky silhouettes. And as Andy would say ... "You too can create some for yourself faster than a witch can cast a spell!" Let's see what products he used to create these haunted silhouettes .....
34909 FolkArt Home Decor Chalk & Wax Brushes, small
Found silhouette designs (available online)
Found book pages, dictionary pages, or Halloween text (for backing)
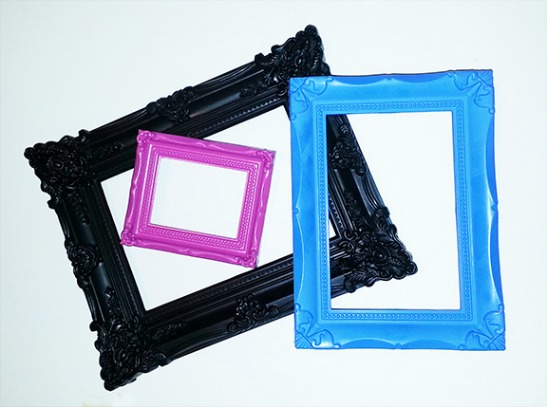
Assorted sized inexpensive frames (with glass and backing board)
Miscellaneous Supplies: Cheese cloth, 1" - 2" Natural bristle brush, No. 1 liner brush, Small flat brush, Glass cleaner, Brush basin or container for water, Paper towels, Craft knife (with a new, sharp blade), Foam plate or palette, and Cardboard (if your frame does not have a backing board)
Andy was smart to take photos for the blog as he created these fabulous pieces; it makes his project so easy to share with you. Let's get started to see step-by-step how Andy did it .....
The Frightful Frames
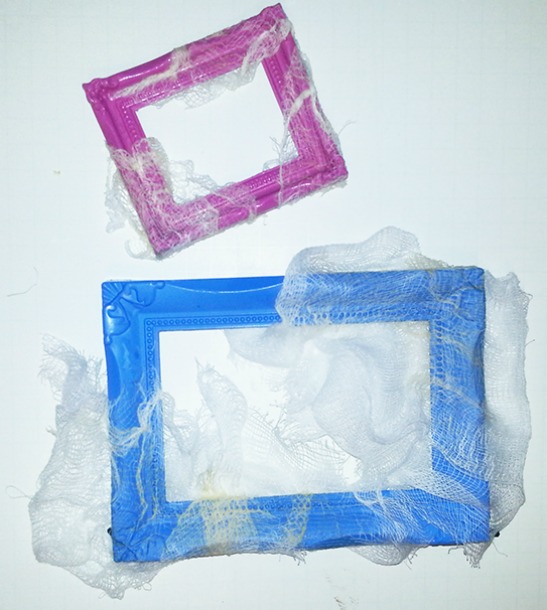
Begin by cutting a couple pieces of cheese cloth a little larger than the frame size. Unfold the cheese cloth; opening it to a single layer. Next dampen the cut section with water and wring it out. TIP: Dampening the cheese cloth will make it easier to work with and adhere to your frame. Think about the cheese cloth placement on each frame.. where do you want to place it, how much, how wrinkled or textured ... play with the placement until you are happy.
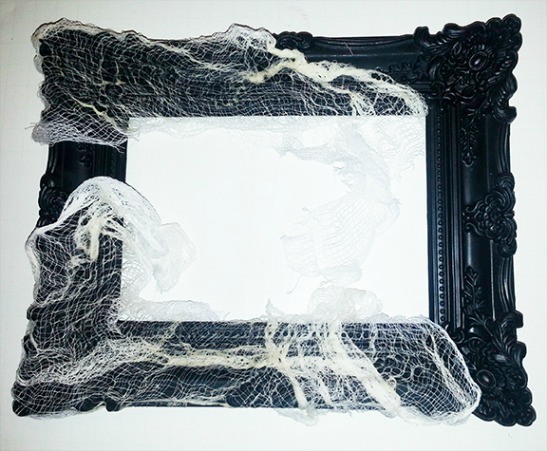
To apply the cheese cloth to his frames, Andy brushed a medium coat of Matte Mod Podge onto the frame in the area the cheese cloth will be placed. Next, he laid the cloth onto the wet Mod Podge working it into the frame molding. TIP: You can adjust the amount of desired texture simply by smoothing out the cheese cloth or adding wrinkles and folds. If additional texture is desired, another layer of cheese cloth can be added. When you are pleased with the arrangement and texture, brush a coat of Mod Podge over the frame and cheese cloth and set aside to thoroughly dry.
Here's a look at two more frames being "dressed" with cheese cloth!
When the Mod Podge is completely dry, excess cheese cloth can be trimmed from the frame edges using a craft knife. Next, brush a coat of FolkArt Home Decor Chalk - Rich Black over the entire frame decoupaged cheese cloth and all! The best brush to use for this step is the small FolkArt Home Decor Chalk brush because the stiffer bristles will allow you to paint over the textured cheese cloth getting paint into all the nooks and crannies; you will need to dab and "scrub" the paint! TIP: Resist the temptation to thin the paint as thinning the paint can reduce its adhesion. Check to be sure that you have completely filled in all of the texture; Andy suggests turning your work looking at it from different angles. Allow the painted frame to completely dry.
Once the painted frame is thoroughly dry, it is time to apply a coat of wax to seal and protect. Using the small FolkArt Home Decor Wax brush, apply a thin coat of FolkArt Home Decor Clear Wax to the frame. Do not apply a thick or heavy application of wax, however, do fill in all the little areas of the texture. Allow the wax to dry for a minimum of four hours and then buff to desired sheen using a soft, lint-free cloth.
Did you know that you can create a color tinted wax? Yes, you can and if desired, you can add extra spookiness to your frames by mixing a small amount of FolkArt Home Decor Chalk - Castle to some FolkArt Home Decor Clear Wax. Apply this dark gray wax to the frame paying close attention to the textured areas. The colored wax will emphasize these areas making the frames even spookier! Allow the wax to dry four hours and then buff to desired sheen. TIP: Allow the sheen to appear a little uneven which will add to the haunted effect!
And here's a look at one of Andy's finished frames ...
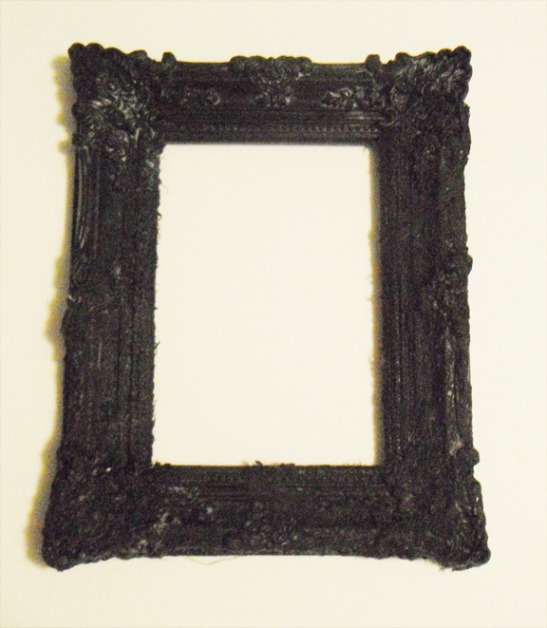
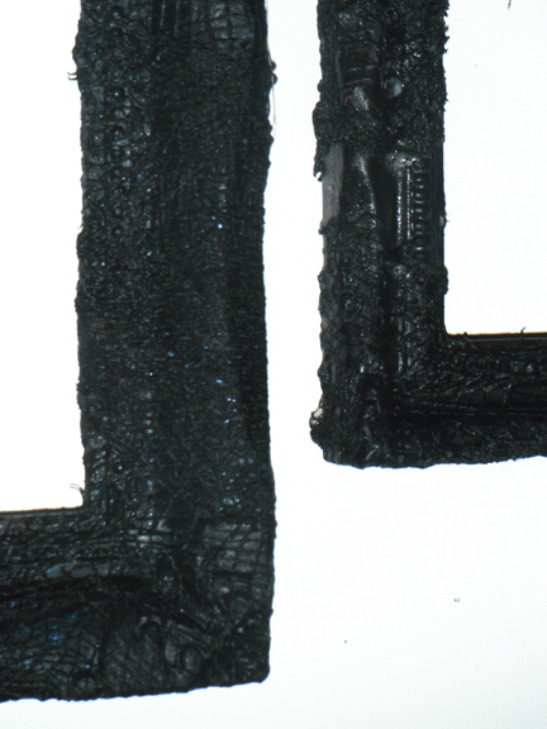
And another shot ... up close and personal... you can see how spooky the frame is!
The Bootiful Backing Boards
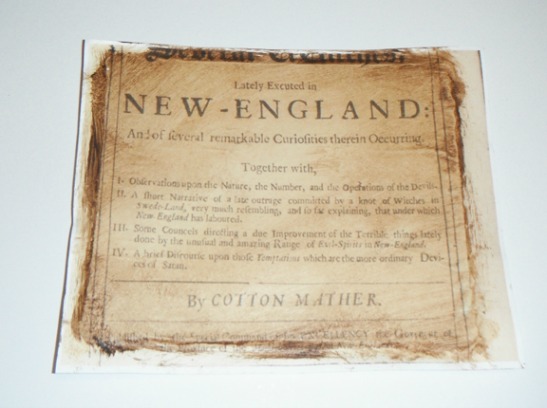
Set your completed frames aside now so Andy can tell us how he created the "backing" artwork. The backing artwork can be personalized to match the silhouette design or you can simply use an old book page, dictionary page, or even scrapbook paper. However, Andy is so cleaver ... he found just the right copyright-free images to match his silhouettes by surfing the web. He then sized the images and printed them.
The next step is to apply a coat of Mod Podge to both the cardboard backing board as well as the back of the printed design. Flip the print over and center it over the backing board; press in place gently smoothing the paper removing trapped air bubbles and/or wrinkles. Allow to dry 15 minutes then apply another coat of Mod Podge over the top of the design page. Allow this to dry.
To enrich to the spookiness of the artwork, Andy antiqued the backing design using FolkArt Home Decor Antiquing Wax when the Mod Podge was dry. Using a large soft natural bristle brush, apply the wax. He then quickly smudged and soften the wax using a soft, lint-free cloth moving the antiquing wax in a random splotchy effect. Allow to dry. Isn't this a cool background?
The Spooky Silhouettes
Andy again surfed the web and found literally thousands of copyright-free silhouette images. Simply select one that appeals to you; size it to your frame, and print! TIP: Before you print, select the "print mirror image" option on your printer dialogue box. These silhouettes are reverse glass painted which means they are painted on the backside of the glass, if your image includes any text, you will want to reverse the print image.
After printing your silhouette design, carefully clean the glass front and back using glass cleaner; then try not to touch the clean glass surface. Using a piece of stencil tape, secure the paper silhouette to one side of the glass. Andy then flipped the glass over so that the paper side is down on the work surface.
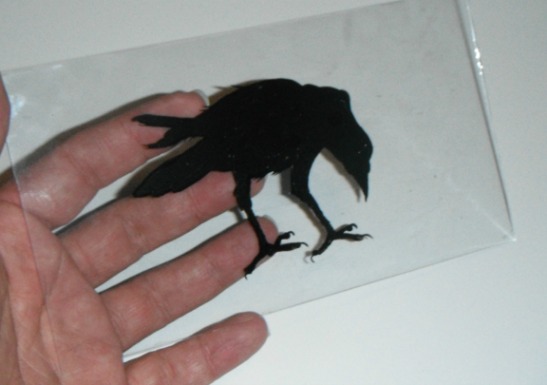
The painting fun begins ... squeeze a small puddle of FolkArt Multi-Surface Pure Black onto a foam plate. Thin the Pure Black with a little water until the paint is a thin flowing consistency. Load a small liner brush with the thinned Pure Black. Working slowly and carefully while using a light touch and a steady hand, begin to outline the design. After the design outline is painted, complete the image by filling it in completely. TIP: Frequently turn the pane of glass over and check to see if any areas are too thin. The object is to achieve a solid, opaque painted silhouette. When satisfied, allow drying time.
And here is a look at Edgar Allan Crow as Andy painted him!
After each frame, backing board and reverse painted glass silhouette was completed and thoroughly dry, Andy then assembled each one. Begin by placing the reverse painted glass silhouette in the frame keeping the painted side to the back of the frame ... the unpainted side of the glass toward the front of the frame. Next, add the backing board and secure with framing tacks.
Wasn't this a fun and easy Halloween project? I LOVE it! Thank you so very much, Andy, for sharing your talents with all of us! And here is one last look at each spooky silhouette ....
Edgar Allen Crow

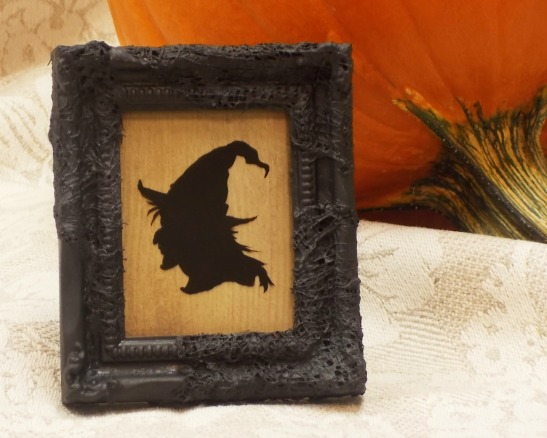
Witch Hazel
Spidey

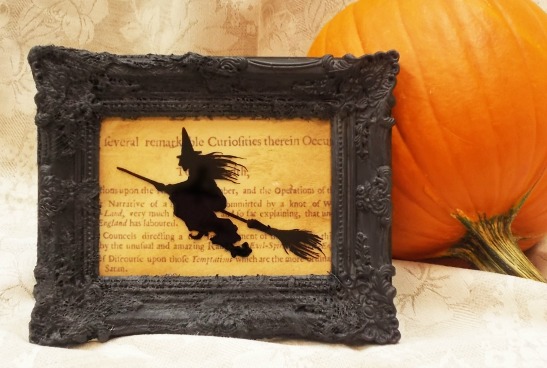
Broomful of Witch
Happy Halloween all and to all a frightful night!