Have you ever marveled at people who can effortlessly create chalkboard lettering art that looks amazing in every way? Well, good news friends because you too can create professional chalkboard art in a flash with Lily & Val layering stencils! These stencils do the hard work for you by allowing you to create drop shadows and embellishments with ease.
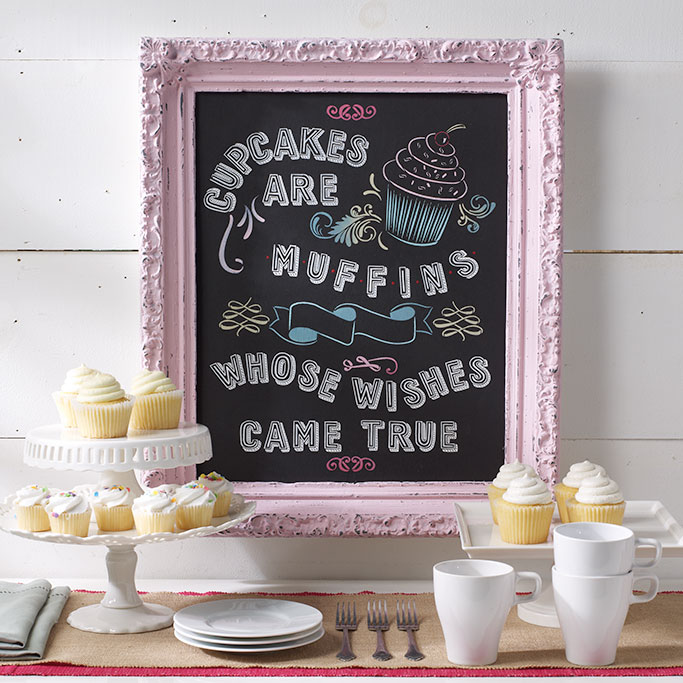
Let's recreate this adorable cupcake sign below that's almost good enough to eat!
Here's what you'll need:
FolkArt Multi-Surface Chalkboard Paint - Black
FolkArt Erasable Liquid Chalk
LIly & Val Stencils - Cupcake
FolkArt ® Brushes- Basecoating Set
Stencil Decor ® Brushes - 3/8"
Pencil
Ornate Frame
STEP 1: If you're creating a sign for a special event, you will want to purchase a frame with a cardboard/particle board backing. Remove the glass and set aside. Using the basecoating brush, basecoat the backing a chalkboard color of your choice and let dry.
TIP: FolkArt Chalkboard Paint is ideal for this type of project because you can use it on any surface and it goes on super smooth!

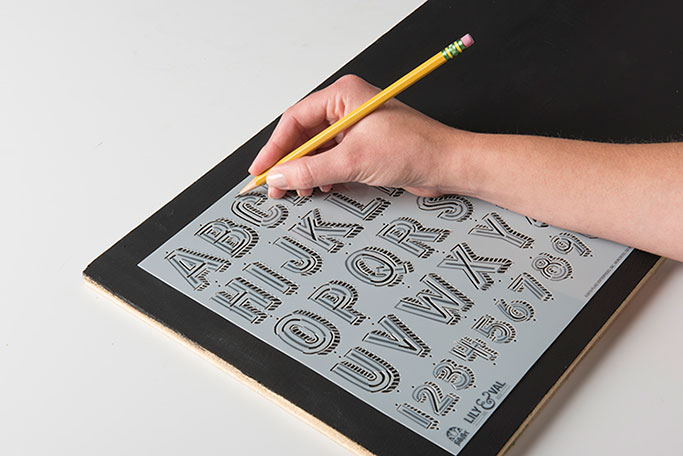
STEP 2: Let's get started stenciling! When you open you stencil set, you'll see two sheets of alphabets and then a graphic stencil filled with design elements. We are going to use the two alphabet stencils first.
Take one of the sheets (it doesn't matter which one) and plan out your phrase on your surface. You can do this easily by marking and aligning the dots above each letter with a pencil. This will ensure that your phrase is just the way you want it when you start to stencil.
.jpg.aspx)
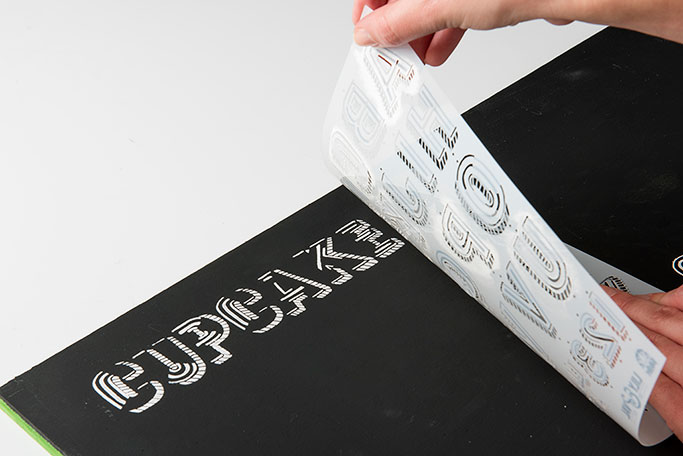
STEP 3: First, apply the stencil where you want the first letter to go while aligning it on top of your first dot. In this case, a "C" for cupcake! With the erasable liquid chalk, pour a little in a bowl and load your stencil brush with it. Make sure to offload onto a paper towel to remove any excess. Pounce up and down to apply a thin layer of chalk to the stencil. Continue until your entire phrase is stenciled. Let dry.
Here's the skinny on this AMAZING liquid chalk: It's is the bomb.com because it looks like chalk AND it doesn't smear! BUT WAIT, there's more! If you make a mistake and want to remove it, just take a damp cloth and go over the areas you want to erase!
.jpg.aspx)
The big reveal!

STEP 4:
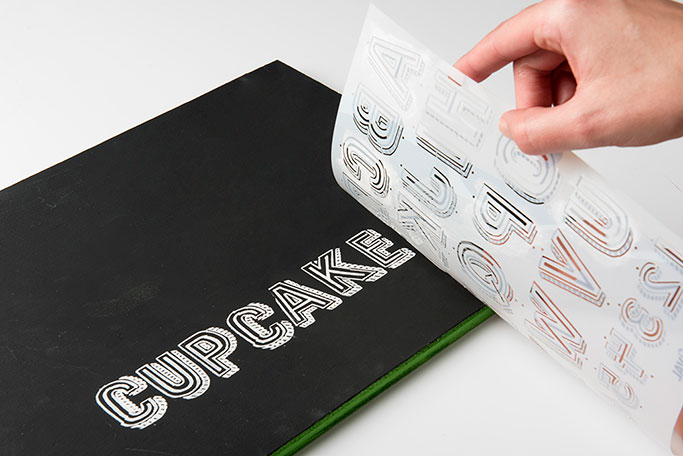
Ok, now we are going to add some pizazz to our already stenciled letters! This part is what makes these stencils so great. Take the second stencil and lay it over your chalk letters making sure to match it up with your pencil dots that you made in Step 2. Once your dots are aligned, go back and stencil your details with erasable liquid chalk.
.jpg.aspx)
Reveal to see your detailed lettered artwork! You did it!

STEP 5:
Next, go back and use the graphic designs from the third stencil to add little cupcakes and flourishes to your piece.
Find the complete line of Lily & Val stencils at
Michaels Stores.
TIP: Don't forget to clean your stencils! The Mylar material cleans up really nice with a little soap and water!
ENJOY!