Email Signup

Subscribe to the Plaid Crafts Newsletter for craft project ideas, product news, our live events, and more!

Upcycle Your Glassware! Save 25%

Save 25% on orders $60+ and get free U.S. ground shipping! Explore the NEW! FolkArt Murano Glass Paint! This promotion cannot be combined with other promos. See shipping details.

Use Code

Sale Ends 3/23/24

Fall Tiered Tray

By: Sherrie Ragsdale

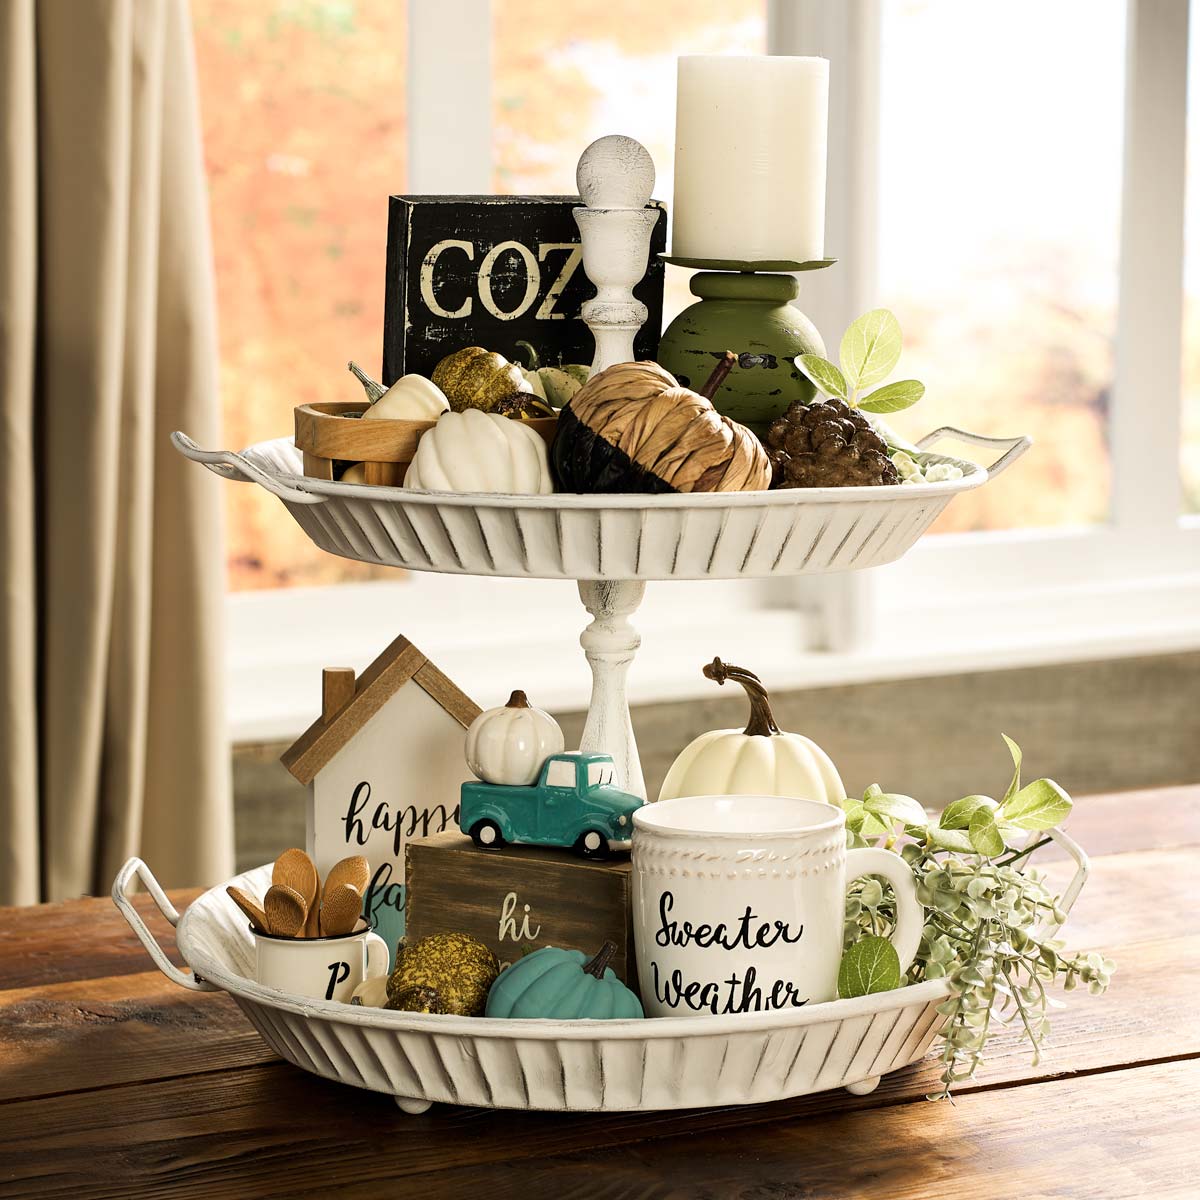
Decorate your fall table with this beautifully crafted tiered tray! Easily build this tray from scratch then fill with smaller autumn projects that will add character and charm to your seasonal decor.

At a Glance:

Project #15594 Skill Level: Intermediate Time:
  • Clock active
  • Clock active
  • Clock active
  • Clock active

This project features these great brands:

  • FolkArt Home Decor Chalk Logo
supplies

FolkArt Home Decor Chalk - White Adirondack, 8 oz. - 34150

Number Needed: 1 $9.99
Item not for sale on Plaid Online.

FolkArt Home Decor Chalk - Castle, 8 oz. - 34168

Number Needed: 1 $9.99
Item not for sale on Plaid Online.

FolkArt ® Brush Sets - Soft Grip - Wash Brush Set - 50603E

Number Needed: 1 $5.99
Item not for sale on Plaid Online.
instructions

Other Supplies

  • 2 old metal trays
  • 2 old wooden candle sticks
  • Large wooden doll head
  • Four small wooden doll head
  • Large nail or screw
  • Scrap block of wood
  • E6000 glue
  • 2 - 2 1/2" flathead drywall screws
  • Drill and drill bits
  • Hammer
  • Screwdriver

Instructions

  1. Find the center of each trays.  Place tray on the wooden block and hammer the large nail through the center to make a hole.  Repeat with the other tray.
  2. Glue the large wooden doll head to one of the candlesticks. 
  3. Glue the four smaller doll heads to the bottom of the larger tray for legs.
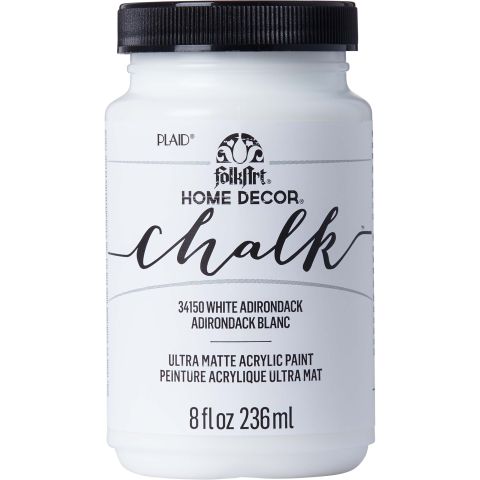
  4. Paint all the pieces White Adirondack.  Allow to dry.
  5. Drill a pilot hole in the bottom and the top of the candlestick without the ball on top.  Place the hole in the bottom of the candlestick on top of the hole in the bottom of the bottom tray and screw it together.
  6. Line the top trays hole up with the hole in the top of the candlestick.  Screw the top tray into the top of the bottom candlestick.
  7. Glue the other candlestick in the middle of the top tray.
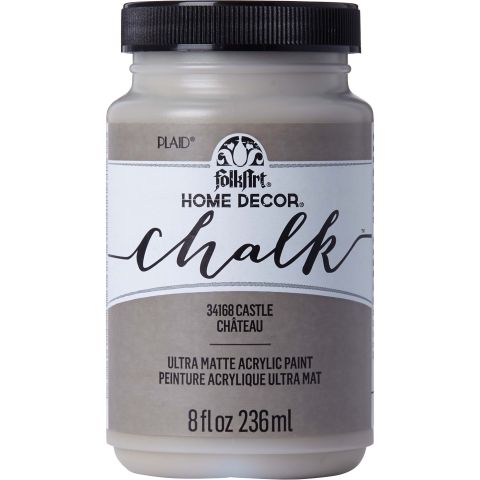
  8. Dry brush Castle all over the trays and candlestick to add a vintage look.

DIY Painted Coffee Mug - Sweater Weather
New!
DIY Painted Coffee Mug - Sweater Weather
Fall Sign Trio
New!
Fall Sign Trio
Painted Monogram Coffee Cup DIY
New!
Painted Monogram Coffee Cup DIY
Distressed Candleholder DIY
New!
Distressed Candleholder DIY

Disclaimer: The information found in each project is presented in good faith, but no warranty is given, nor results guaranteed, nor is freedom from any patent to be inferred. Since we have no control over physical conditions surrounding the application of information herein contained, Plaid Enterprises, Inc. disclaims any liability for untoward results.

Important: Please be sure to thoroughly read the instructions for all products, paying particular attention to all cautions and warnings shown to ensure the proper and safe use of the product.

Copyright: All Rights Reserved. No part of this Project may be reproduced in any form without permission in writing, except for your personal use, except by reviewer, who may in reviewing this project, quote brief passages in a magazine or newspaper.