Email Signup

Subscribe to the Plaid Crafts Newsletter for craft project ideas, product news, our live events, and more!

25% Bucilla Spring Sale

Save 25% on orders of $60 or more and get free U.S. shipping! Shop new arrivals from Bucilla - Seasonal Felt Stockings & Ornaments! This promotion cannot be combined with other promos. See shipping details. for inspirational ideas. Get free U.S. ground shipping on orders $60+! This promotion cannot be combined with other promos. See shipping details.

Use Code

Sale Ends 4/20/24

Icy Pastel Gift Jars & Serving Tray

Celebrate the season with soft subtle colors with brilliant shine. These projects would make great gift ideas as well as decor pieces in your icy holiday decor.

This project features these great brands:

  • FolkArt Glitterific Paint Logo
  • FolkArt Multi-Surface Paint Logo
  • Mod Podge Decoupage Finishes and Formulas Logo

At a Glance:

Project #16302 Skill Level: Intermediate
supplies

Plaid Supplies

FolkArt ® Glass Etching Cream™, 2.98 oz. - 2731

Number Needed: 1 $13.99
Item not for sale on Plaid Online.

FolkArt ® Painting Tools - Stencil Tape, 3/4" x 25 yds. - 50380

Number Needed: 1 $9.99
Item not for sale on Plaid Online.

FolkArt ® Glitterific Fine™ Acrylic Paint Set - 5 pc - 44510

Number Needed: 1 $24.99
Item not for sale on Plaid Online.

Mod Podge ® Matte, 8 oz. - CS11301

Number Needed: 1 $7.49
Item not for sale on Plaid Online.

FolkArt ® Multi-Surface Satin Acrylic Paint 16 Color Set - Pastels - PROMOMSP16

Number Needed: 1 $29.99
Item not for sale on Plaid Online.

Folkart ® Brush Sets - Gold Taklon Set, 3 pc. - 50559

Number Needed: 1 $5.99
Item not for sale on Plaid Online.

FolkArt ® Dragonfly Glaze™ - Violet-Blue-Green, 2 oz. - 44383

Number Needed: 1 $5.79
Item not for sale on Plaid Online.

Other Supplies

  • Glass jars
  • Pastel pink ribbon
  • Nitrile gloves
  • Chip brush
  • Soap and water
  • Water basin
  • Paper towels

instructions

Jars:

  1. Clean the glass jars thoroughly with soap and water. Let dry.
  2. Apply tape around the center of the jars so that the top and bottom of the jars are separated. Use your finger to make sure the tape it making complete contact with the jar and there is a strong seal.
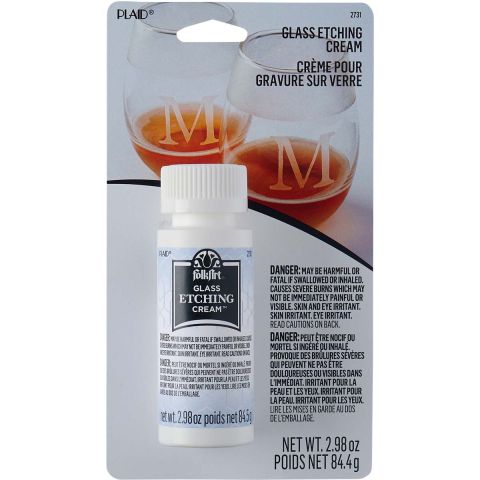
  3. Wearing gloves and using a chip brush, apply FolkArt Etching Cream to the area below the tape. Apply a generous, even coat.
  4. Allow the cream to remain on the before rinsing in water according to the instructions on the packaging.
  5. After removing the cream, remove the tape and wash the jars with soap and water.
  6. Add treats to the jar like macarons or candy.
  7. Tie a ribbon around the jar and embellish the ribbon with coorindating FolkArt Glitterific Fine. 
Tray:
  1. Using a 1" flat brush, basecoat the entire tray with Baby Pink. Let dry.
  2. Apply tape to the tray going diagonally and paint the smaller taped off area with Patina. See project photo for reference. Let dry.
  3. Using a 1" flat brush, apply Dragonfly Glaze to the Patina area and let dry.
  4. Remove tape.

resources

Related Videos

Mod Podge Tips and Tricks for No Wrinkles

Learn how to get perfect Mod Podge projects everytime!

Watch this Video

Learn how to get perfect Mod Podge projects everytime!

How Mod Podge is Made

Get a behind-the-scenes look at how Mod Podge is made, bottled and shipped to you!

Watch this Video

Get a behind-the-scenes look at how Mod Podge is made, bottled and shipped to you!

Applying Paper to Wood Using Mod Podge

Learn basic steps of applying paper to wood using Mod Podge.

Watch this Video

Learn basic steps of applying paper to wood using Mod Podge.

Related Resources

Free Lesson Plans featuring Mod Podge

Free Lesson Plans featuring Mod Podge

Use these free lesson plans to craft an unforgettable experience in the classroom with one of these

View PDF
Mod Podge Clear Image Transfer FAQs

Mod Podge Clear Image Transfer FAQs

Learn more about Mod Podge Clear Image Transfer Medium by reading the FAQ. 

View PDF
Mod Podge Ultra Frequently Asked Questions

Mod Podge Ultra Frequently Asked Questions

Learn more about Mod Podge Ultra by reading the frequently asked questions. 

View PDF

Related FAQs

Decorated candles using Mod Podge ® or Royal Coat ® Decoupage Finish are meant for decorative purposes and not for illumination. Many of the decorations would catch fire and be hazardous if the candle were burned. However, if you are using a wide pillar candle and the decorations do not go to the top of the candle, it can be burned down slightly to create a well, then a votive candle inserted into the well. A new votive candle can be inserted when the old one is finished. Use extreme caution and good judgment when burning candles that have been decorated.
First check to see if the napkin is 2 ply. If so, separate and lay aside. Brush Mod Podge directly on the your surface. Carefully place the printed napkin on the surface and lightly blot down with a dampened sponge. Start blotting in the center and work to the edge. Once it is in place, let dry. After about 30 minutes lightly apply a top coat of Mod Podge.
  1. Apply a coat of Mod Podge® to the inside of the form and allow to dry slightly. Place the Napkin design where desired and gently rub it flat with your thumb.
  2. Cover the image with a second very thin coat of Mod Podge®, beginning in the center and brushing out. Allow to dry thoroughly.
  3. Add special sponging or spouncing effects, as desired, around the design and let dry.
  4. Paint the whole inside with a light color of FolkArt® Acrylic Colors. If you want to use a darker color inside, first paint around the Napkin design with a light color, let dry and then add the darker color.
Twin Elf Ornaments
New!
Twin Elf Ornaments
Shimmering Wood Turning Ornaments
New!
Shimmering Wood Turning Ornaments
Christmas Story Place-Setting
New!
Christmas Story Place-Setting
Jeweled Snowflakes Ornament
New!
Jeweled Snowflakes Ornament

Disclaimer: The information found in each project is presented in good faith, but no warranty is given, nor results guaranteed, nor is freedom from any patent to be inferred. Since we have no control over physical conditions surrounding the application of information herein contained, Plaid Enterprises, Inc. disclaims any liability for untoward results.

Important: Please be sure to thoroughly read the instructions for all products, paying particular attention to all cautions and warnings shown to ensure the proper and safe use of the product.

Copyright: All Rights Reserved. No part of this Project may be reproduced in any form without permission in writing, except for your personal use, except by reviewer, who may in reviewing this project, quote brief passages in a magazine or newspaper.