The winter holidays are over and its January, time to clean up our homes and get organized!
Today, Priscilla Hauser shows us a simple-to-paint apple on a glass canning jar with FolkArt Home Decor Chalk! Did you know that decorating simple surfaces like glass canning jars can offer the best storage / organization solutions?
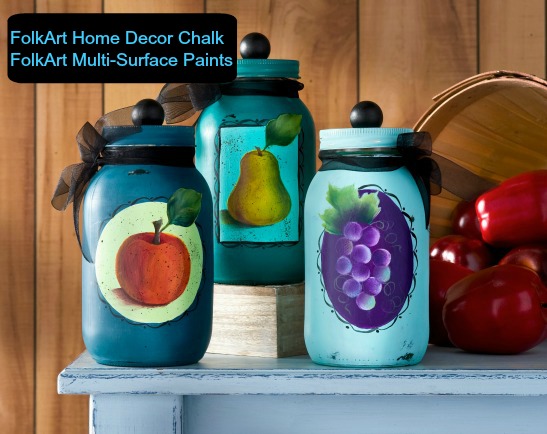
Priscilla painted an apple, a pear and a cluster of grapes on these three decorated glass canning jars. All three would look lovely in the kitchen, a family room or den, or even an art studio offering a place to store anything from macaroni or loose coins to paint brushes!
Come along and let's see how Priscilla created the apple jar. She makes it so easy, step-by-step! If you would like to create all three, instructions can be found on Plaidonline.com for how-to paint the pear jar as well as how-to paint the grape jar.
Let's begin by gathering the necessary supplies:
- Large Clear Glass Canning Jar
- Miscellaneous Supplies: Brush Basin or container for water, Paper Towels, Foam Plate for palette, 3/4" Flat Brush, No. 12 Flat Brush, No. 1 Liner Brush, Tracing Paper, White Chalk, Old Toothbrush, Fine Grit Sandpaper, Small Wood Knob, Black Organza Ribbon, White Craft Glue
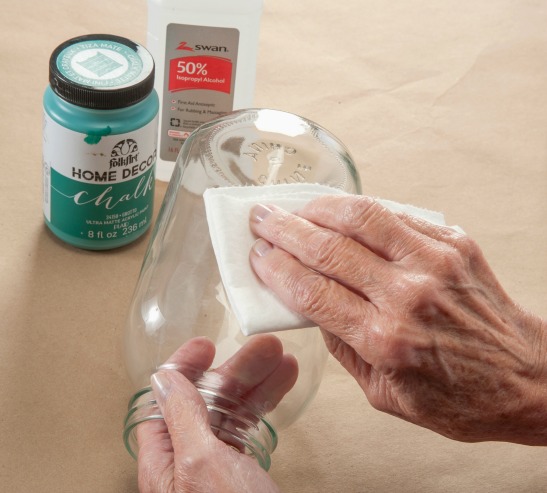
OK, so let's get crafting .... begin by removing price stickers, washing the caning jar in warm soapy water, rinse well and allow to dry. Next, moisten a paper towel with rubbing alcohol. Wipe over the glass canning jar exterior to remove any remaining dirt, grease, or soap film. Thoroughly cleaned glass will give you better paint adhesion. TIP: NEVER wear hand lotion when crafting glass as the lotions may leave a residue on the glass preventing the paint to adhere.
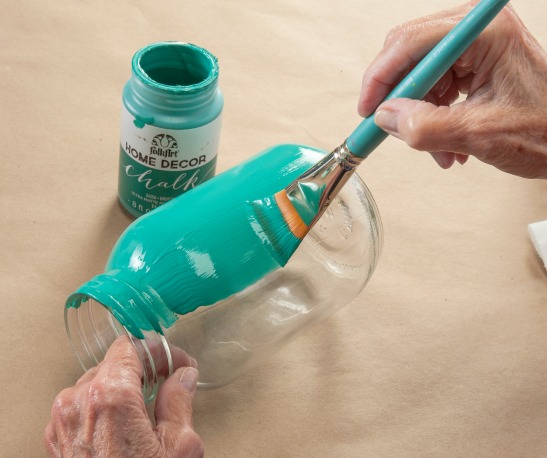
The next step is to smoothly paint the glass jar FolkArt Home Decor Chalk - Turkish Tile, (or color of your choice) using a 3/4" flat brush. NOTE: The color shown here is actually Grotto which was the background for the pear jar. FolkArt Home Decor Chalk will dry almost instantly, however, allow it to dry 2 hours prior to distressing.
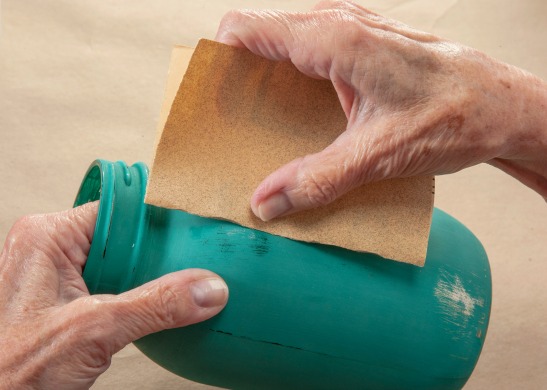
Using fine grit sandpaper, lightly sand to distress some areas of the glass jar. The idea is to rough it up a bit and expose some of the clear glass.
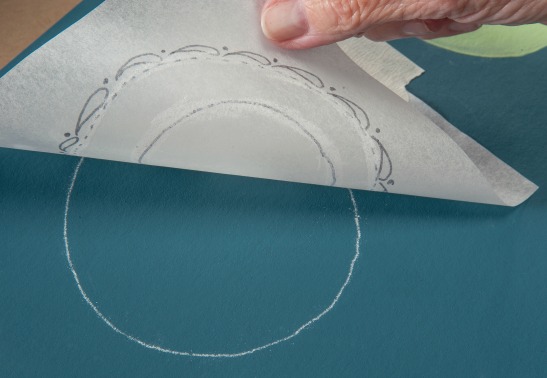
Next you will want to trace the pattern which can be found here onto a sheet of tracing paper. To achieve this, Priscilla positioned a sheet of transfer paper over the pattern, traced the pattern lines very carefully with a fine point marker. She then flipped the traced pattern over, retraced the back side of the pattern lines with white chalk. Next, transfer the background shape (the circle) to the canning jar. To transfer the circle to the painting surface, flip the pattern over, position where desired chalk side down and retrace the pattern once more. It's as easy as that!
NOTE: For demonstration purposes, today Priscilla is painting on flat mat board.
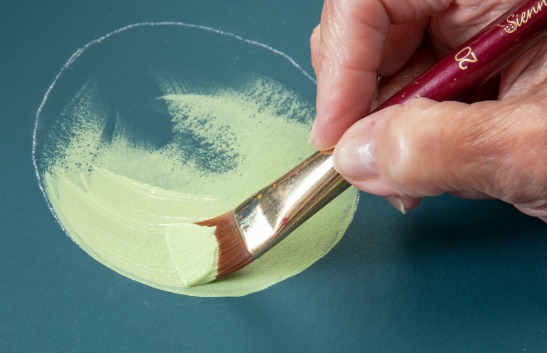
Using a large flat brush, basecoat the circle shape Soft Apple and allow to dry. Reapply a second coat for opaque coverage and allow to dry. Once dry, reposition the traced pattern back over the painted circle, then transfer the apple, stem and leaf.
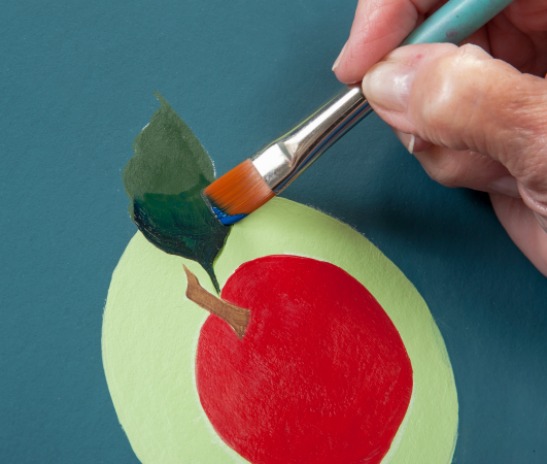
Next, Priscilla colorbook painted the apple - Engine Red, the stem - Bark Brown, and the leaf - Thicket. Each section was allowed to dry and painted a second coat for opaque coverage.
Priscilla began painting the base of the leaf next. She wet the base with a small amount of Blending Gel and then side loaded her flat brush with Ink Spot. You can see where she then added the Ink Spot along the bottom or base of the leaf.
To complete the leaf, lightly brush Blending Gel on the remaining area of the leaf. Load Fresh Foliage to paint the highlights to the leaf. Using the chisel edge of the brush, Priscilla touched the leaf edge, applied pressure, pulled and lifted quickly allowing the Fresh Foliage to lightly blend into the darker areas of the leaf.
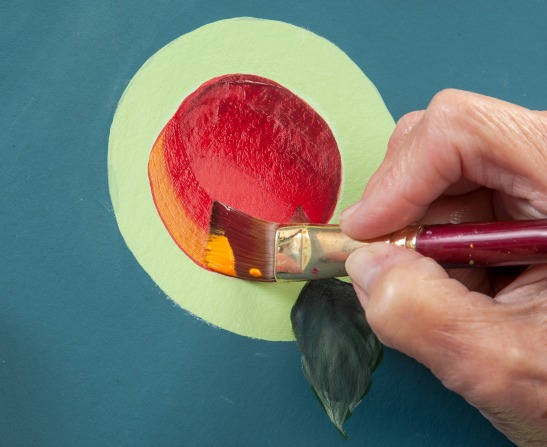
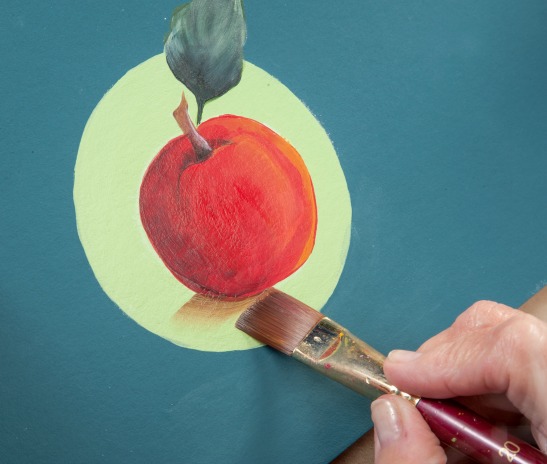
Priscilla then began shading the Engine Red apple. She loaded a large flat brush with Blending Gel; then sideloaded the brush with Berry Wine. Keeping the Berry Wine side of the brush to the outside edge of the apple, she pulled the brush following the apple's shape. And you can see the shading along the left side of the apple!
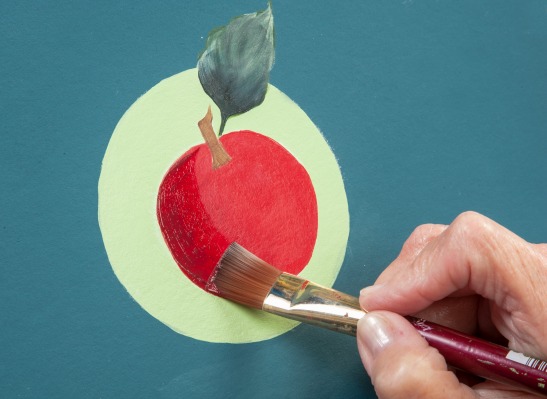
To highlight the right side of the apple, Priscilla loaded the same large flat brush with Blending Gel and sideloaded it with Vivid Orange. She then repeated the same stroke following the shape of the apple. As you can see in this pic, Priscilla flipped her work around finding it easier to paint the same large "c" or curve stroke.
Next comes the "smile" of the apple. Priscilla sideloaded a smaller flat brush with Berry Wine and painted the smile keeping the Berry Wine to the bottom of the apple.
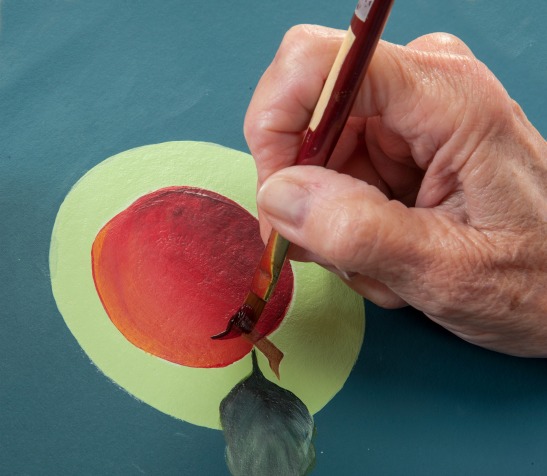
The base of the stem was shaded with a touch of Licorice.
Priscilla then painted a Daffodil Yellow highlight ton the right side of the apple just under the smile.
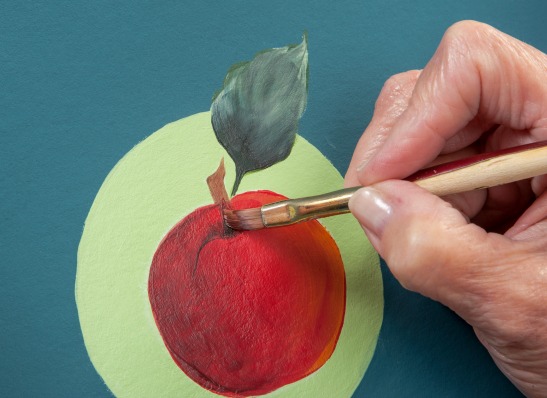
Of course, Priscilla did not want her apple to appear as though it was floating in mid air! So she loaded her flat brush with Blending Gel and then sideloaded it with Bark Brown to paint a shadow while keeping the Bark Brown side of the brush closest to the apple.
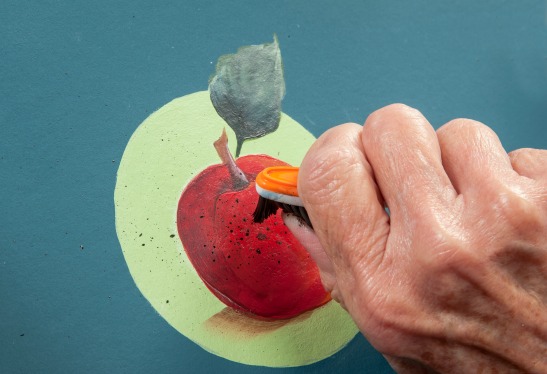
The next step, "flyspecking" or spattering is always so much fun and enhances your painted projects! Priscilla shows us how .... you will want to load an old toothbrush with thinned Bark Brown. While holding the loaded toothbrush over your painted apple with the bristles downward, run your thumb across the bristles and tiny flecks of paint will fly! TIP: If you don't want to use your thumb, try running the bristles across a palette knife.
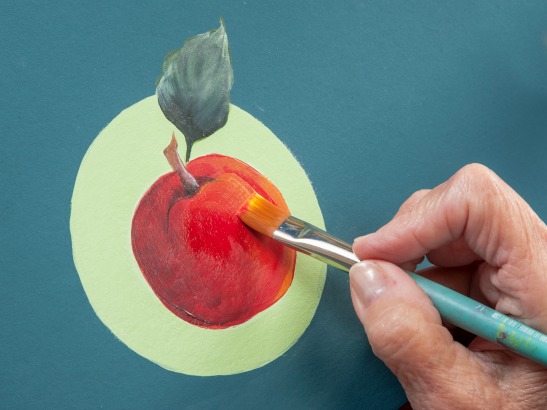
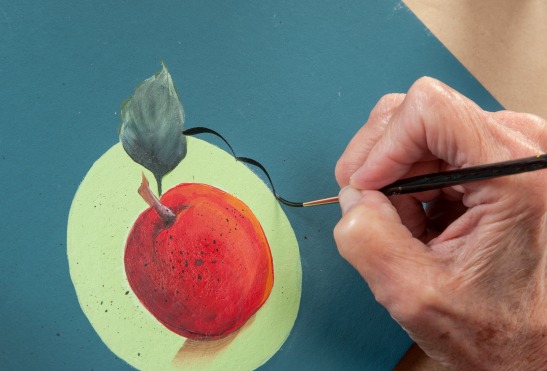
Lastly, Priscilla shows us how to embellish our painted apple by painting a comma stroke trim around the Soft Apple background circle. Begin by thinning Licorice with water to an ink-like consistency. Load a No. 1 Liner brush with the thinned paint and paint a continuous border of small delicate comma strokes. To paint a comma stroke, hold your brush upright, touch the surface, apply light pressure, pull and lift quickly while creating a slight curve, ending on the tip of the bristles.
As with all painted artwork, don't forget to sign and date your work! When your painted project is completed dry, you will notice that the FolkArt Home Decor Chalk dried to an ultra matte finish while the FolkArt Multi-Surface Paints dried to a satin finish. The difference in sheens is fun to see. However, should you desire, you can add a layer of FolkArt Home Decor
Clear Wax to seal and protect.
Here's a final look at Priscilla's three painted fruit jars; don't you just adore them? You can see that Priscilla painted a small wood knob Licorice and glue it to the top of each jar lid. The three jars were then embellished a bit more with black organza ribbon tied in a bow around the jar neck, so fun!
