
The art of stenciling to decorate walls, furniture, fabrics and decorative home accessories has been around for years. And in todayâs creative world there are literally hundreds and hundreds of stencil designs available to you! Basically, a stencil is a thin sheet of material such as paper, plastic, metal, mylar or vinyl that designs or letters are cut from and then used to replicate art when paint is transferred through the opening. Allow me to share with you some âHow-To Basicsâ of stenciling.
Letâs start with the surface we want to decorateâ¦
What types of surfaces can I stencil on and how should I prepare these surfaces?
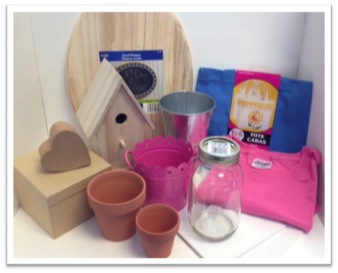
- Wood: Sand smooth with fine grit sandpaper then remove sawdust with damp paper towel or tack cloth.
- Tin/Metal: Wash with warm soapy water; allow to dry. Wipe surface with white vinegar damped cloth or paper towel and allow to dry.
- Paper Mache: Wipe clean with a damp cloth or paper towel to remove dust.
- Glass/Ceramics: Thoroughly wash with warm soapy water, allow to dry. Wipe surface with rubbing alcohol damped cloth or paper towel.
- Canvas: Wipe primed canvas clean with dampened cloth to remove dust. If unprimed, apply a coat or two with gesso allowing each application to thoroughly dry before adding the second.
- Terra Cotta: Wipe surface clean with dampened cloth or paper towel. Seal interior of terra cotta flower pot with clear acrylic sealer.
- Fabric: Thoroughly wash fabric in warm soapy water to remove manufacturers sizing. Do not use dryer sheet or fabric softener. Allow to dry; if needed iron to remove wrinkles without using spray starch.
____
What type or kind of stencil is the best?
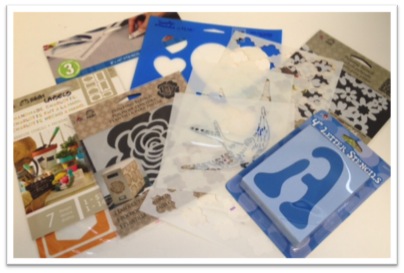
- Mylar or Plastic or Polystyrene: These materials are what most ready-made stencils on the market are manufactured from. Mylar is easy to use, easy to keep clean and can be reused many times.
- Peel n Stick or Vinyl: This stencil material is also on the market today with many creative designs available. A Peel n Stick vinyl-type stencil can be used on most any type of surface, however, it is PERFECT when stenciling on glassware or ceramics as they âclingâ to the surface especially if the surface is dimensional and has curves.
- Paper or Cardstock: A paper or cardstock stencil is usually one that is used only a couple times as it becomes more fragile with extended uses. Paint may build up on the stencil making it difficult to use and the moisture from a heavy paint build up may allow the stencil to buckle or wave. To prevent this and extend the life of a paper stencil, before using it the first time, spray seal both sides of the stencil with clear acrylic sealer.
- Metal: If you locate a metal stencil, often it will be a brass stencil offering both design elements as well as lettering. These stencils can be used for embossing, theorem painting, or setting type to create signs.
- Cut your own blanks: In addition to all the pre-made stencil designs available, you will also find âstencil blanksâ which offer the creative individual an opportunity to design a personal one-of-a-kind stencil by cutting their own design. Stencils can be cut using a craft knife, very sharp fine point scissors or a stencil burning tool. You can also investigate using a cutting machine often used in scrapbooking
____
What type of tools do I need to stencil?
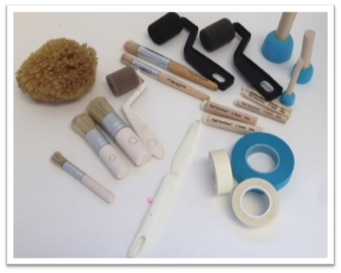
- Brush: Stencil brushes are manufactured in a wide variety of sizes to match the project whether you are stenciling a note card or a large wall surface. Stencil brushes are usually round and made of good natural bristles; they are firm, yet flexible (or allow movement) and spring back to their original shape. Stencil brush handles will vary in size, weight and length. Experiment and find the one that is perfect for your stenciling needs.
- Dauber: A dauber is an awesome tool to use when stenciling small quick projects. It is a small wood dowel with a circular sponge attached at one end usually found available in two sizes: 1/4" and 5/8â. When using a dauber to stencil, you can achieve a soft even application of paint.
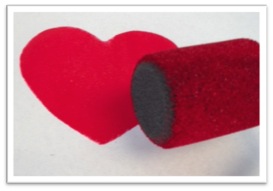
- Spouncer: When stenciling with a spouncer, the painted design will appear heavier with color. A spouncer is a circular foam sponge attached to a wood handle available in several sizes. It is best to load the spouncer and âoff-loadâ the paint before stenciling to achieve a more even paint transfer.
- Sponge: Stenciling with a sponge is also fun and will give you an alternative look. Try experimenting with cosmetic sponges that are dense, household cellulose sponges, and sea sponges that are very loose and contain many open cells. Each type of sponge will produce a slightly different effect.
- Roller: Using a sponge paint roller to stencil is helpful if you are trying to stencil a large area in a quick amount of time such as walls or floors. The key is to âoff-loadâ the paint applied to the roller and to have the stencil securely placed against the surface to reduce paint ârun underâ.
- Palette Knife: Stenciling with a palette knife is a lot of fun. Load the palette knife with thick paste or texture paint then âiceâ over the stencil opening being careful not to over stroke. Carefully lift the stencil to reveal a raised design. Allow to dry.
- Stencil Tape: To securely hold stencils in place while stenciling use stencil tape which is a low-tack tape that will not damage the crafting surface.
- Stencil Adhesives: To hold a stencil in place while in use, some crafters use stencil adhesives which are manufactured as a spray or brush on. Stencil adhesives are applied to the backside of the stencil and then allowed to dry tacky. Once applied to the stencil surface, the stencil will remain in place and not shift. Refer to the manufacturerâs label as some adhesives can be cleaned from the back of the stencil while others are more permanent.
____
What kind of paint is the best to use when stenciling?
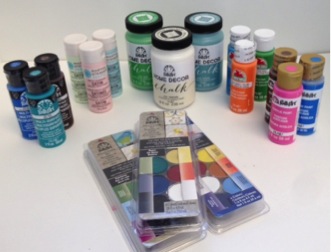
- Acrylic Craft Paints: Available in 2 oz bottles, acrylic craft paints are more likely the most frequently used type of paint when stenciling. The beauty of using acrylic craft paint is the wide color palette to choose from, paints blend well when shading, works well on most surfaces, and easy clean up with soap and water.
- Stencil Cremes: One type of stencil paint, stencil crèmes have been on the market for years. Stencil crèmes are oil-based paints in a wax medium which provide the stenciler a no-drip, no run-under mess. When working with stencil crèmes, you must first remove the thin wax layer from the surface of the paint before loading your brush with color. Stencil crèmes blend together beautifully offering the crafter a softer, hand-painted feel.
- Chalk Paints: Used more on home décor DIY projects, chalk paint allows the do-it-yourself enthusiast the opportunity to paint, distress, stencil and possibly distress the stenciling using only one paint while decorating a piece of furniture.
____
What is the best technique to use when loading my stenciling tool with paint?
Most stenciling is completed using a âdry-brush techniqueâ where you load paint onto your stenciling tool evenly across the entire surface then remove or âoff-loadâ paint creating a dry brush with color. If you were to stencil immediately after loading the stenciling tool, your stenciled design will be heavy and you may create paint drips or run under mess where the paint may bleed under the stencil design. Should that happen, quickly clean up both the stencil design as well as the back of the stencil.
____
What is the best way to stencil?
Like most crafting techniques learned, stenciling too can be persuaded by personal preference.
Circular Motion: Many stenciling purists prefer the âcircular motionâ technique when the stencil brush is held directly straight up at a 90Ë angle to the surface and the brush is then moved lightly in a circular movement clockwise then counter-clockwise around the stencil design beginning at the edges of the stencil.
Stippling Motion: Another technique often used when stenciling especially when using daubers, spouncers, sponges and sometimes with brushes is a stippling or dabbing up and down motion. Simply pounce or dab your stencil tool straight up and down over the stencil.
____
How many different paint techniques are there when stenciling?
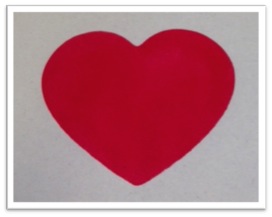
Opaque: As the word implies, to stencil opaquely is to create a solid color transfer with no highlighting or shading.
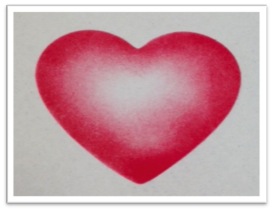
Highlighting/Shading: To blend more than one color on a design element would be an example of a highlighted or shaded stencil design. Usually the lighter color is stenciled first adding a darker color over the lighter color where deeper values are desired. Or as shown above, you can also stencil with only one color and create highlights and shading.
Flyspeck/Splatter Painting: For a completely different type of stencil technique, use a stencil as a mask, tape in place then flyspeck or splatter paint using a splattering tool, a stencil brush, or an old toothbrush loaded with thinned paint. Be sure to cover areas not to be splatter painted.
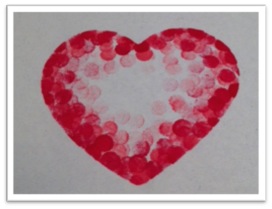
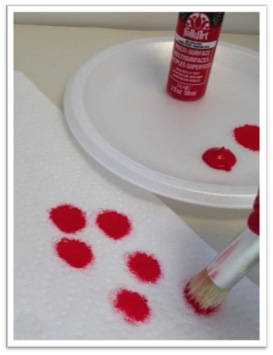
Dot Work: Similar to flyspeck/splatter painting, dot work can be achieved using a stencil too. Paint dots within the stencil opening, overlapping the dot work closer to the stencil edges to define the stencil design.
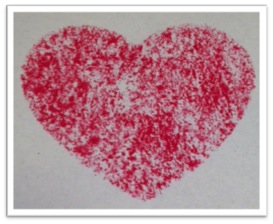
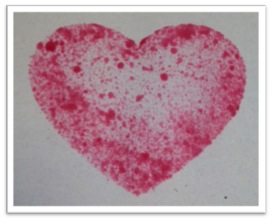
Sponged: Using a moist household cellulose or sea sponge loaded with paint will provide you with a completely different look than when using a brush, dauber or spouncer as seen above.
Stencil Roller: As mentioned earlier, stenciling large areas like walls and floors with an opaque look is easily accomplished when you use a roller.
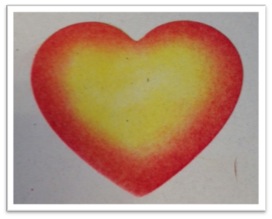
Blended Stencil Cremes: A soft blended feel is easy to accomplish when stenciling with Stencil Cremes as you see above. The entire heart was stenciled yellow first and then red was added over the yellow just around the heart edges. The two colors blended well to create a soft orange/red.
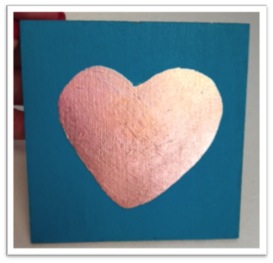
Gilding Sheets: For a more elegant effect, stencils can be used with gilding adhesive or gold leaf sizing and metal leafing. Read and follow the manufacturerâs instructions for sizing and leaf application. (Copper gilding on turquoise)
____
More Stenciling Tips and FAQs:
Can I stencil a reverse image?
Yes simply flip over or reverse a clean stencil, begin stenciling on the backside to obtain a reverse image.
What is the best way to clean my supplies after each use?
After each use, stencils and stencil tools should be cleaned thoroughly. Never allow paint to dry in a stencil brush as it may ruin the brush. If using waterbase paints, clean your stencils and tools in warm soapy water. For quick paint removal, wipe stencils with a rubbing alcohol dampened paper towel. When stenciling with oil base paints, clean stenciling supplies with low-odor turpentine or mineral spirits.
How shall I care for my stenciled artwork?
From small craft surfaces to large furniture pieces, all stenciled items should have a protective finish applied after the stencil paint is thoroughly dry. Brush on a coat or two of a protective finish/varnish. To clean or dust, simply wipe with a damp cloth.
Fabric items should be heat set to fully cure the paint to the fabric surface. It is best to read and follow manufacturerâs curing instructions.
____
I hope you have enjoyed learning some stenciling basics â¦are you inspired to try your hand at stenciling? What will be your first stencil project? Enjoy and have fun!
For more easy and awesome DIY projects, craft tips and tricks, updates on the latest trends, be sure to subscribe to the our newsletter!
