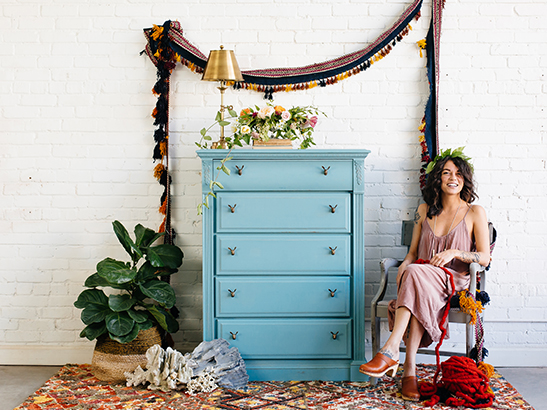
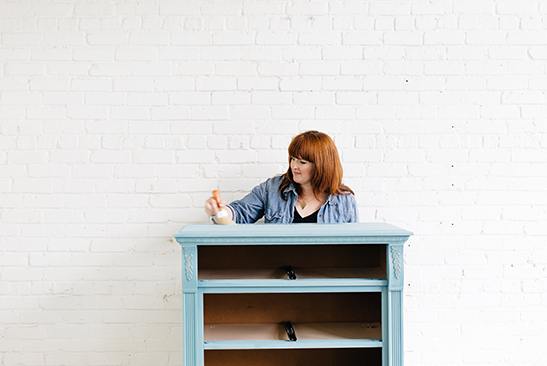
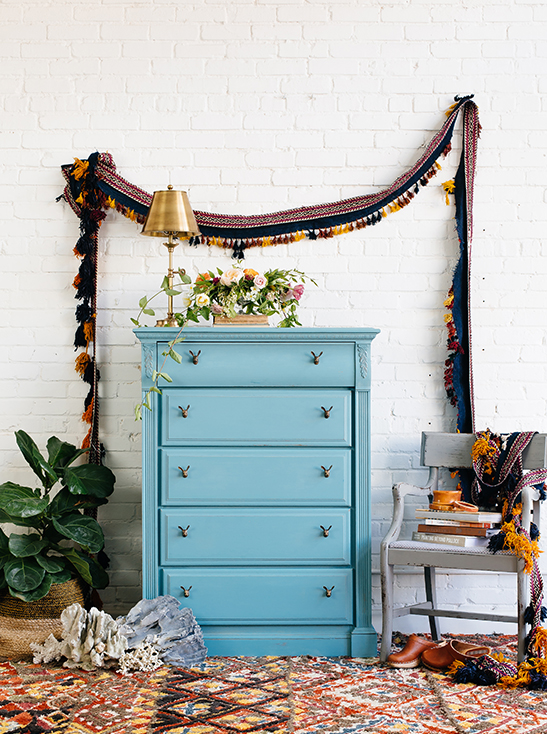
I can't wait to tell you all about what I've been up to lately! Hint: it involves lots and lots of paint. That's probably of no surprise, but here's the exciting part: I have a new favorite paint. Waverly® Inspirations Chalk Paint available at Walmart! It's my new crafting kryptonite. In fact, I recently spent an entire day with the brilliant and bonkers talented Barb Blair testing out its super powers. We decided on an afternoon project of refinishing this beautiful vintage chest of drawers. To our amazement, we were able to paint the entire piece with only a single bottle of paint. My mind was blown! Not only is it super efficient when it comes to coverage (which also makes it super wallet-friendly), but the finish is smooth and seamless, guaranteeing nothing short of picture perfection. We also used Waverly® Inspirations paint brushes, which work with the chalk paint like a dream.
Take a peak into our afternoon together and learn just how quick and easy transforming furniture can be with Waverly® Inspirations Chalk paint. Follow along!
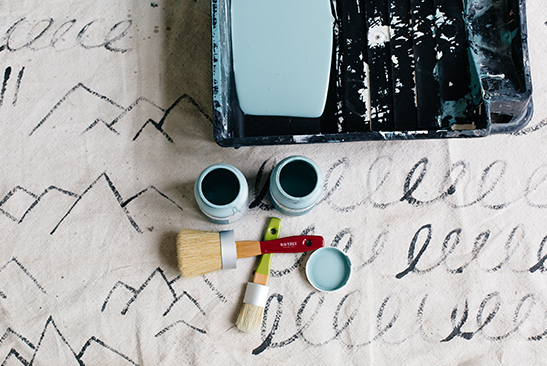
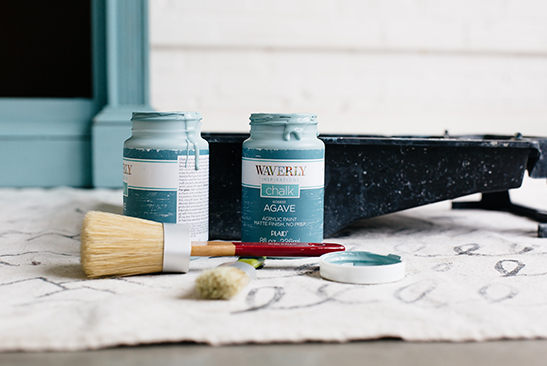
What you Need:
- Waverly® Inspirations Paint Brushes
- Waverly® Inspirations Wax Brush
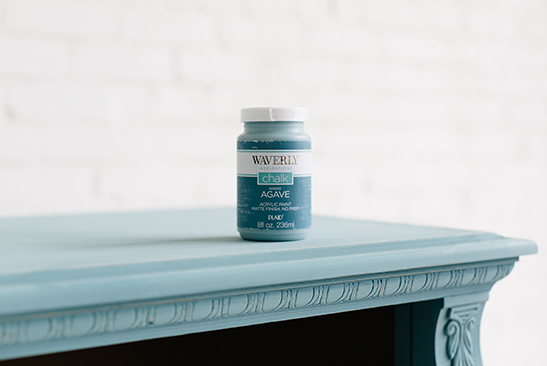
- Waverly® Inspirations Chalk Paint (Agave)
- Waverly® Inspirations Clear Wax
- Paint Tray
- Shop Towels
- Painters Tape
- New Hardware
- Wood Filler
- Putty Spatula
- Sanding Sponge (120 grit/ fine)
- Drop Cloth
Step 1
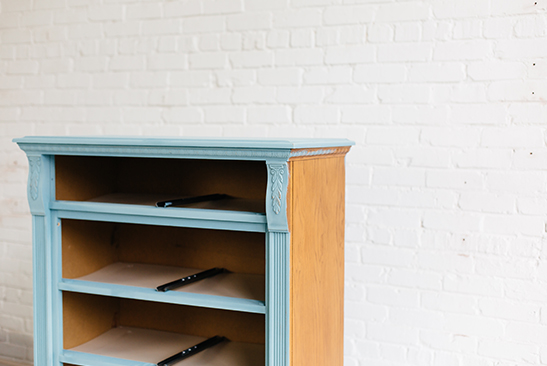
I believe that clean and straight paint lines are necessary for a beautiful finish, so I use painters tape to mark off all of the drawer runners, drawer sides, and the inside the cabinet base. This ensures nice straight lines and a pro finish.
Step 2
I chose to put new hardware on my piece, so I needed to remove the old hardware and wood-fill some of the holes. To do this, fill each hole with a generous amount of wood filler and smooth completely with a putty spatula. Be careful not to leave excess wood filler around the hole. You want this fill to be as clean and smooth as possible so it will not show up in the paint finish. Allow the fill to dry completely (a few hours or overnight)
I chose to put new hardware on my piece, so I needed to remove the old hardware and wood-fill some of the holes. To do this, fill each hole with a generous amount of wood filler and smooth completely with a putty spatula. Be careful not to leave excess wood filler around the hole. You want this fill to be as clean and smooth as possible so it will not show up in the paint finish. Allow the fill to dry completely (a few hours or overnight)
When the first round of fill is dry, use a sanding sponge to lightly sand the surface. This does two things: removes excess wood filler and smooths the hole so that you can see where more wood filler is needed. When you are done sanding, apply a second coat of wood filler exactly as you did the first. You will use much less wood filler this time and it will dry in about an hour since it is a shallow fill. When the second coat of wood filler is dry, sand with a sanding sponge again to make sure the surface is completely smooth and ready for paint.
Once the piece of furniture is all taped off and hardware holes are sanded and wood-filled, use a shop towel or clean rag to wipe down the entire piece and remove any dust or dirt from the surface.
Step 3
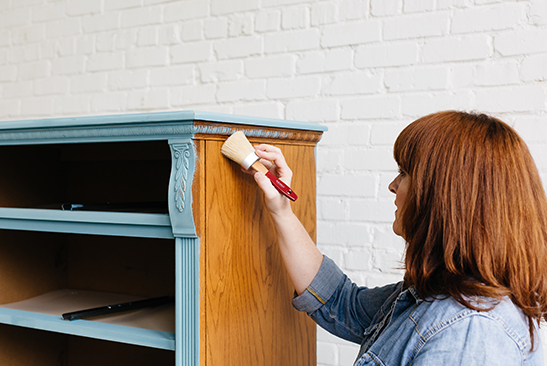
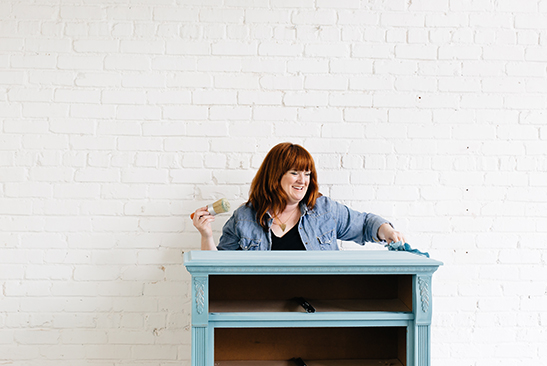
Pour Waverly® Inspirations Chalk paint in a paint tray and begin painting the piece of furniture with a Waverly® Inspirations paint brush. The piece I painted here was completed with two coats, and I only had to use about a bottle of paint!
Pour Waverly® Inspirations Chalk paint in a paint tray and begin painting the piece of furniture with a Waverly® Inspirations paint brush. The piece I painted here was completed with two coats, and I only had to use about a bottle of paint!
Step 4
A good rule of thumb when painting is to remember that less is more. I want to achieve a smooth and even look, so while I may start off moving the paint brush back and forth in all directions, I finish with long, smooth strokes to ensure a beautiful finish.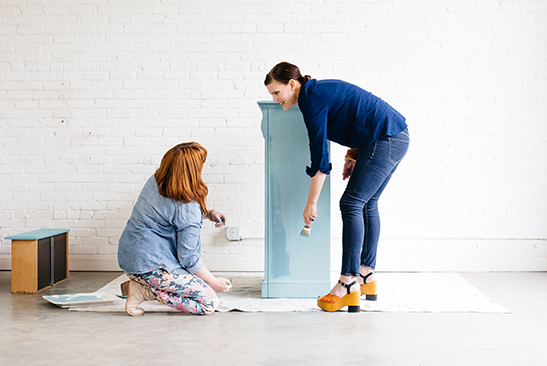
Step 5
Allow the first coat of paint to dry completely (a few hours) and then apply a second coat of paint exactly as you did the first. Allow the second coat of paint plenty of time to dry before moving on. (I allowed mine to sit overnight, but you don't have to wait that long if you don't want to.)
Step 6
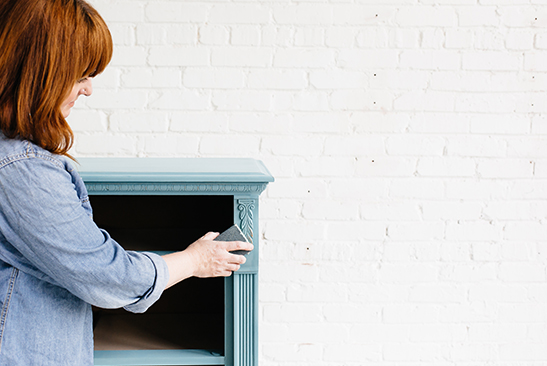
I chose to distress this piece of furniture, so I used a fine sanding sponge to sand the entire piece. Every surface of the piece gets sanded but I focus more on the hard lines and edges of the piece in order to give an even and natural distressed look. Distressing patterns are different for everyone, but for me personally I like a natural progression in distressing vs. a forced look. Sometimes over aggression in distressing leaves patches or holes that I personally don't love, but hey if you're a fan... go for it!
Step 7
Once the distressing is complete, use a vacuum to remove all of the sanding dust from the piece of furniture. You want to make sure that the surface is clean and ready for the final wax finish.
Once the vacuuming is done, it's time to apply the wax finish. Pour some of the Waverly® Inspirations Clear Wax into a tray or dish and use the Waverly® Inspirations Wax Brush to apply. I LOVE this wax. It goes on super smooth and easy and is one of the first waxes I have used that applies more like a polyurethane than a wax. Just be sure not to apply too much!
Tip: dip your wax brush in the wax and then dab it or wipe it on the side of the tray to remove most of the excess.
Step 8
Once the wax has been applied to the entire piece, give it 24 hours to dry completely and then buff it out with a clean, lint-free shop towel or cloth. You will have a beautiful soft shine when it is all said and done! All that's left is to attach the new hardware to your piece.
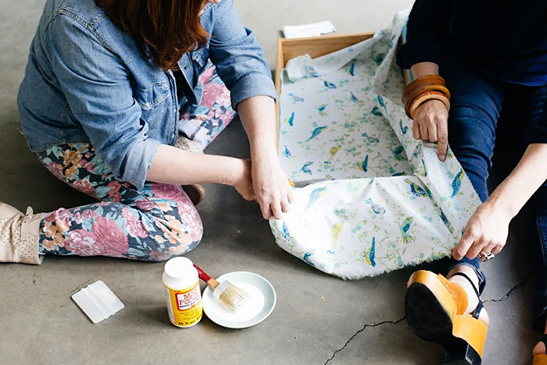
Stay tuned for our next post! Barb and I are going to show you a quick and easy way to line drawers with fabric. Get pumped!
Barb Blair is a furniture designer, author, and shop owner. She is an avid lover of color and has a fresh eye for unpredictable combinations of style and texture. Knack is Barb's brick and mortar shop where she sells her furniture designs, as well as a lovely selection of home and gift products. She is a published author of Furniture Makeovers, published by Chronicle Books, and her second book Furniture Makes the Room is due out in the Spring of 2016.
