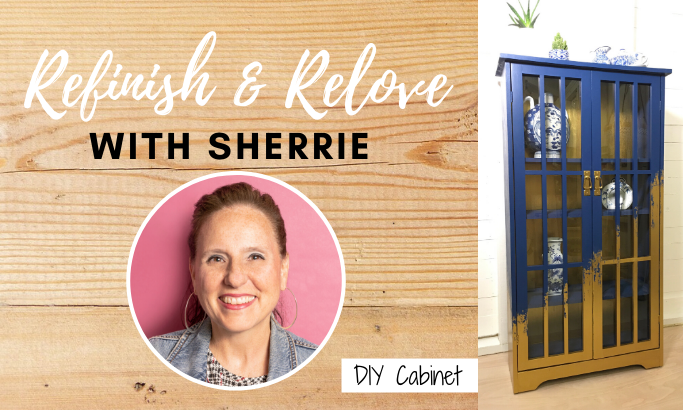
We are so excited to introduce you to Sherrie, our expert content creator in our content studio. In this series, we want to take you through the entire process from start to finish of how a DIY piece is created. From searching for a piece at the thrift store to adding a finishing glitter topcoat, Sherrie will share her tips and tricks she has gathered in her many years of professional crafting with you. If you are a fan of Plaid's craft inspiration here on our website then you have probably seen some of Sherrie's work before. Here is Sherrie's story and how she taught her self how to create something out of nothing. 
We did a short Q&A with Sherrie where she shares tips and tricks with us.
Supplies
Instructions:
1. Remove hardware. Remove all removable shelving. Basecoat furniture with Nautical from the top down to a diagonal on the front and along the sides as shown in photo.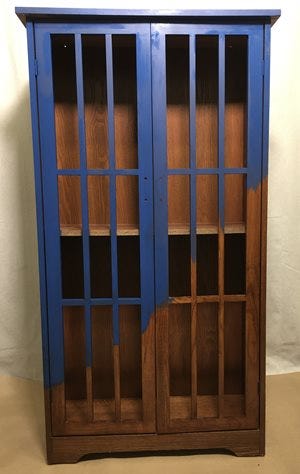
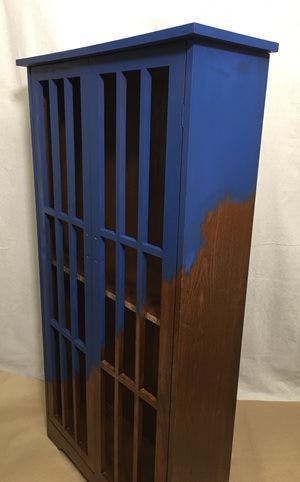
2. Paint from the bottom to the Nautical with Treasure Gold.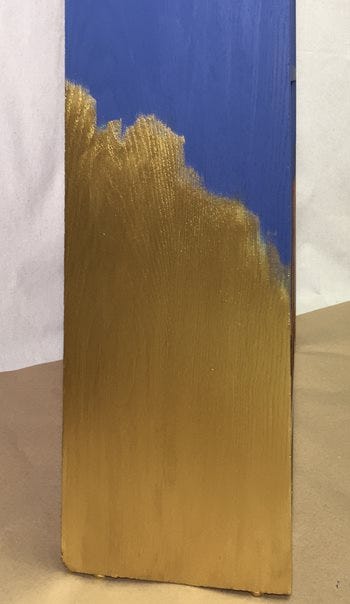
3. Pour Nautical on to the plate. Use a large flat piece of a wood block into the paint and dab on to the plate to remove excess. Glide the Nautical paint into the Treasure Gold as shown in the video clip.
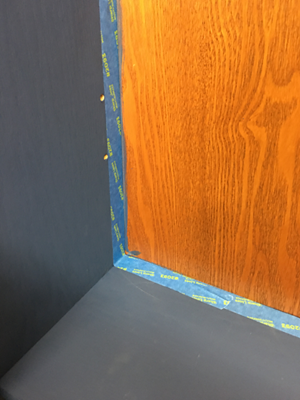
4. Paint the back of bookshelf with Treasure Gold. Paint the inside sides and shelves with Nautical.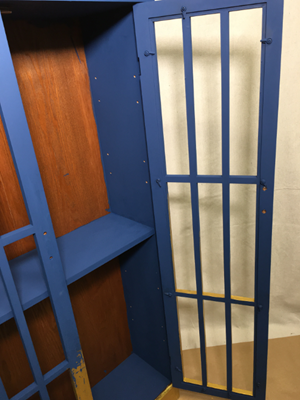
And that's it! Check out the finished piece below!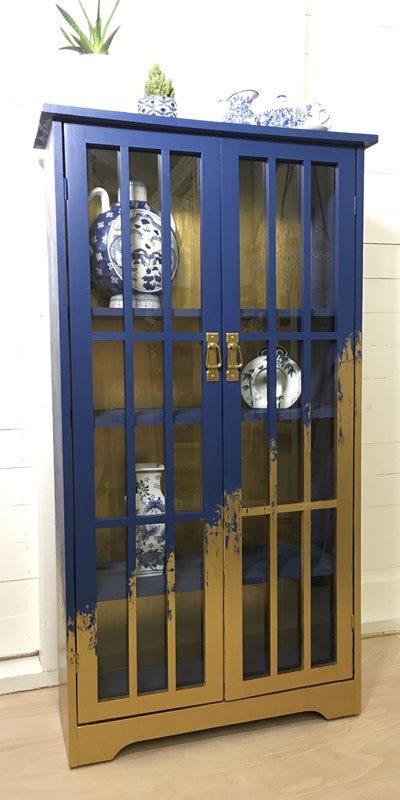
We are so thrilled to introduce this new blog series, and we hope you can take something away from the tips you have learned today. What kind of DIY projects do you like to tackle? Share with us! Share your DIY project photos with us by using #PlaidCrafts. You could be featured on our social media account.
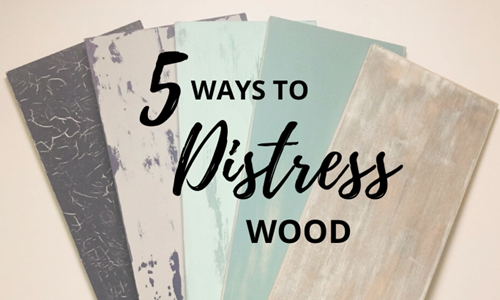
Need more DIY help? Check out Sherrie's article on 5 Ways to Distress Wood. Click the photo below to learn more!
Happy Crafting!!

I started making small home décor items 26 years ago really out of necessity. My husband and I had just built a new house. About a year later my first son was born and like a lot of young couples with a new family we wanted to fill our house with furniture but soon discovered how costly it would be. I quit my job at the time and became a stay at home mom which made the budget even tighter. That’s when I decided I was going to teach myself about power tools. YouTube didn’t exist 26 years ago so I learn everything I know from either woodworking magazines, woodworking books, or just plain old trial and error. My brother gave me a table saw for Christmas one year. That is when I started building furniture. Before I knew it I was filling custom orders. My tool collection began to expand which made the possibilities endless. I found out quickly I had a true passion for everything DIY. However, what is most rewarding is taking something that has been labeled “unusable” and making it into something new again. Not only is it cost-efficient but it helps to keep trash out of our land fields.
We did a short Q&A with Sherrie where she shares tips and tricks with us.
How do you come up with the projects that you do?
I look for inspiration from almost anything. For instance, I may see a large structure with an unusual shape and think of ways that I can create a piece of furniture that has the same feel. I see things that speak to me and then I put my own twist on it.
Tips or advice to give anyone wanting to get into crafting and DIYing?
Don’t ever get discouraged. Not everything I do is a homerun. I’ve had lots of projects that didn’t meet my own expectations but I always learn from the mistakes. Don’t let anyone tell you, you can’t do something. There is always a way to figure things out. There are books, magazines, and the internet to help and walk you through pretty much anything.
How do you find hidden treasures at the thrift store?
I take my time and really look at every inch of every shelf. I’m drawn mostly to things made from wood. Solid wood is always easy to transform. All you need is a little wood putty and sandpaper. I also look for things that can be combined. Maybe one piece of furniture has amazing legs and another piece has a great top. I can put these two different designs together and make a new and trendy up to date piece of furniture.
Depending on the project, taking us through your thought process of creating a piece?
I think the first thing I take into consideration when I’m looking at a new project is how much time it will take. I look at the shape of things. I like basic shapes. I like quick transformations. That’s one reason why I love using Folkart Home Décor Chalk Paint. There is zero prep. I can just dive into my project with no waiting. Not to say that I shy away from difficult things. A lot of times I have something in my head that I can only build from scratch. That takes time and patience. These are the things that I’m most proud of when they are complete.
Sherrie and her expertise are here to guide you step by step on upcycling a cabinet with a pop of color.
Supplies
- 34161 FolkArt ® Home Decor™ Chalk - Nautical, 8 oz.
- 50557 Folkart ® Brush Sets - Basecoating Set, 2 pc.
- 5535 FolkArt ® Treasure Gold™ - Gold, 4 oz.
- Thrift Store Cabinet
- Wood Block
- Paper Plate

Instructions:
1. Remove hardware. Remove all removable shelving. Basecoat furniture with Nautical from the top down to a diagonal on the front and along the sides as shown in photo.


2. Paint from the bottom to the Nautical with Treasure Gold.

3. Pour Nautical on to the plate. Use a large flat piece of a wood block into the paint and dab on to the plate to remove excess. Glide the Nautical paint into the Treasure Gold as shown in the video clip.
{^media|(width)500|(height)400|(ext).mp4|(url)~/Plaid/media/BlogImages/SherrieCabinet_1.mp4^}
4. Paint the back of bookshelf with Treasure Gold. Paint the inside sides and shelves with Nautical.


And that's it! Check out the finished piece below!

We are so thrilled to introduce this new blog series, and we hope you can take something away from the tips you have learned today. What kind of DIY projects do you like to tackle? Share with us! Share your DIY project photos with us by using #PlaidCrafts. You could be featured on our social media account.
Need more DIY help? Check out Sherrie's article on 5 Ways to Distress Wood. Click the photo below to learn more!
Happy Crafting!!


