
Instructions
- Using a screwdriver, remove all drawer pull hardware creating a smooth surface for painting. Set hardware aside.
- Clean the previously finished surface with household glass cleaner to remove dust, dirt or grease deposits.
- Pour a small amount of Ocean into a foam bowl as a palette or load a Waverly Inspirations Basecoating Brush directly from the paint bottle.
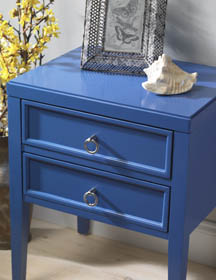
- Apply Ocean to the entire exterior surface of the table using long, smooth brushstrokes and allow to dry. Clean the basecoating brush with soap and water. Wait approximately one hour to allow both the brush and the painted table to dry thoroughly.
- Apply a second coat of Ocean over the entire table for opaque coverage. Allow to dry completely.
- Using a ruler, measure the interior of each drawer. Cut the fabric to match these measurements.
- Working one drawer at a time, evenly brush a liberal amount of Mod Podge onto the interior of the drawer. Press the pre-cut fabric onto the wet Mod Podge, smoothing out wrinkles and air bubbles, pressing the fabric into the corners and along edges. Wipe away any excess Mod Podge. The Mod Podge will serve as the glue to attach the Waverly Inspirations fabric to the interior of each drawer. Allow 20–30 minutes to dry. If desired, brush a topcoat of Mod Podge over the fabric in place. Allow to dry thoroughly.
- Replace all hardware.
TIPS:
- If needed, lightly sand smooth any rough areas using a fine grit sandpaper prior to painting and between paint applications, wiping away sanding dust before applying the next coat.
- Paint using a light touch and long, smooth brushstrokes. Rather than pushing the paint onto the surface with pressure, allow the paint to glide off the bristles of brush.
- Measure and cut the fabric for the drawer interiors by cutting the sides separate from the bottom. Measure and cut approximately ½” more fabric than the height of the side measurement for the drawer. When attaching the sides, allow that extra ½” to flow onto the base or bottom of the drawer, ensuring complete fabric coverage. Follow through by cutting and adding the bottom piece after the sides are in place. It may be easier to allow the sides to dry first before applying the bottom.

