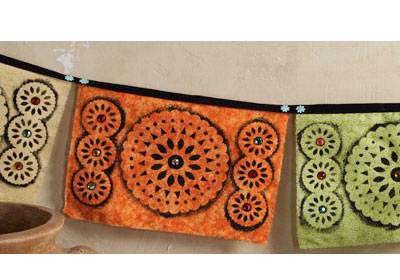
Traditional Day of the Dead flags are easy to make with scrap fabrics, stencils and paint.
Instructions
- Cut or tear the fabric into 12x8.5 inch pieces. You will need 1 per flag. Bright and pastel colors work the best.
- Place a flag on a piece of wax paper. Position the large circle in the center of a flag. Dip your stencil paintbrush into the Pure Black paint, tap of excess and paint around the edge of the stencil with and up-and-down motion. Fill in the center of the stencil. Repeat with the small strip of circles on the left and right side of the center. Allow the paint to dry. Repeat for each flag that you wish to make.
- Glue gems to the center of the circles.
- Cut a piece of ribbon or twine that will be long enough to fit each of the flags plus an extra 2 yards to hanging and tying. Hot glue the flags to across the top to the ribbon. Begin in the center and work your way to each side. Leave about a fingers width between each of the flags.
Tip: Add more colors! We used traditional black to simulate the cuttings of a flag but you can go bold or even glittery by using different paints.

