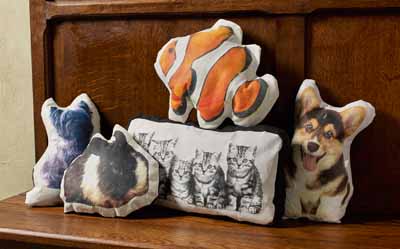
Show the love for your four-legged friends by creating a fun throw pillow using Mod Podge Photo Transfer!
Instructions
- Take a good, clear photo of your pet. Use a dry toner copy machine to enlarge photo to fit on standard size paper – 8.5” x 11” or 11” x 17” works best. Never use an actual photo
- Cover work surface with wax paper. Apply Mod Podge Photo Transfer Medium on to the face of the pet image using a ¾” flat brush or squeegee and should be applied to the image in a level, medium thickness.
- Carefully lift coated image off of the waxed paper. Flip image over and place on white fabric. Lightly smooth from center outwards to release any air bubbles. Allow to dry 24 hours.
- Use a sponge to moisten the paper and then begin rubbing with light pressure over entire paper. Paper will begin to roll up and peel away.
- While wet, it may feel as though all paper has been removed. Allow surface to dry and repeat until no more white haze appears. It is best to use light pressure with every repeat.
- Trace a line 1.5” away from pet image, following shape and contours of pet if desired and cut on this line. Use just cut image as a pattern to cut same shape out of black fabric.
- Pin both pieces right sides together and sew 0.5 ” seam allowance, leaving an opening at the base.
- Cut slits along seam, being careful not to cut through sewing. Turn right side out.
- Stuff with fiberfill and slip-stitch opening closed.


