Create your own DIY wood burned coasters with the Plaid Wood Burning set!

Instructions
- Put the Calligraphy Point onto your Wood Burning Tool. See product packaging for instructions.
- Plug in your Wood Burning Tool and turn it on to a medium-hot setting. See instructions on the back of the tool.
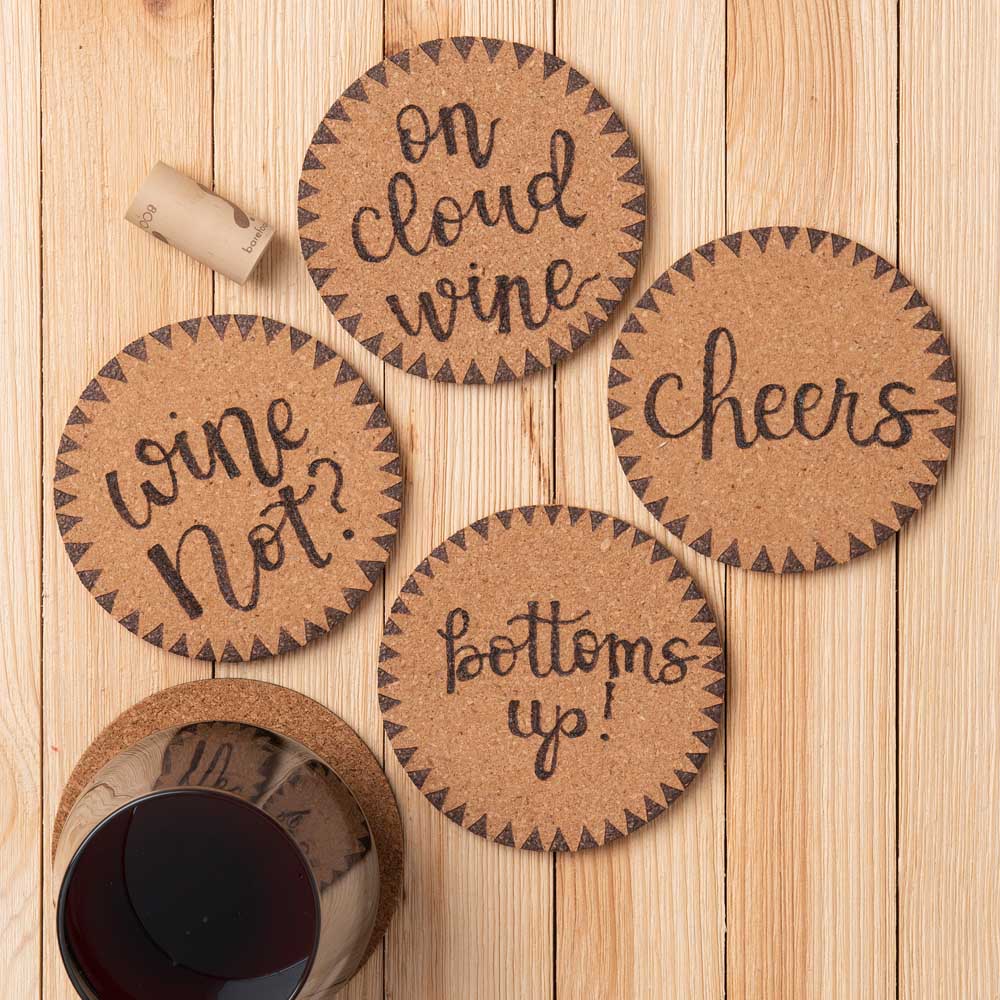
- Using a pencil, draw beverage related sayings on your coasters. You may use the project photo for reference.
- Test your Wood Burning Tool on a scrap piece of cork to make sure it is hot enough to burn.
- Carefully burn the penciled design onto the coasters.
- Tip: Be sure to keep a very steady pressure to ensure that your line will be smooth and even.
- Turn your Wood Burning Tool off and allow to cool.
- In case the tip is still warm, use a clean rag to remove the Calligraphy Point and replace it with the Shading Point. Turn the Wood Burning Tool back on to the heat setting you used previously.
- Once you have tested the tool on scrap cork and it is hot enough to burn, touch the tip of the Shading Point to the edges of the cork coaster to create a zig-zag border. See project photo for reference.
