We are excited to announce that Arteza has joined Plaid Enterprises, expanding our portfolio of trusted creative brands alongside Bucilla, Delta, Apple Barrel, and more.
We are excited to announce that Arteza has joined Plaid Enterprises, expanding our portfolio of trusted creative brands alongside Bucilla, Delta, Apple Barrel, and more.
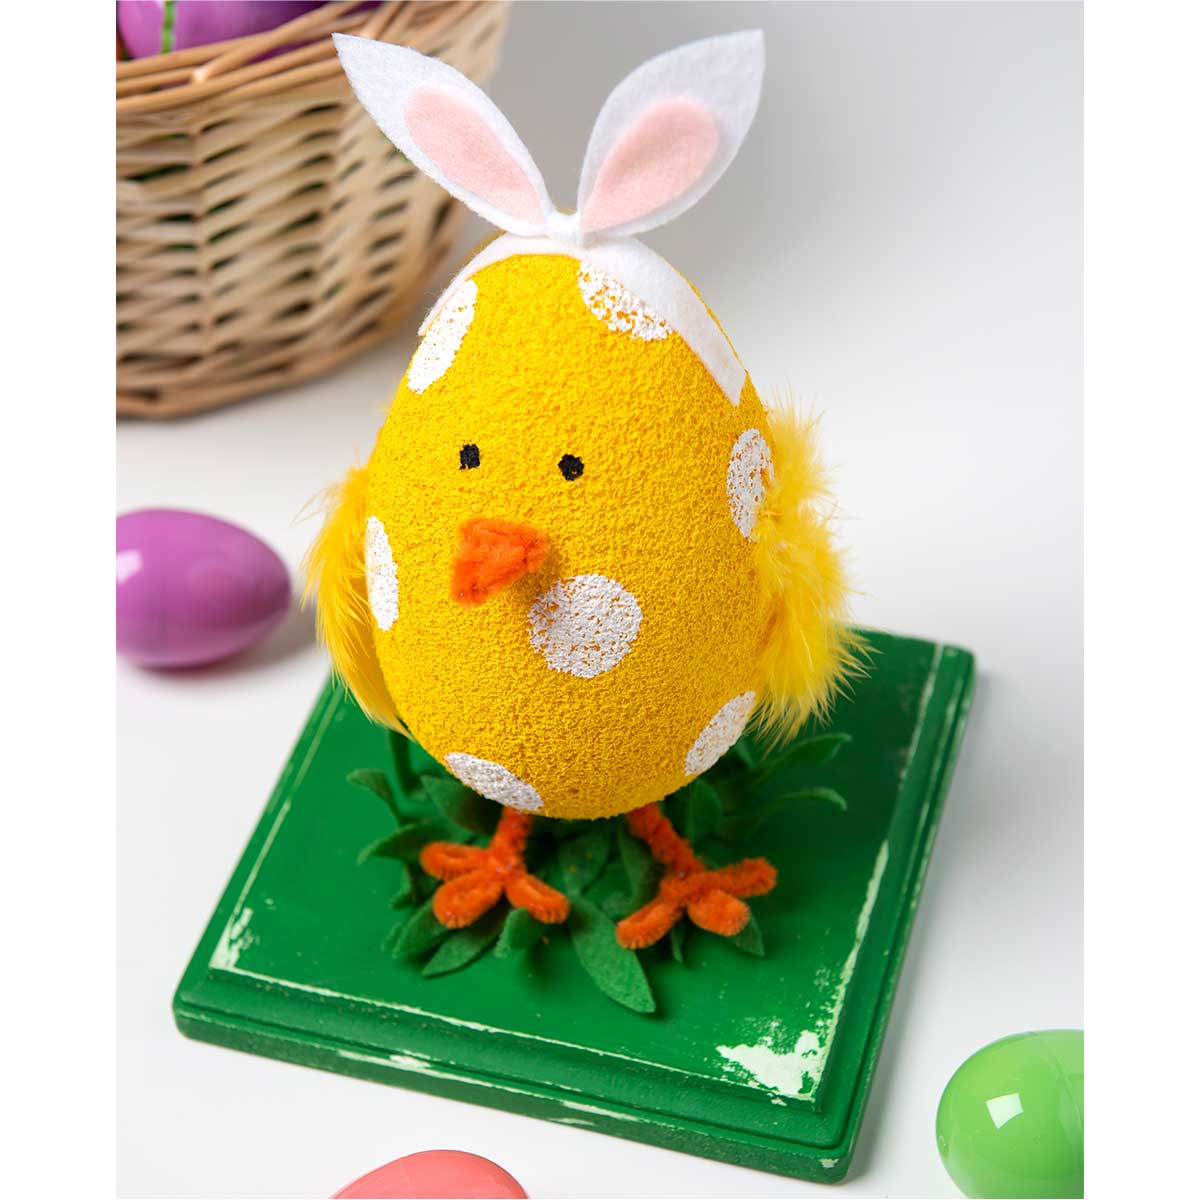
Basecoat the egg with Bright Yellow. Allow to dry completely
Add White polka dots using the 5/8” detail painter.
Basecoat the wood plaque with White. Once the paint is dry, paint with Green Machine. Lightly sand the edges to create a distressed look.
Fold an orange pipe cleaner in half and twist a 4” section. With the remainder of the pipe cleaner twist the pieces to create the chick foot. Repeat for the second leg and stick the legs into the bottom of the chick.
Use an orange pipe cleaner to create the beak. Fold into a triangle and wrap the pieces for the beak. Leave about ½” piece to stick into the foam egg.
With the end of a paint brush add two small dots in Black for the eyes.
Cut a 4”x ½” piece of white felt for the headband. Using the pattern cut the ears out of white. Tie the ears into a knot at the center. Cut the inside of the ears out of Baby Pink felt and hot glue to the white ears. Hot glue the ears to the headband and attach the headband to the chick with hot glue.
Hot glue the dowel rod piece to the center of the plaque and paint with Green Machine.
Cut pieces of the Apple Green felt and hot glue to the base to create grass.
Hot glue a few feathers to the side of the chick to create wings.
Gently push the bottom of the chick onto the dowel rod.