
_x000D_
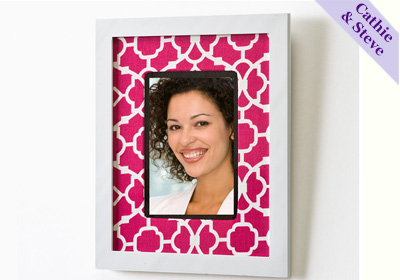
Create a stylish photo mat with Mod Podge and your favorite designer fabric._x000D_
Instructions
1. Lay the fabric (print side down) flat on your work surface. Trim the fabric so that it is larger than the mat. 1” extra all the way around should be enough.2. On the backside, add a drop of Mod Podge to each corner and pull back the corner of the fabric. Press into the Mod Podge. Add a strip of Mod Podge down the side edges and fold back the fabric into the Mod Podge. Smooth with your fingers and make sure the fabric is taut.
3. Using your scissors, cut a slit in the center of the fabric where the mat opening should be. Make slices that lead up to each corner. Trim away excess fabrics if needed. Apply a coat of Mod Podge around the inside edge of the mat. Fold back the fabric and pull taut. On the backside, use Mod Podge to glue the ribbon around the edge of the opening.
4. Paint the frame with Whicker White paint. Replace the mat into the frame and add a photo.
PROJECT TIP: This same technique can be done with your favorite paper.

