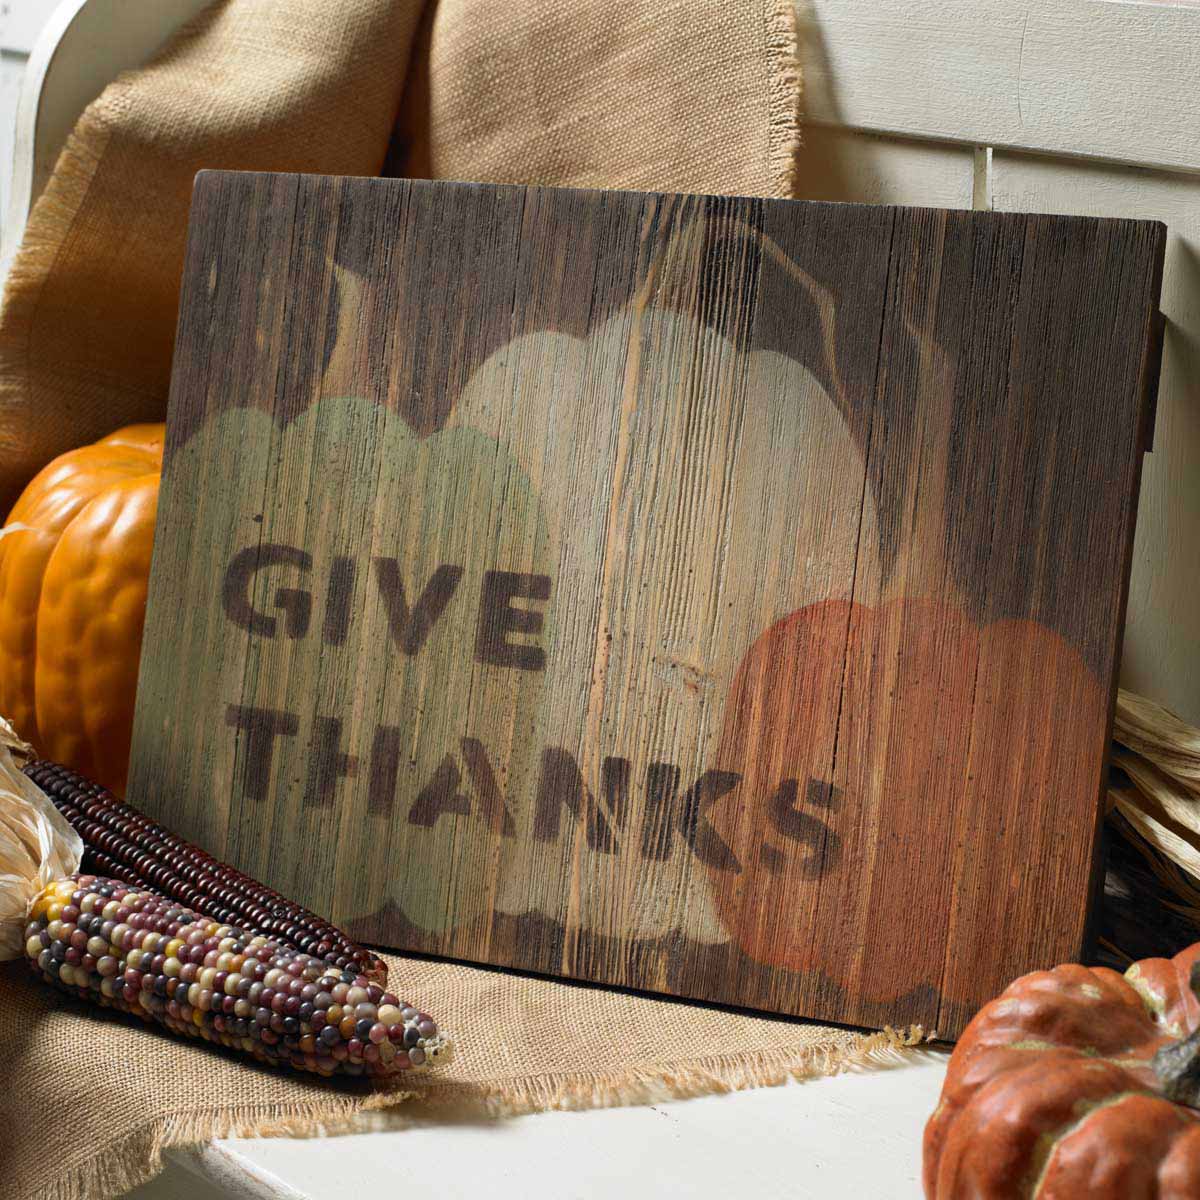
Show your thankfulness this fall with this beautifully hand-painted "Give Thanks" wooden sign. Make your space feel warm and cozy on a crisp fall evening with this handmade sign you can use year after year.
Instructions
Preparation
- Trace and transfer the pumpkin and stem pattern directly onto the raw wood pallet board.
Painting
- Using a large flat brush, paint the back pumpkin with an equal mix of Whipped Cream and Cadet Grey.
- Using the same large flat brush, paint the pumpkin on the right Persimmon.
- Paint the pumpkin on the left with a mixture of Lichen plus a touch of London Stone.
- The background is painted a mixture of Persimmon plus a touch of Raven.
- Switching to the medium flat brush, paint the stems with the Persimmon plus Raven mixture plus a touch of Whipped Cream. White still wet, blend in a little Whipped Cream on the left side of all stems.
- Allow all painted areas to dry thoroughly, and then sand the surface very heavily using an electric sander.
- Place a strip of painter’s tape horizontally 1½” in from the left side and 4½” up from the bottom. Place another strip of tape horizontally underneath 1½” in from the left and 2” up from the bottom. The painter’s tape lines will serve as a guide for each letter stencil placement.
- Starting with the letter “G,” place the bottom of the alphabet stencil along the top edge of the painter’s tape.
- Using a wedge sponge, load the sponge into the brown mix from step no. 4 (Persimmon plus Raven) by dabbing into the paint mixture.
- Offload excess paint by dabbing the sponge onto the palette. Next, dab the loaded sponge over the open areas of the “G” stencil. Lift to reveal the stenciled letter. Allow to dry before stenciling the next letter.
- Repeat this process until “Give Thanks” has been stenciled. Remove the painter’s tape guideline. Allow to dry thoroughly.
- Sand again to create a distress effect.
- Thin the Persimmon plus Raven mixture with a little water, and then splatter the surface using a toothbrush. Allow to dry.
Finishing
- Apply an even coat of Ceramcoat Ivory Wax using the large flat brush. Allow to dry and then buff with a soft lint-free cloth.
