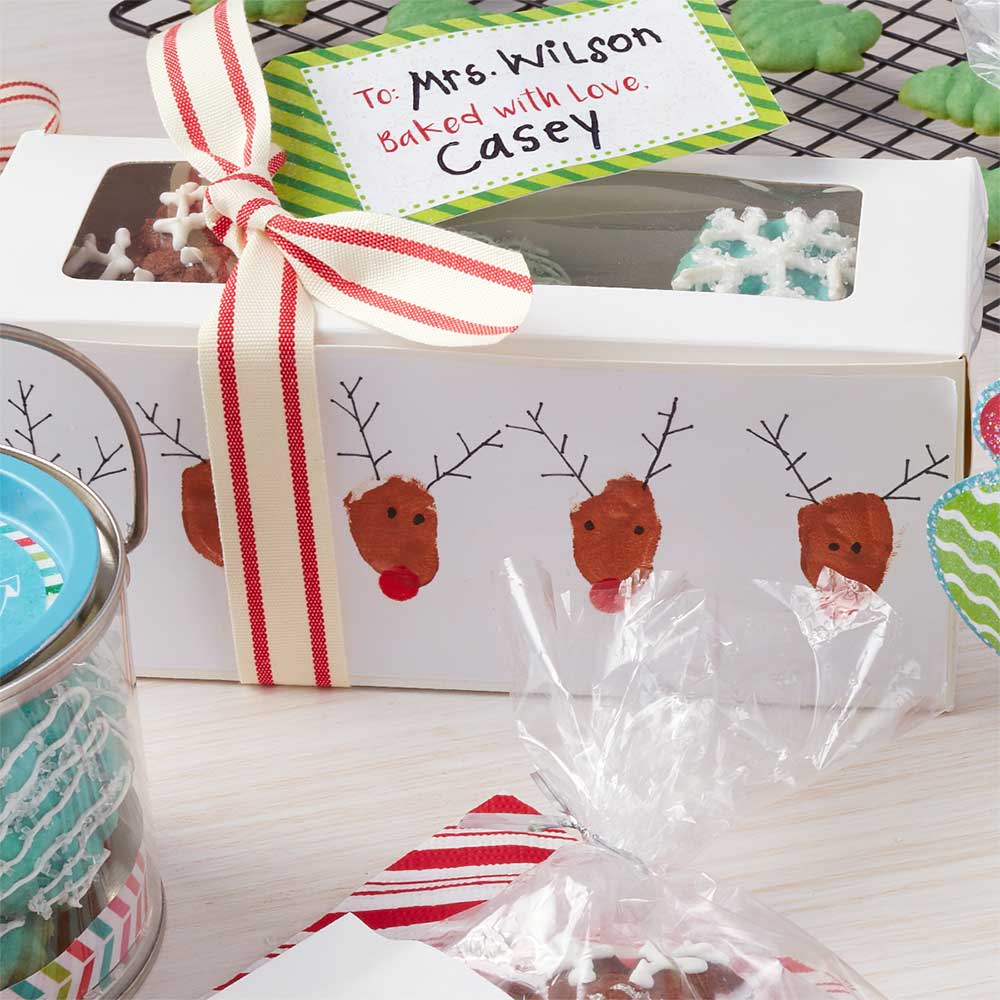
A perfect gift for your child's teacher or mentor, this sweet homemade Christmas gift is perfect for a batch of your favorite cookies.


Instructions
- Cut two rectangles 7¾” long x 3” tall from the thin white paper.
- Squeeze a small amount of Chestnut onto a paper plate. Using the ¼” dauber, dauber the paint onto your child’s thumb. Press a row of thumbprints in the along the center of each white strip of paper. Let dry.
- Squeeze out a small amount of Bright Red onto the paper plate. Using the ⅝” dauber, daube a red nose on the bottom of each thumbprint. Let dry.
- Draw antlers and eyes on the reindeer.
- With the box flat, apply a thin coat of Kids Washout to one side of the box. Place the artwork and smooth with your fingers in place. Topcoat with Kids Washout.
- Repeat with the second side. Be sure to double check the direction of the folds so that your artwork is right side up.
- As your box dries, print out the gift tag design from the downloadable art. Cut out. Sign the card with the permanent marker or pencil.
- Layer the prepared tag onto the scrapbook paper with Mod Podge Sparkle. Let dry.
- Cut out the tag, punch a hole with the hole punch, and thread with a 17” length of ribbon.
- Assemble box, fill with cookies, and attach gift tag.

