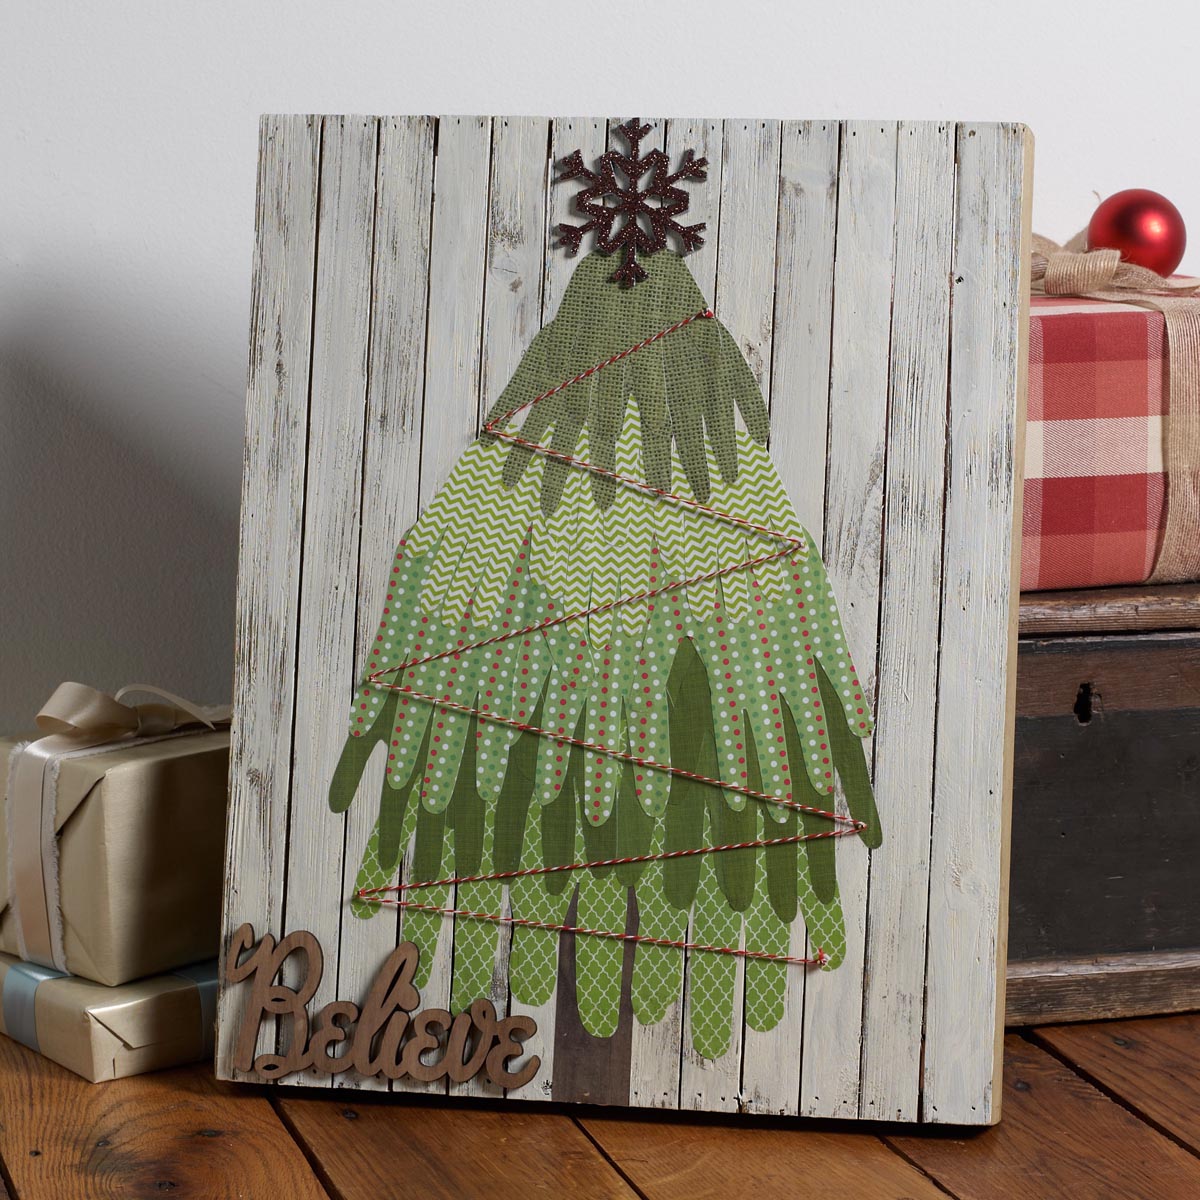
Create Christmas tree wall art with cut-paper handprints, string and Mod Podge.
Instructions
- Working on the lower center of the plaque, attach the brown strip of paper to the plaque. This will be the trunk of the tree. Attach by applying Mod Podge to the back of the paper, position on the plaque and smooth to remove any air bubbles.
- Begin on the lower portion of the tree with the largest handprints. Attach them with Mod Podge. The fingers should be pointing down. Work your way up the tree adding more handprints until you reach the top. The smallest handprint should be the top of the tree. Top-coat the entire tree with a layer of Mod Podge.
- Add sparkle Mod Podge to the fingertips to create a frosted look. Allow to dry.
- Attach small nails across the tree. Begin at the top and work across the tree until you reach the end. Begin at the top. Tie the twine to the top nail, work your way down the tree, wrapping the string around each nail. Tie off the twine on the last nail.
- Using the Mod Melter, attach the snowflake and saying to the plaque.


