Instructions
Preparation Instructions:
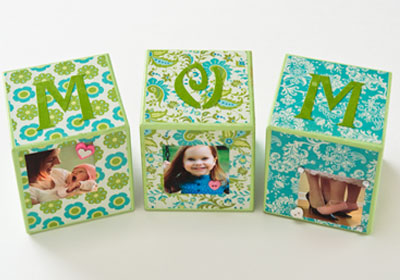
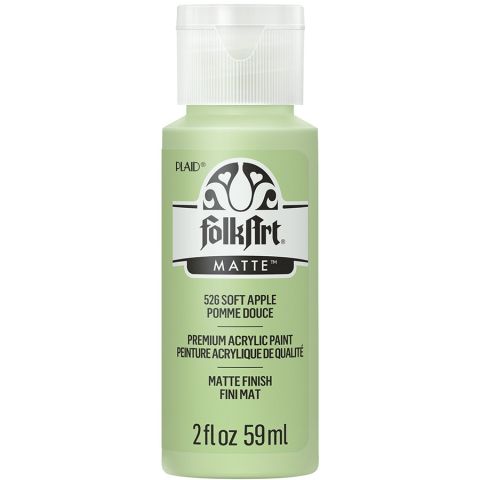
1. Lightly sand all sides of each wood block. Basecoat Soft Apple on all six sides using ¾” flat brush. Allow to dry and reapply.
2. While waiting for basecoat to dry, photo copies into 2” squares. Also cut Mod Podge papers into 3 ¼” squares. I suggest using one paper design to each wood block; therefore you will need to cut six squares.
Mod Podge Instructions:
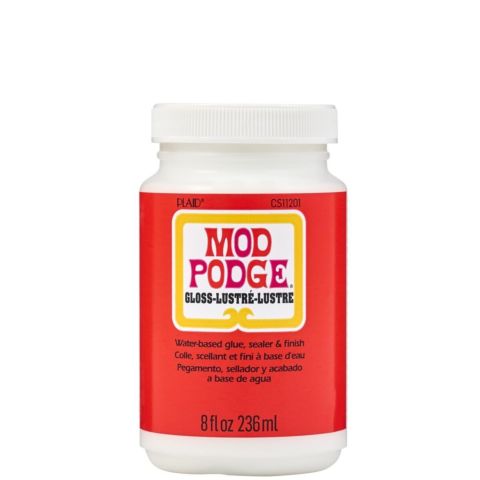
1. Working one side of a block at a time, brush Mod Podge Gloss onto the wood surface as well as the back side of the Mod Podge paper using a ¾” flat brush.
2. Center the paper square on the wood block and press in place. Next place a sheet of waxed paper over your papered project surface. Using your Mod Podge squeegee, press and drag the squeegee over the paper from the center towards the edges to remove any excess medium as well as release any air pockets. Remove waxed paper and repeat until each side is papered with the Summer Crush patterns. Repeat creating all three blocks.
3. Continue using same techniques to adhere photo copies.
4. Using a pencil, trace around Mailbox Stencil letters M O M onto green cardstock and cut out.
5. Add “M O M” cutouts to top of each block using same Mod Podge techniques. (NOTE: If desired, M O M can also be stenciled directly onto patterned papers. Be sure to use contrasting paint colors so letters are defined.)
6. Apply a coat or two of Gloss Mod Podge over entire block allowing each application to thoroughly dry before applying next.
7. Using white craft glue, add small buttons, gems, metal charms or ribbon bows of your choice.

