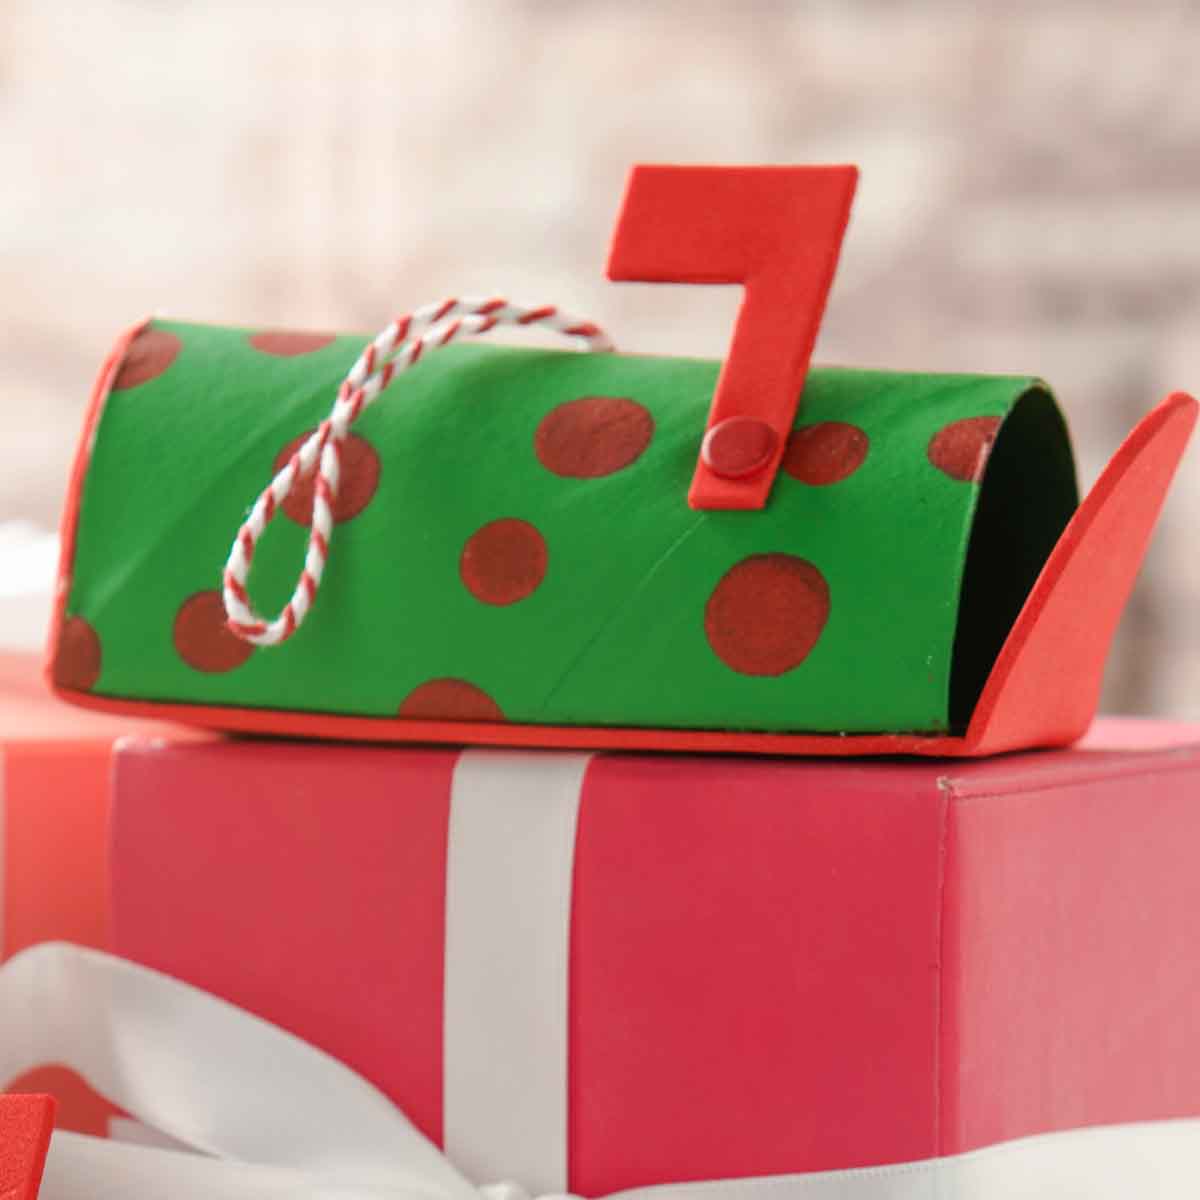
Send off your wish list to Santa with this festive mailbox ornament.
Instructions
Construction
- Cut your cardboard tube in half lengthwise so that when flat, it looks like a rectangle.
- Fold both long ends of your roll ½″ inward. Curve your roll so that it looks like a tall half cylinder.
- Trace the bottom of your roll on your craft foam. Leave a 2-3″ section on the end of your roll to be the flap on your mailbox. Cut the 2-3″ section of your foam to fit in the curved inside of your mailbox. See project photo for reference.
- Hot glue the cut piece of craft foam to the folds on your paper roll. Don’t glue the 2-3″ curved section of your foam.
- Trace the end of your toilet paper roll that doesn’t have the curved foam on it onto your left over craft foam. Cut this piece out and hot glue it to the other end of your roll.
- Cut out a mailbox flag shape from your left over craft foam. Use your paper fastener to attach this to your mailbox.
- Use your screwdriver to screw a little hole at the top of your mailbox. Use the string to make a loop from inside the hole. See project photo for reference.
Green Polka Dot Mailbox
- Paint your mailbox with Christmas Green. Let dry.
- Use Apple Red to paint polka-dots on your mailbox. Let dry.
- Paint your craft foam with Apple Red. Let dry.
- Paint your paper fastener with Apple Red. Let dry.
Striped Mailbox
- Paint your mailbox with Snow White. Let dry.
- Place stripes of stencil tape on your mailbox. Paint Apple Red on the exposed area. Remove tape. Let dry.
- Paint your craft foam with Apple Red. Let dry.
- Paint your paper fastener with Apple Red. Let dry.
Blue Mailbox
- Paint your mailbox with Sky Blue. Let dry.
- Mix a 3:1 ratio of Snow White and water. Dip your toothbrush in the mixture and flick the mixture onto your mailbox. See project photo for reference. Let dry.
- Paint your craft foam with Snow White. Let dry.
- Paint your paper fastener with Snow White. Let dry.


