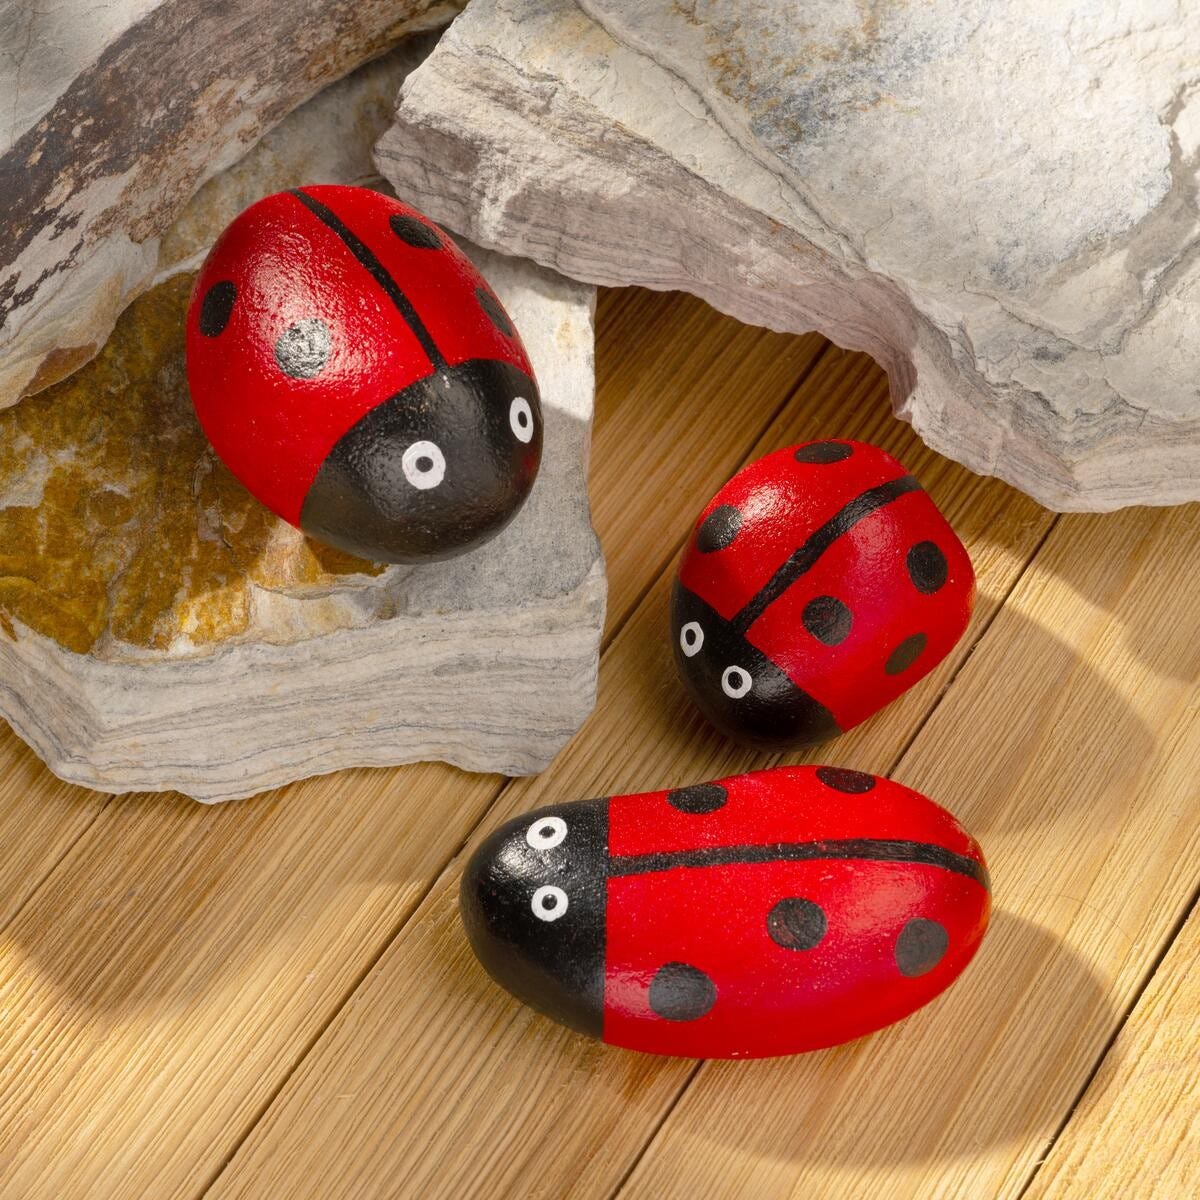
Add a pop of color and cuteness to your garden or room with these DIY ladybug rocks! They're fun, easy to make, and perfect for adding a playful touch to any space.

FolkArt ® Multi-Surface Satin Acrylic Paints - Wicker White, 2 oz. - 2894
FolkArt
2 oz
+ 73 colors
$1.99

FolkArt ® Multi-Surface Satin Acrylic Paints - Lipstick Red, 2 oz. - 7270
FolkArt
2 oz
+ 73 colors
$1.99
FolkArt ® Multi-Surface Satin Acrylic Paints - Licorice, 2 oz. - 2934
FolkArt
2 oz
+ 73 colors
$1.99

Other Supplies
Paper Towels
Water cup or basin to clean brushes
Painters Tape (optional)
Instructions:
- Basecoat the Rocks:
- Use a medium brush from the FolkArt Paintbrush Set to apply a basecoat of Lipstick Red on each rock.
- Let them dry completely before moving on to the next step.
- Use Licorice to paint one end of the rock for the ladybug's head.
- Add a line down the center of the rock to divide the wings.
- Dot black spots on each side of the wings for that classic ladybug look.
- Use Wicker White to add tiny dots on the head for eyes. Add smaller dots of Licorice in the center of the Wicker White.
- Allow the paint to dry thoroughly.
- Place your ladybug rocks in the garden, on a windowsill, or anywhere you want to add a touch of whimsy!
