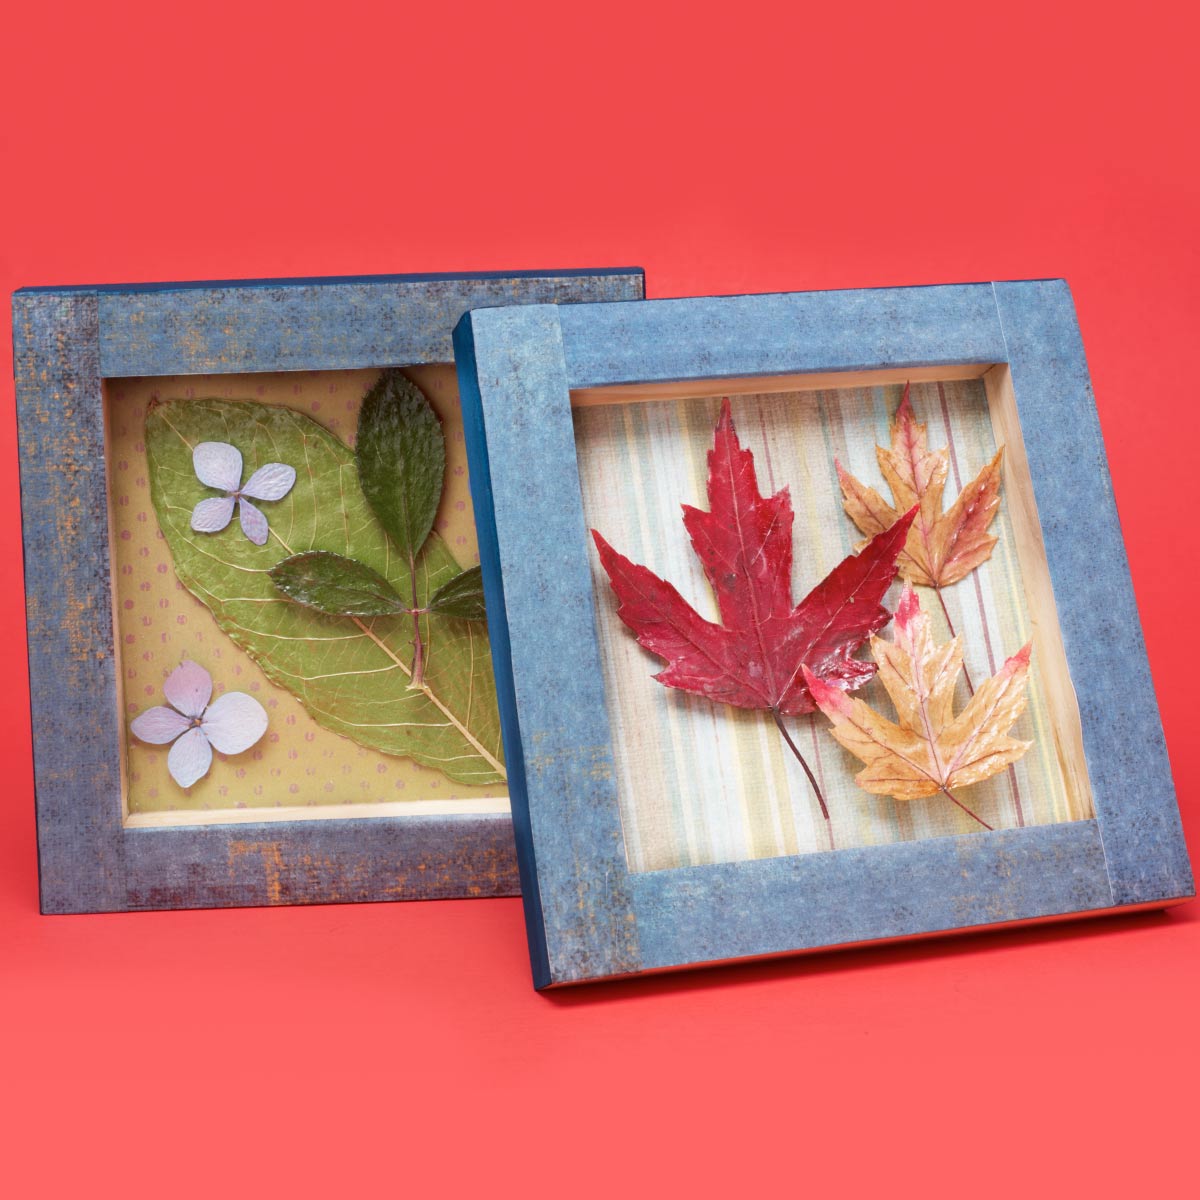
Save the colors of the season with this unique Mod Podge craft! Add a touch of nature to your home decor with this project - great for kids who love to go on nature walks.

Instructions
NOTE: Enjoy nature while collecting leaves and flower petals. Press all nature collections between sheets of wax paper using your favorite pressing techniques. We stored ours in a shadowbox when we were finished!- Seal each leaf and fl ower individually by placing them face up on wax paper. Carefully coat each specimen with Mod Podge Gloss. While still wet, move to a clean spot on the wax paper, set aside and let dry.
- NOTE: Each leaf will be more durable with the coating of Mod Podge, however, they will still be somewhat fragile.
- Next, decorate the shadow box. Measure and cut white construction paper to fi t inside the box lid. Repeat for the sides.
- Using crayons, color each paper shape.
- NOTE: Draw patterns of wind, earth, and sun rays to tie in the nature theme.
- Attach each decorated piece of construction paper to the box lid using Mod Podge Matte. Working one side at a time, apply a smooth, even coat of Mod Podge to the box surface and then to the backside of the colored paper. Then press in place.
- NOTE: Mod Podge always works best when applying glue to glue. Let dry.
- Create risers by cutting small squares of corrugated cardboard. Mod Podge a couple squares together to create depth in the shadow box.
- NOTE: Create interest in varying depths by using a few single squares but also prepare some double and triple stacked squares.
- Prearrange your sealed leaves and flowers in the shadow box to determine placement and layering options. Apply Mod Podge to the corrugated cardboard stacks and then adhere to the shadow box. Next, add a touch of Mod Podge Matte to the top of the corrugate cardboard stack and carefully press a sealed leaf or flower on top. Let dry flat completely before hanging upright.


