We are excited to announce that Arteza has joined Plaid Enterprises, expanding our portfolio of trusted creative brands alongside Bucilla, Delta, Apple Barrel, and more.
We are excited to announce that Arteza has joined Plaid Enterprises, expanding our portfolio of trusted creative brands alongside Bucilla, Delta, Apple Barrel, and more.
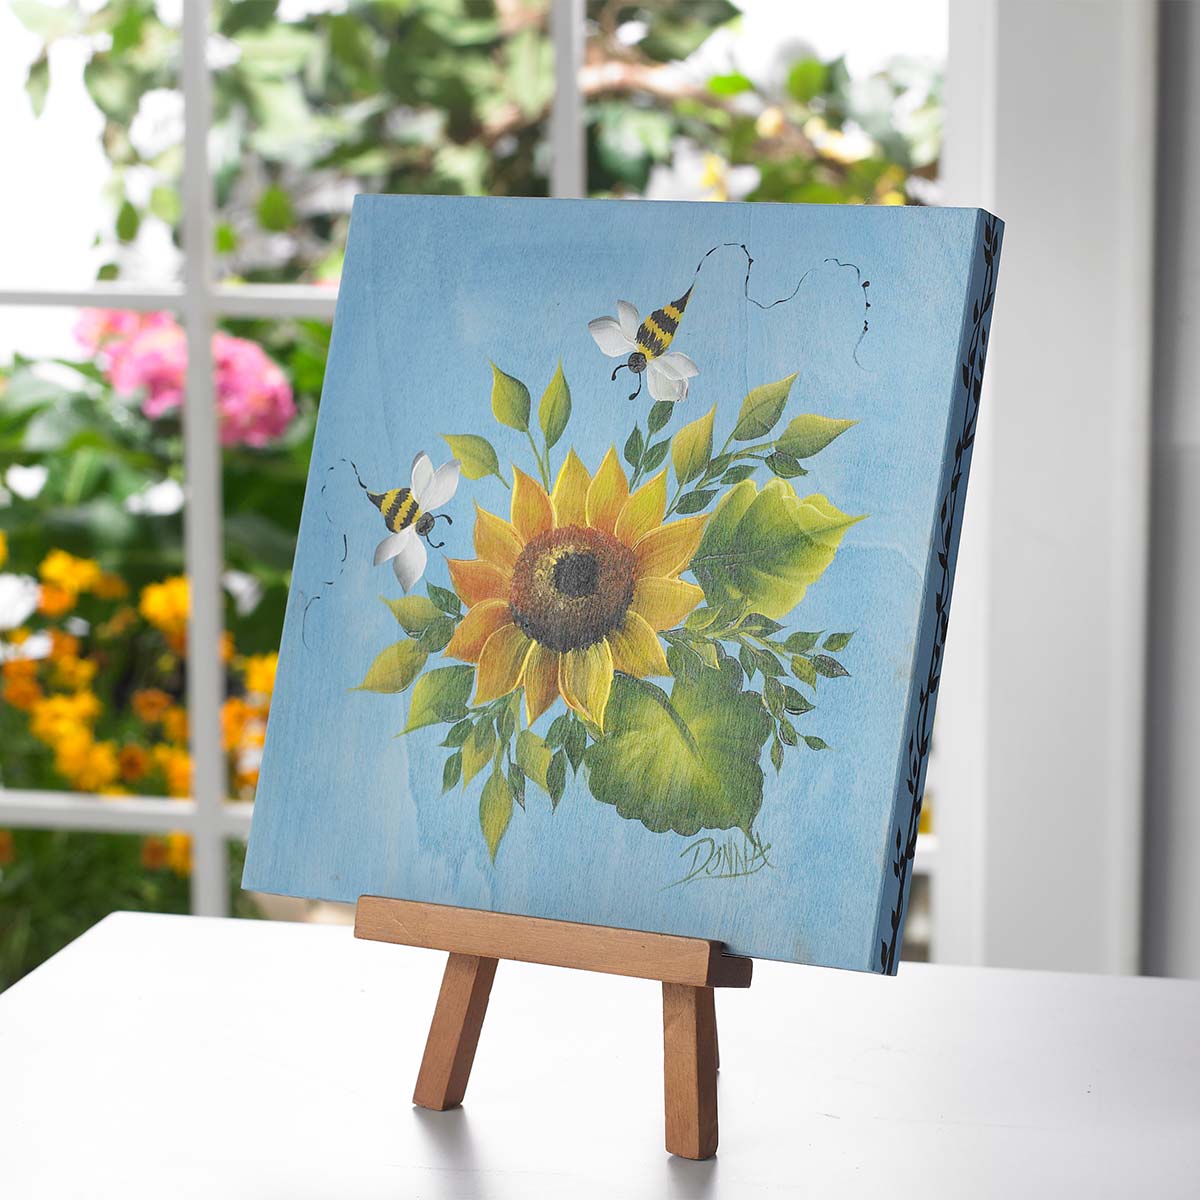
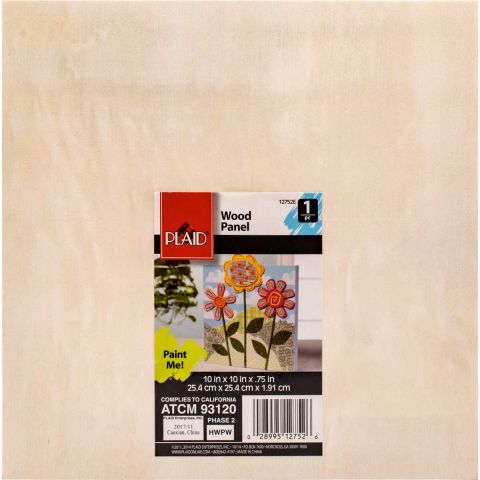
Background – Create a light blue color by mixing a very small amount of Cobalt Hue into a puddle of Titanium White. NOTE: Be sure to add a little at a time. It is easier to add more Cobalt Hue to deepen the color than to add more Titanium White to lighten the color. Once satisfied with the light blue mixture, paint the wood canvas panel lightly using the 3/4" Flat brush. Allow to dry. Sand the surface smooth using medium grit sandpaper. If desired, a second coat of the light blue mixture can be applied for a more opaque color effect.
One Stroke Sunflower – NOTE: Use the One Stroke Teaching Guide as a practice guide; lay a sheet of either tracing paper or waxed paper over the printed guide, then practice painting a One Stroke Sunflower before painting directly onto the prepared wood canvas panel.
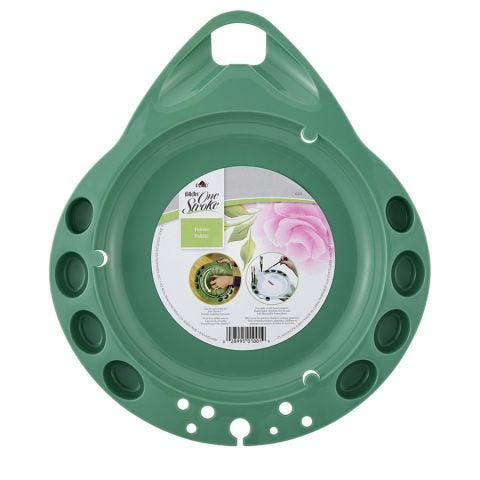
Sunflower Center – Fluff the 3/4" Scruffy Brush prior to using it. Load the Scruffy Brush by pouncing one half of the brush into a puddle of Pueblo. Then pounce the second half of the brush into Licorice. Pounce a few times on the palette to blend the colors. Then begin pouncing the loaded Scruffy Brush on the surface following the count shown on the Teaching Guide pouncing left to right in an arc. Lift the brush, then reconnect the Scruffy Brush where you started. Continue pouncing across the front of the first pounced row slightly lower creating a flower center similar to a donut shape.
Sunflower Petals – Begin painting sunflower petals using the One Stroke leaf stroke. Double load a No. 12 Flat brush with both Daffodil Yellow and Yellow Ochre, blend on the palette. Touch the flat of the loaded brush slightly overlapping the wet Pueblo at the top of the flower center. Touch, press and pull the stroke outward. Release pressure and pull the brush back to its chisel edge creating the tip of the sunflower petal. A flower petal is created that is blended, shaded and highlighted all in one stroke! Work quickly and continue painting sunflower petals around the flower center while the Pueblo and Licorice are still wet. NOTE: If the center begins to dry, re-pounce the area to apply wet paint before painting additional sunflower petals.
Sunflower Center – Reload the 3/4" Scruffy brush with both Pueblo and Licorice, then repeat pouncing the center beginning at the top. Allow the pounced flower center to slightly overlap the base of each sunflower petal. Pounce a Yellow Ochre highlight around the center edge of the “donut.”
One Stroke Wiggle Leaves – Double load a No. 12 Flat brush two-thirds full with Thicket and Citrus Green; blend well on the palette. While holding the brush vertical and on its chisel edge, paint three lines creating a “Y” as a placeholder for the direction of the wiggle leaf strokes. Touch the chisel edge along the right hand side of the “Y” keeping Thicket to the outside of the leaf and Citrus Green to the inside. Apply pressure and begin to “wiggle” the brush creating small scallop-like strokes while keeping the pressure on the brush even. Pivot the brush slightly so that the brush aligns with the tail of the “Y.” Release pressure and lift back to the chisel edge while pulling a small point to the end of the leaf. Repeat the same steps for the second half of the wiggle leaf. NOTE: It may be easier to turn the surface to achieve the best angle to paint the second half. Remember to keep Thicket to the outside of the stroke. End the wiggle leaf on the chisel edge, lift to complete. Still working on the chisel edge of the brush, pull a stem into the middle of the leaf. If desired, paint a second wiggle leaf reversing the double loaded brush so that Citrus Green is to the outside and Thicket on the inside.
Basic One Stroke Leaves – Double load a No. 12 Flat brush two-thirds full with Thicket and Citrus Green; blend well on the palette. Hold the brush up on the chisel edge so that it is just touching the surface. Begin the Basic One Stroke Leaf by applying pressure and allowing the bristles to expand in width. Pull the stroke while lifting the brush and releasing pressure; ending the brush stroke on the chisel edge pulling to create the tip of the leaf. Touch, press, pull and lift to the chisel edge!
One Stroke Bumblebees – Load a No. 12 Flat brush with Daffodil Yellow. Using the flat of the brush, touch the surface where the bumblebee will be painted. Apply pressure and allow the bristles of the brush to fan out. Complete the stroke by pulling, releasing pressure, and lifting to the chisel edge creating a One Stroke leaf stroke. This is the base of the bumblebee body. Using the handle end of the paintbrush loaded with Licorice, paint a black head at the base of the yellow bee body. Touch Licorice to the surface, draw a black circle, then lift the brush handle. Load a No. 2 Script Liner brush with thinned Licorice. Using light pressure so that only the tip of the bristles are touching the Daffodil Yellow body, begin painting liner strokes horizontally across the body. Complete a couple more rows of black stripes on the bee body. Still using the Script Liner brush loaded with thinned Licorice, paint two antennae. If desired, paint a wiggly dotted flight path from the tail of the bee to where he has been. Next, load a No. 10 Flat brush with Titanium White with a touch of Licorice. Paint a One Stroke leaf stroke to the right of the body creating a wing ending the wing on the chisel edge where the head meets the body. Repeat and paint a second wind on the same side slightly overlapping the first stroke. Repeat for the left side of the bumblebee.