We are excited to announce that Arteza has joined Plaid Enterprises, expanding our portfolio of trusted creative brands alongside Bucilla, Delta, Apple Barrel, and more.
We are excited to announce that Arteza has joined Plaid Enterprises, expanding our portfolio of trusted creative brands alongside Bucilla, Delta, Apple Barrel, and more.
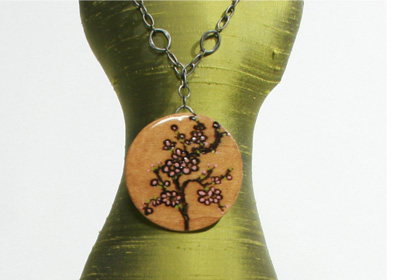
Stamp the image onto the top of the wood disk. Allow the ink to dry.
Pre-heat the wood burning tool with the skinny tip attached.
Burn the disk by drawing over the stamped image. Hold the tip for a long amount of time to create a deep burn, dragging the tip like a pencil to create a thin burned line.
Add a coat of FolkArt Stain to the front and back of the wood disk. One coat will yield a light color, two or three coats will produce a darker color. Let dry.
Using a thin paintbrush, apply Baby Pink and Yellow Citron paint to the stained disk to highlight the design.
Use the Baby Pink to paint small flower buds and Yellow Citron to make small leaves. Let dry.
Apply an even coat of Dimensional Magic to the top of the disk. Use a pin to pop any air bubbles.
Let dry for 8 hours in a non-drafty place.
Using 2 pairs of pliers, remove a large link from the loop chain.
Apply E6000 glue to half of the large link and glue to the top back of the disk pendant. This will serve as a bail.
Cut a length of chain to fit your neck.
Using pliers attach a clasp to each end of the chain with jump-rings.
Attach the disk pendant to the center of the chain with a jump-ring.
Add more jump-rings to create a longer dangle pendant.