
March is National Craft Month!! And to celebrate the joy and fun of crafting, we reached out to some of our crafty ambassadors to help us out. We asked 4 of our ambassadors to give us their tips and tricks for crafting to share with all of you. Each crafter has a certain type of craft they enjoy doing and we wanted to share their passions with you. We are encouraged and proud to support these crafty women as they express themselves through arts and crafts!
How do you craft? What type of crafting are you passionate about?
Make sure to shop Walmart.com to get all the craft supplies needed to complete your next project, like these ambassadors!
Keep reading to learn some crafting tips and tricks to inspire your creativity!

Hey Crafters! National Craft Month is amongst us and I’m sure we're all looking for fun and creative projects to get our hands into. I personally love upcycling old items and my favorite way to transform an everyday object is to give it a fresh and exciting coat of paint! Before you jump into your next project with some of your favorite Plaid paints, here are some helpful tips and tricks:
_________________
burlap+blue is a regularly updated, authentic site featuring engaging, affordable and doable DIY, crafts, home decor, free printables and more.
Our goal is to inspire you with real life, uplifting content to make you more creative and to make your life and home brighter.
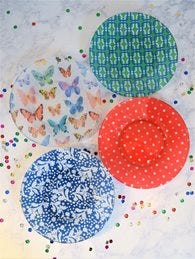
If you love versatile crafting supplies, then you’ll love Mod Podge! There are so many clever Mod Podge crafts out there! From seasonal crafts and wreaths, to home decor and kids projects, a jar of Mod Podge is a crafters’ best friend. These Mod Podge crafts are perfect for all skill levels and budgets; I know you’ll find something you’ll love!” Linda, burlap+blue blog, https://www.burlapandblue.com/category/mod-podge-crafts/
Tips/Tricks for working with Mod Podge:
1. Ensure that you are using the appropriate Mod Podge formula. There is a Mod Podge product for almost every project and finish imaginable. Choosing the right product will go a long way towards creating a successful finished product.
2. Remember to apply a thin layer of Mod Podge to adhere your material (fabric, tissue paper, etc) to your surface. Do this first, before applying your top layers of Mod Podge.
3. After applying your Mod Podge, remember to smooth out your material to remove air bubbles. Plaid makes a tool specifically for this, and it's been invaluable to me. I'm not sure how I crafted without it!
4. Thin coats are better. Apply 2-3 thin coats of Mod Podge to your project, versus one heavy, thick coat.
5. Experiment and have fun! If you make a mistake, that's ok! Just try again. Mod Podge is versatile and forgiving, but it can take a little practice to really feel comfortable with it.
_________________________

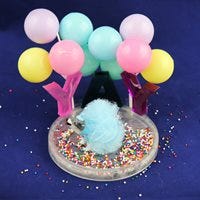
Ciao amici! My name is Morena and I love snark, shenanigans & crafting. I strolled over from Morena’s Corner to show you how FUN and EASY it can be to craft with resin. When I began I started out small, making pendants by using molds. Once I became more confident I moved to bigger projects, like trays and tables. Here are some things I learned along the way, and I hope these tips will encourage you to give resin crafts a try!
Resin Mixing & Measuring Hacks:
Speaking of using what you have…Mod Podge is PERFECT for sealing fabric and paper before adding resin! Don’t ever pour resin directly onto paper or fabric! The textile will get wet and always look wet. For projects like this refinished tabletop, I brush on at least three layers of Mod Podge before pouring the resin. I’ll brush one layer of Mod Podge on in a top to bottom motion, and let it dry completely. Then I’ll brush a second layer going left to right and let it dry completely. The third layer might be overkill, but it helps make sure I haven’t missed any spots!
Budget Tips
Silicone ice cube trays and candy molds from the dollar store are great to use with resin! While they aren’t as detailed as the typical resin molds you normally see, they are a budget friendly way to start learning how to work with resin. Sometimes your item will look cloudy when you pop it out of the mold, but there’s an easy to fix: just paint a light layer of resin over the item and it will shine again!
Finishing Up
It’s important to plan ahead before you pour your resin and think about how you will protect the surface as the resin sets. There’s nothing worse than checking your project after a day and realizing that pet fur is sealed into the finish! Set up your project in a pet free room away from a lot of traffic. If you can’t do that, set a box over the project as it dries. I saved a large shipping box just to use with this lap tray project that I finished with resin. I measured and made sure the box would fit over the tray before I poured it, and then I protected the project with the box set over it. The end result was a perfect finish!
There are so many ways, big and small, to use resin! I just started to learn how to 3D print, and was thrilled to learn that resin is a perfect finish for projects because it helps minimize print lines! I’m always learning something new about ways to use resin, and I hope I helped teach you something new today, too. I’d love for you to visit my site so I can share more of my crafting secrets with you!
_______________
â

Waverly Inspirations Chalk Paint Tips & Tricks
Did you find these crafting tips helpful?? Let us know if you use any of these tips the next time you craft!
Happy Crafting!
How do you craft? What type of crafting are you passionate about?
Make sure to shop Walmart.com to get all the craft supplies needed to complete your next project, like these ambassadors!
Keep reading to learn some crafting tips and tricks to inspire your creativity!
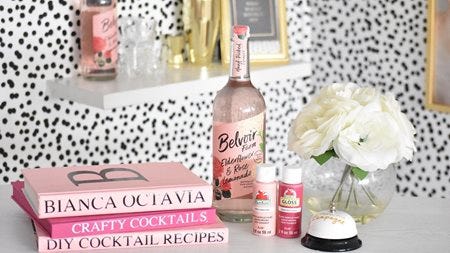
Bianca Octavia
Check out Bianca on Instagram: www.instagram.com/iambiancaoctavia
Check out her website: www.biancaoctavia.com
Tips & Tricks for Painting for Beginners
Check out her website: www.biancaoctavia.com
Tips & Tricks for Painting for Beginners
Hey Crafters! National Craft Month is amongst us and I’m sure we're all looking for fun and creative projects to get our hands into. I personally love upcycling old items and my favorite way to transform an everyday object is to give it a fresh and exciting coat of paint! Before you jump into your next project with some of your favorite Plaid paints, here are some helpful tips and tricks:
- Choosing the right color:
- When picking out your paint colors, keep in mind that acrylic paint may dry a slightly darker shade than the color swatch on the bottle. For a more accurate idea of what the dried color will look like, go by the color of the actual paint itself on the bottom side of the bottle.
- A little goes a long way:
- It might not seem like it, but the smallest drop of paint can cover a lot more than you’d imagine. When starting a project, begin with a small amount of paint and try not to overload your paintbrush. It's better to take your time and paint multiple coats to achieve full coverage, than to overuse and possibly flood/ruin your project.
- In a hurry? No worries!
- One of the most helpful hacks I’ve learned throughout my crafting journey is the power of a blow dryer. While acrylic paint is popular for its fast drying time, sometimes we need it done faster. Depending on the size of your painted project, going over it with low-medium heat can have it ready to go in three minutes or less. This tip has literally been a lifesaver for me when I’m in a pinch!
- Never let acrylic paint dry on a paintbrush:
- The cost of crafting supplies can start to add up so I try my very best to maintain and keep my paint brushes for as long as possible. When painting, keep two cups of water nearby. One cup to wash out your colors in, and the other cup with clean water to keep your brushes hydrated. Leaving a used paintbrush out for as little as 15 minutes could cause your brush to become rock hard and in some cases unusable. Another tip; you can use Brush Plus from FolkArt to keep your paint brushes fresh after each use!
- So you accidentally let your paint brush dry out………
- It happens, sometimes when we finish a big project we are tired and don’t feel like cleaning up at that moment. If your paint brush dries out, you may be able to save it by wetting it with cold water and rubbing it over a bar of soap until the paint begins to loosen and the brush regains its original shape. Stay away from warm or hot water as it may help the paint settle into the brush more.
- Messy crafter? Me too!
- I have sacrificed 75% of my wardrobe in the name of crafting. The great thing about acrylic paint is that it can be mostly, and sometimes even totally be removed from clothes. If you catch the stain before it dries, use hand washing detergent and water to scrub the stain until it is completely gone. If the stain has already dried, soak the stained area with 91% Isopropyl rubbing alcohol for 15 minutes, then scrape the paint off. If needed, repeat the process with the alcohol until the stain has been totally removed.
- Have fun and go beyond the canvas!
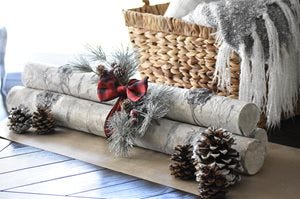
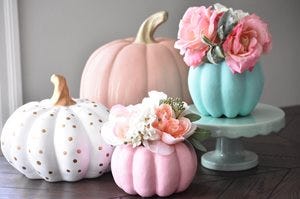
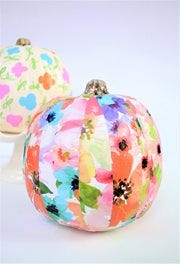
- Get creative with your projects and surfaces. Before you throw something away, ask yourself can it be upcycled or given a new life with a fresh coat of paint. I’ve painted old library books and turned them into high-end coffee table books for my bar area. I’ve also painted pool noodles and turned them into faux fire logs and turned Halloween pumpkins into floral fall centerpieces. No matter what you’re painting, Plaid has an amazing variety of paints that can be used for almost any type of surface. Make sure the paint you choose pairs well with the surface you plan on covering whether it’s glass, wood, plastic or metal.
_________________
Linda Smith
Check Linda out on Instagram: www.instagram.com/burlapandblue
Visit her website: www.burlapandblue.com
Hi, I’m Linda, owner at burlap+blue & all crafty things.
burlap+blue is a craft, DIY, and home decor blog that I started over 10 years ago. I started it to support my Etsy shop, but soon discovered that blogging was what I really loved.burlap+blue is a regularly updated, authentic site featuring engaging, affordable and doable DIY, crafts, home decor, free printables and more.
Our goal is to inspire you with real life, uplifting content to make you more creative and to make your life and home brighter.
If you love versatile crafting supplies, then you’ll love Mod Podge! There are so many clever Mod Podge crafts out there! From seasonal crafts and wreaths, to home decor and kids projects, a jar of Mod Podge is a crafters’ best friend. These Mod Podge crafts are perfect for all skill levels and budgets; I know you’ll find something you’ll love!” Linda, burlap+blue blog, https://www.burlapandblue.com/category/mod-podge-crafts/
Tips/Tricks for working with Mod Podge:
1. Ensure that you are using the appropriate Mod Podge formula. There is a Mod Podge product for almost every project and finish imaginable. Choosing the right product will go a long way towards creating a successful finished product.
2. Remember to apply a thin layer of Mod Podge to adhere your material (fabric, tissue paper, etc) to your surface. Do this first, before applying your top layers of Mod Podge.
3. After applying your Mod Podge, remember to smooth out your material to remove air bubbles. Plaid makes a tool specifically for this, and it's been invaluable to me. I'm not sure how I crafted without it!
4. Thin coats are better. Apply 2-3 thin coats of Mod Podge to your project, versus one heavy, thick coat.
5. Experiment and have fun! If you make a mistake, that's ok! Just try again. Mod Podge is versatile and forgiving, but it can take a little practice to really feel comfortable with it.
_________________________
Morena's Corner
Check out Morena's Instagram: www.instagram.com/morenascorner
Visit her website: www.morenascorner.com
Visit her website: www.morenascorner.com
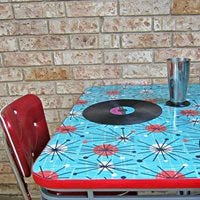
Ciao amici! My name is Morena and I love snark, shenanigans & crafting. I strolled over from Morena’s Corner to show you how FUN and EASY it can be to craft with resin. When I began I started out small, making pendants by using molds. Once I became more confident I moved to bigger projects, like trays and tables. Here are some things I learned along the way, and I hope these tips will encourage you to give resin crafts a try!
Resin Mixing & Measuring Hacks:
- It’s very important to measure the two parts accurately, otherwise the resin won’t set correctly. Here’s what I do to make measuring and mixing a breeze:
- Recycle two plastic medicine syringes to draw the contents from the bottles. I labeled the syringes with the numbers 1 and 2, and only used them with the matching bottle. These syringes help me draw up the correct amount each time!
- For larger projects, use disposable plastic cups and draw a line on each of them. Don’t ever use the same cup for both parts of the resin…you want them separate until you’re ready to mix them!
- Rinse out and recycle plastic party cups to combine and mix your resin in. You’ll have to throw away the cup after you’re done (don’t rinse resin out in your sinks!), so why not reuse a cup or container first instead of putting it straight in the trash?
- It’s tempting to mix up the two parts quickly but don’t do it! You’ll have bubbles galore! Slow and steady mixing is key.
- If your room is cold (below 75 degrees) or the box has been stored in a cool place, you should set each of the capped containers in a warm tub of water to gently warm the contents up. This will help reduce bubbles when you mix them together.
- You’ll be surprised at how many of your craft supplies can be used with resin!
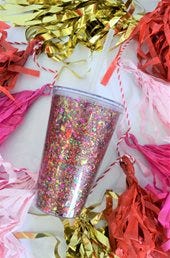
- Papercrafting supplies are great for this medium. Glitter and shaker sprinkles are perfect for mixing into your resin.
- You can use craft paint to color your resin, but use it sparingly or the resin won’t set fully.
- Beautiful scrapbook papers look amazing when sealed in resin!
- Heat embossing tools are GREAT for popping bubbles in resin! Gently heat the surface and watch the tiny bubbles disappear!
Speaking of using what you have…Mod Podge is PERFECT for sealing fabric and paper before adding resin! Don’t ever pour resin directly onto paper or fabric! The textile will get wet and always look wet. For projects like this refinished tabletop, I brush on at least three layers of Mod Podge before pouring the resin. I’ll brush one layer of Mod Podge on in a top to bottom motion, and let it dry completely. Then I’ll brush a second layer going left to right and let it dry completely. The third layer might be overkill, but it helps make sure I haven’t missed any spots!
Budget Tips
Silicone ice cube trays and candy molds from the dollar store are great to use with resin! While they aren’t as detailed as the typical resin molds you normally see, they are a budget friendly way to start learning how to work with resin. Sometimes your item will look cloudy when you pop it out of the mold, but there’s an easy to fix: just paint a light layer of resin over the item and it will shine again!
Finishing Up
It’s important to plan ahead before you pour your resin and think about how you will protect the surface as the resin sets. There’s nothing worse than checking your project after a day and realizing that pet fur is sealed into the finish! Set up your project in a pet free room away from a lot of traffic. If you can’t do that, set a box over the project as it dries. I saved a large shipping box just to use with this lap tray project that I finished with resin. I measured and made sure the box would fit over the tray before I poured it, and then I protected the project with the box set over it. The end result was a perfect finish!
There are so many ways, big and small, to use resin! I just started to learn how to 3D print, and was thrilled to learn that resin is a perfect finish for projects because it helps minimize print lines! I’m always learning something new about ways to use resin, and I hope I helped teach you something new today, too. I’d love for you to visit my site so I can share more of my crafting secrets with you!
_______________
â
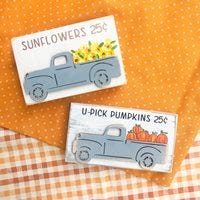
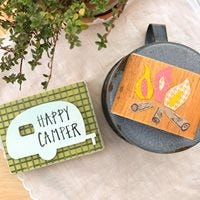
Jessica Peppers of Happy Camper Crafts
Check out Jessica on Instagram: www.instagram.com/happycampercrafts
Read her blog: happycamperhandmade.com
Read her blog: happycamperhandmade.com
Waverly Inspirations Chalk Paint Tips & Tricks
- Before starting your project, make sure to stir the paint well. This will make sure all the pigment is mixed thoroughly and will provide you with the best color and coverage.
- You can use both regular brushes, as well as foam brushes. However, you might find you like the results of a regular brush better. If using a foam brush, make sure it is brand new, to avoid getting debris in your paint or on your project.
- Make sure your surface is clean. If you’ve recently sanded your project, you will want to make sure to wipe away any dust for best results.
- The colors are rich, deep and provide great coverage. These full coverage paints create a great base coat or primer for projects and are equally great as a standalone color.
- Waverly Inspirations Chalk Paint allows you to create different looks on wood projects:
- For a distressed shabby chic look, use sandpaper to sand edges to remove some paint for the perfect well-worn distressed looks.
- For an antiqued look, layer White over a darker color like Mineral. Again, using sandpaper, sand edges and other areas of your project to create a distressed look.
- A “washed” or stained look is also easy to achieve. Take a wet paper towel, cloth or wet wipe and dip it in the paint, then rub it onto your wood project. This will give it a stained or washed look when it dries.
- The matte finish of these paints makes it easy to apply additional designs or lettering. Paint, paint pens, ink-based stamps or even vinyl will all adhere nicely to the base coat of paint. You may need to give your piece a light sand to even out the surface prior to adding your design or lettering.
- Waverly Inspirations Chalk Paint is very versatile and can be applied to a variety of surfaces, like wood, glass, metal, even fabric. When trying a new surface, always test it in a small inconspicuous area to see how it applies. Let it dry before you carry on with the rest of your project, this will ensure that it gives you the finish and coverage you desire after it dries completely.
- Both in colors and finish, the chalk paint pairs well with other Plaid Craft paints!
- Give it a try and have fun! Waverly Inspirations Chalk Paint comes in three sizes, start with the smaller size if you’re new to chalk paint and still figuring it out. Once you know you love it, the larger sizes are perfect for all your future projects!
Did you find these crafting tips helpful?? Let us know if you use any of these tips the next time you craft!
Happy Crafting!
