The store will not work correctly when cookies are disabled.
SPECIAL ANNOUNCEMENT
Offers
Plaid Welcomes Arteza® to Our Family of Brands
We are excited to announce that Arteza has joined Plaid Enterprises, expanding our portfolio of trusted creative brands alongside Bucilla, Delta, Apple Barrel, and more.
We are excited to announce that Arteza has joined Plaid Enterprises, expanding our portfolio of trusted creative brands alongside Bucilla, Delta, Apple Barrel, and more.
Plaid Crafts is your source for creative products, education, and inspiration.
From the start, Plaid has been at the forefront of innovation, creating products that have become household names. Iconic brands like Mod Podge, FolkArt, Apple Barrel, Delta Ceramcoat, and Bucilla Stitchery Kits are just a few of the beloved names that crafters trust for quality and creativity.
For Artists, by artists. Premium Folkart paint is created with the highest quality ingredients and trend setting innovation. With over 200 colors to choose from makes, it makes finding the perfect shade effortless for painting and crafting.
Fun, bright, and bold! Apple Barrel is perfect for creating fun projects big and small. Add a pop of color with this high-quality, non-toxic paint that’s simple to use.
For over 150 years, Bucilla® has helped people all over the world capture the satisfying feeling of stitching heirloom-quality needlework pieces. Whether you have been stitching for years or you are looking to learn a new skill, Bucilla®provides the producs and education for every interest and skill level. Create beautiful handmade creations that will give you and your family lastimg memories with any Bucilla product.
Fragment Effects is a complete glass chip crafting program that allows you to create unique artwork with dimension, color, and sparkle. It bridges the gap of many crafts like stained glass, glass painting, mosaics, paint by number, and diamond art kits – with a new twist!
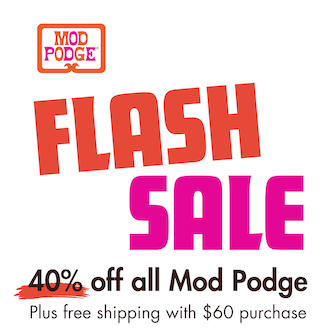
America's number one decoupage medium. Mod Podge is an all-in-one glue, sealer, and finish.Whether it is home and outdoor décor, personalized gifts, upcycling, or DIY fashion Mod Podge has you prepared. Choose from one of Mod Podge’s specialty formulas to create your perfect decoupage project. Whether you’re adding sparkle, creating a weather look, or preserving memories, Mod Podge is here to help.
For over 40 years, Delta has inspired decorative painters, home décor enthusiasts, and creative crafters with high-quality products. Delta Ceramcoat Acrylic Paint offers a wide array of colors that will give your projects a fresh, modern look with excellent coverage.
Waverly Inspirations® is a no-prep acrylic chalk paint with a sophisticated matte finish. This specially formulated line works beautifully when layered and is easy to distress, perfect for DIY projects, upcycling, furniture flipping, and thrifted pieces. Our rich color collections are inspired by Waverly Inspirations® fabrics, making them great for any home décor project. Shop this full line of acrylic chalk paint exclusively at Walmart stores nationwide and on Walmart.com.
Upcycle a pair of basic sneakers with Kicks Studio! Transform your style with this acrylic paint specifically designed for leather, vinyl, and more. This unique water-resistant paint formula is flexible and will not crack or peel - making it perfect for painting sneakers. Add Kicks Studio to your craft supplies to upcycle your fashion and make a statement! Your Kicks, Your Style!
Create the look of real stained-glass effects. Gallery Glass acrylic paint can be easily applied vertically or horizontally to windows, doors and décor to add beautiful transparent or opaque color. This non-toxic paint is repositionable and permanent until you are ready to remove.
Developed by artist and teacher Donna Dewberry, the One Stroke learn-to-paint program makes painting approachable for artists of all skill levels. By breaking down classic brush strokes and recombining them in a myriad of ways, Donna has taught countless students and certified instructors how to create lush flowers and beautiful landscapes.