Email Signup

Subscribe to the Plaid Crafts Newsletter for craft project ideas, product news, our live events, and more!

25% Bucilla Spring Sale

Save 25% on orders of $60 or more and get free U.S. shipping! Shop new arrivals from Bucilla - Seasonal Felt Stockings & Ornaments! This promotion cannot be combined with other promos. See shipping details. for inspirational ideas. Get free U.S. ground shipping on orders $60+! This promotion cannot be combined with other promos. See shipping details.

Use Code

Sale Ends 4/20/24

Blue Galaxy Resin Coasters

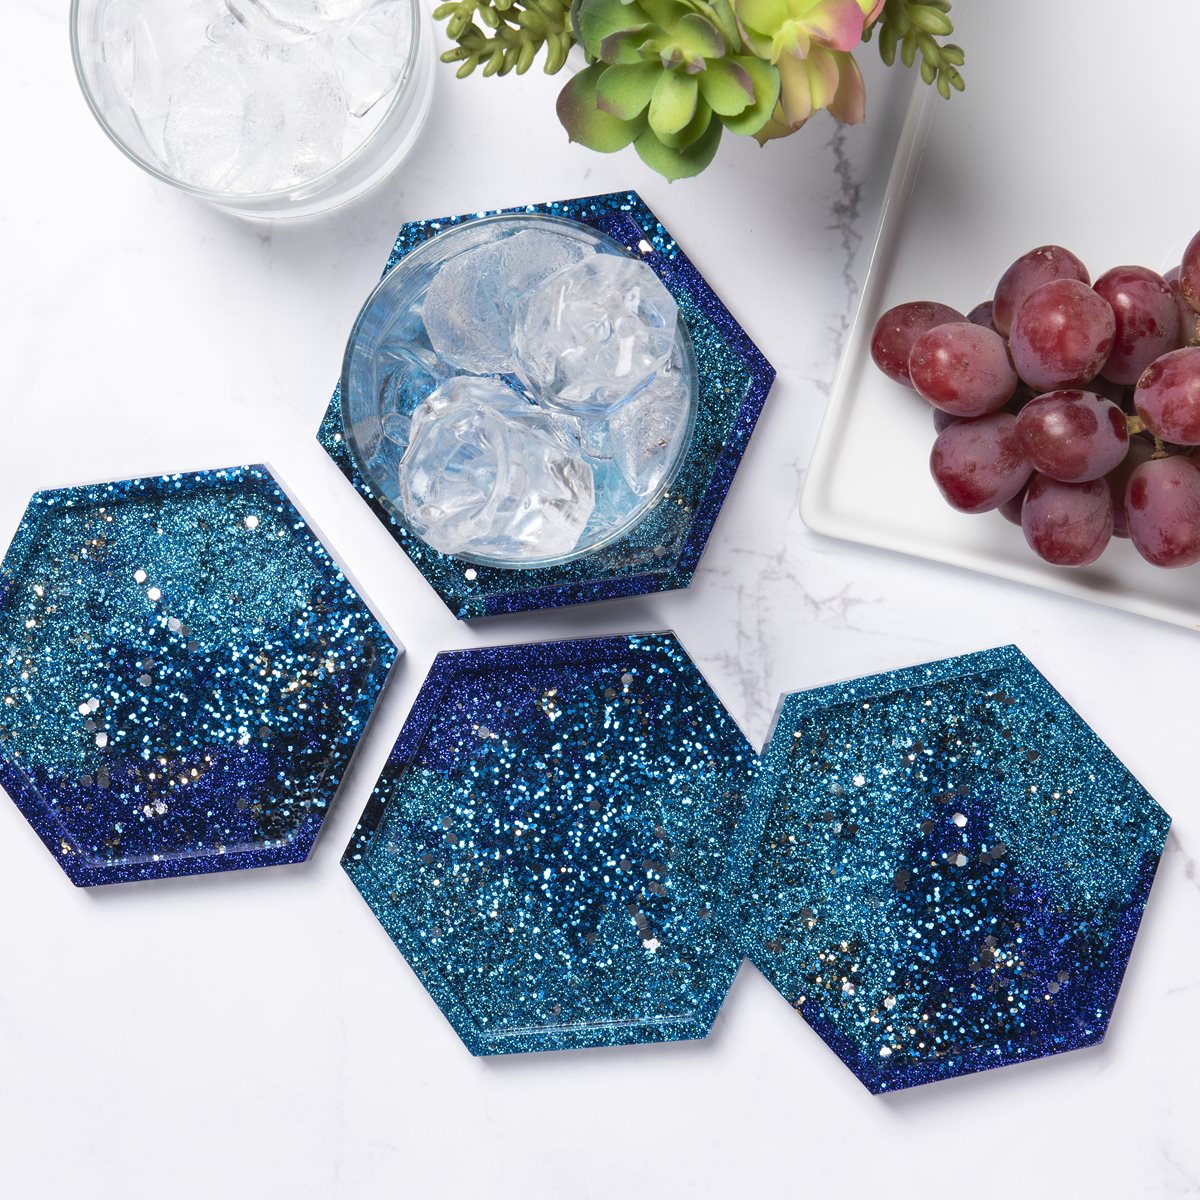
Explore outer space with these galaxy-inspired Mod Podge Resin coasters. Use the Mod Podge Resin mold, glitter, and more to make your coasters look like a collection of stars in the Milky Way.

This project features these great brands:

At a Glance:

Project #15861 Skill Level: Advanced
supplies

Plaid Supplies

Mod Podge ® Resin - 8 oz. - 25263

Number Needed: 1 $19.99
Item not for sale on Plaid Online.

Mod Podge ® Silicone Molds - Coasters, 3 pc. - 25267

Number Needed: 1 $13.99
Item not for sale on Plaid Online.

Other Supplies

  • Respirator
  • Torch
  • Gloves
  • Disposable cups
  • Craft sticks
  • Variety of blue glitters

instructions

  1. Mix Mod Podge Resin according to instructions on plaidonline.com/ModPodgeResin.
  2. Split the Mod Podge Resin evenly into 3 cups. In one cup, add a pinch of a blue glitter, in the second, add a pinch of a different blue glitter, in the third, a pinch of another blue glitter. Stir each cup slowly until glitter is combined with the resin.
  3. Pour each resin mixture into the coaster mold slowly, in a swirling motion, only pouring a little of each color at a time. Layer the colors and use a craft stick to gently swirl the colors together. Remove any bubbles carefully using a torch.
  4. Allow resin to cure fully according to instructions on plaidonline.com/ModPodgeResin before de-molding.

Watch a Video Tutorial

Related FAQs

Can a Mod Podge Resin project be decorated with paint?
Can I apply Mod Podge Resin in layers, and how long should I wait between applying each layer?
Can I use a mold when working with Mod Podge Resin? And what types of molds work best?
How can I thin out the resin mixture?
How do I mix Mod Podge Resin?
resources

Related Videos

Getting Started with Mod Podge Resin

Watch this Video

How to Mix Resin

Watch this Video

Using Acrylic Paint with Resin

Watch this Video

Related Resources

Mod Podge Resin Info Sheet

Mod Podge Resin Info Sheet

Download this PDF document to learn more about Mod Podge Resin.

View PDF

Related FAQs

Once Mod Podge Resin has been completely cured, it can be decorated or embellished with paint, markers, ink, and more. Once decorated, it is recommended that the surface be protected by pouring a thin top coat of clear Mod Podge Resin over the decorated surface.
Yes, Mod Podge Resin can be applied to a surface in layers. The second layer can be applied once the first layer has set. This could be one to two hours, depending upon the humidity level and temperature in the room.
Mod Podge Resin works best with all types of molds. Some molds like a silicone mold will not require a mold release agent, while other types of molds made of plastic polypropylene or polyethylene sheet plastic will require a mold release agent

How much resin will you need?

* - Required Field

Rainbow "Create" Sign
New!
Rainbow "Create" Sign
Chicken Coop Birdhouse
New!
Chicken Coop Birdhouse
Mod Podge Cupcake Stand
New!
Mod Podge Cupcake Stand
FolkArt One Gloss Painted Glass Votives
New!
FolkArt One Gloss Painted Glass Votives

Disclaimer: The information found in each project is presented in good faith, but no warranty is given, nor results guaranteed, nor is freedom from any patent to be inferred. Since we have no control over physical conditions surrounding the application of information herein contained, Plaid Enterprises, Inc. disclaims any liability for untoward results.

Important: Please be sure to thoroughly read the instructions for all products, paying particular attention to all cautions and warnings shown to ensure the proper and safe use of the product.

Copyright: All Rights Reserved. No part of this Project may be reproduced in any form without permission in writing, except for your personal use, except by reviewer, who may in reviewing this project, quote brief passages in a magazine or newspaper.