Email Signup

Subscribe to the Plaid Crafts Newsletter for craft project ideas, product news, our live events, and more!

25% Bucilla Spring Sale

Save 25% on orders of $60 or more and get free U.S. shipping! Shop new arrivals from Bucilla - Seasonal Felt Stockings & Ornaments! This promotion cannot be combined with other promos. See shipping details. for inspirational ideas. Get free U.S. ground shipping on orders $60+! This promotion cannot be combined with other promos. See shipping details.

Use Code

Sale Ends 4/20/24

Circle String Art

At a Glance:

#6332 Skill Level: Advanced Time:
  • Clock active
  • Clock active
  • Clock active
  • Clock active

This project features these great brands:

  • Bucilla Logo
supplies

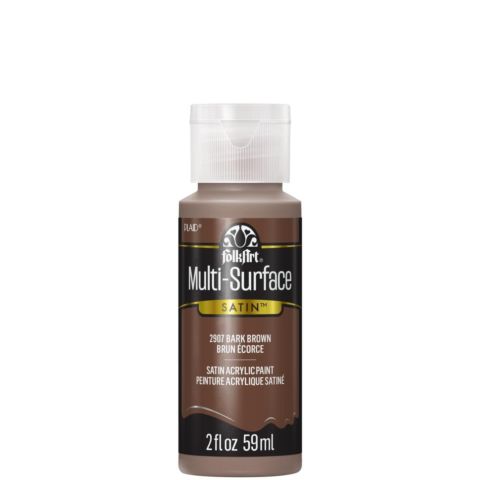
FolkArt ® Multi-Surface Satin Acrylic Paints - Bark Brown, 2 oz. - 2907

Number Needed: 1 $1.99
Item not for sale on Plaid Online.

Plaid ® Brush Sets - Foam Brush Set of 4 - 44246

Number Needed: 1 $0.99
Item not for sale on Plaid Online.

BUCILLA STRING CREATION - SQUARE BORDER GRID

Number Needed: 1 $5.99
Item not for sale on Plaid Online.
instructions

Other Supplies

One skein DMC Pearl Cotton #5 - #798 Blue, One skein DMC Pearl Cotton #5 - #208 Purple, DMC embroidery floss any color, 3” Wooden embroidery hoop, Large eye needle, Strong tape (masking or duct), 8” x 10” Piece of purple felt, Small piece of old rag, Clear drying glue or hot glue, Ruler, Plastic bowl for paint

Instructions

  1. Put a cup of water in the bowl. Squirt a small amount (around 1 tsp) of Bark Brown into the bowl and mix the paint with the water. Use the foam brush and the watered paint to stain the wood. Allow the mixture to sit on the wood surface for a minute or two. Wipe the surface with the rag. Allow the wood to dry.
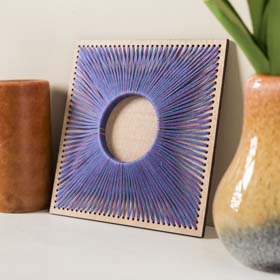
  2. Use the inside circle of the embroidery hoop only. Place it in the center of the square. Use the embroidery floss to tie the hoop to each corner making sure to keep the hoop in the center.
  3. Thread the needle with equal lengths of purple and blue Pearl Cotton thread. Starting at one corner come up through the hole from the back making sure to leave about 1" of a tail. Tape tail to the back.
  4. Take the needle over the top of the hoop into the center then under the hoop and back into the same hole you started. Make sure when you pull the threads tight they are untwisted and laying flat. Continue this same pattern until the thread in the needle is short. Tape on the back.
  5. Repeat the above threading until all the holes are full and the hoop is covered.
  6. Glue the felt to the back and trim away any excess.

Disclaimer: The information found in each project is presented in good faith, but no warranty is given, nor results guaranteed, nor is freedom from any patent to be inferred. Since we have no control over physical conditions surrounding the application of information herein contained, Plaid Enterprises, Inc. disclaims any liability for untoward results.

Important: Please be sure to thoroughly read the instructions for all products, paying particular attention to all cautions and warnings shown to ensure the proper and safe use of the product.

Copyright: All Rights Reserved. No part of this Project may be reproduced in any form without permission in writing, except for your personal use, except by reviewer, who may in reviewing this project, quote brief passages in a magazine or newspaper.

Hydrangeas in Turquoise Vase
New!
Hydrangeas in Turquoise Vase
Gingham Heart Plaque
New!
Gingham Heart Plaque
Watercolor Gelz Wedding Portrait
New!
Watercolor Gelz Wedding Portrait
Letter with Beaded Garland
New!
Letter with Beaded Garland