Email Signup

Subscribe to the Plaid Crafts Newsletter for craft project ideas, product news, our live events, and more!

25% Bucilla Spring Sale

Save 25% on orders of $60 or more and get free U.S. shipping! Shop new arrivals from Bucilla - Seasonal Felt Stockings & Ornaments! This promotion cannot be combined with other promos. See shipping details. for inspirational ideas. Get free U.S. ground shipping on orders $60+! This promotion cannot be combined with other promos. See shipping details.

Use Code

Sale Ends 4/20/24

DIY Wonder Woman Costume

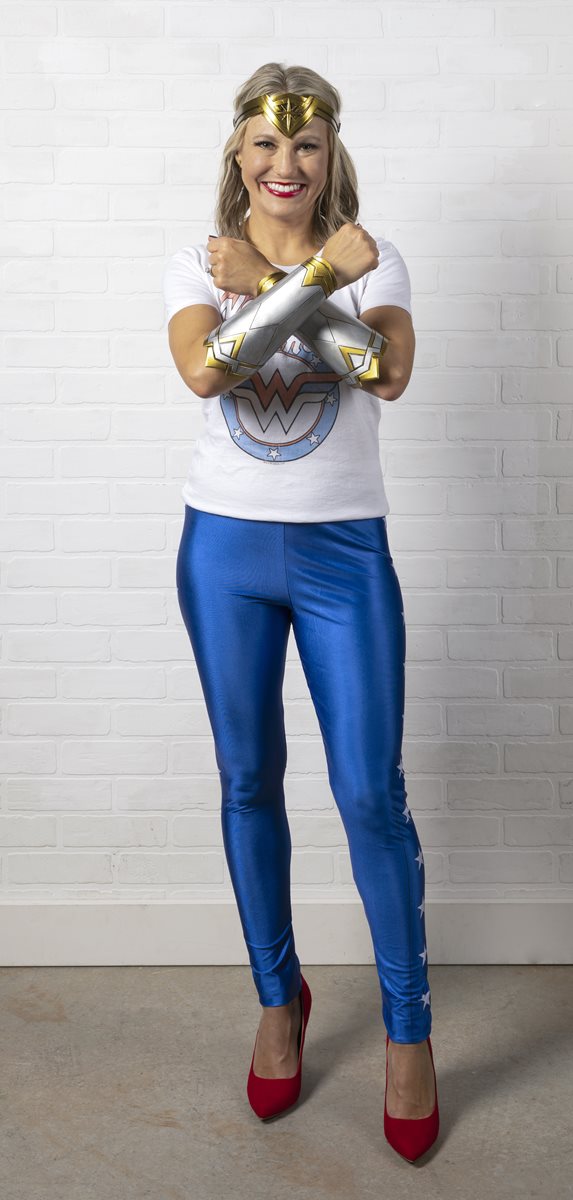
Need a quick costume? Then we've got you covered! Make your own Wonder Woman accessories just in time for this year's Halloween celebration using Mod Podge and FolkArt Treasure Gold.

This project features these great brands:

  • FolkArt Multi-Surface Paint Logo
  • Mod Podge Decoupage Finishes and Formulas Logo

At a Glance:

Project #16235 Skill Level: Intermediate
supplies

Plaid Supplies

FolkArt ® Treasure Gold™ - Gold, 4 oz. - 5535

Number Needed: 1 $15.99
Item not for sale on Plaid Online.

FolkArt ® Treasure Gold™ - Antique Silver, 4 oz. - 5554

Number Needed: 1 $15.99
Item not for sale on Plaid Online.

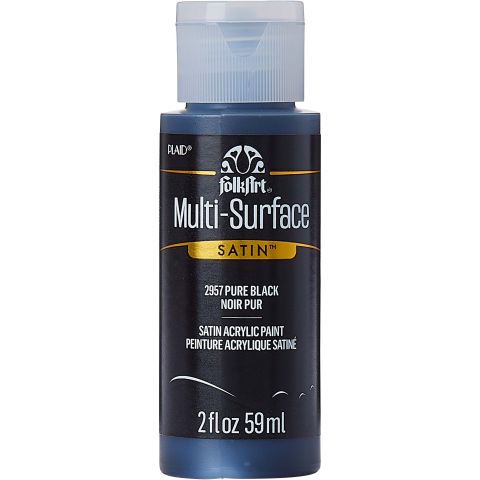
FolkArt ® Multi-Surface Satin Acrylic Paints - Pure Black, 2 oz. - 2957

Number Needed: 1 $1.99
Item not for sale on Plaid Online.

Mod Podge ® Gloss, 32 oz. - CS11203

Number Needed: 1 $21.99
Item not for sale on Plaid Online.

Folkart ® Brush Sets - Artist Variety Set, 10 pc. - 50536

Number Needed: 1 $8.99
Item not for sale on Plaid Online.

Other Supplies

  • 3D Priner
  • PLA fillament
  • Heat Gun
  • Wet Wash Cloth
  • Leather Strapping
  • Adhesive

instructions

  1. 3D Print Bracers flat using PLA fillament
  2. Take print off of 3D printer
  3. Use a Heat Gun to heat up 3D fillament to shape
  4. Cover arm with wet wash cloth and wrap warmed up Bracer over arm
  5. Allow to cool resting on arm
  6. Remove arm from Bracer
  7. Prime Bracer using Mod Podge Gloss
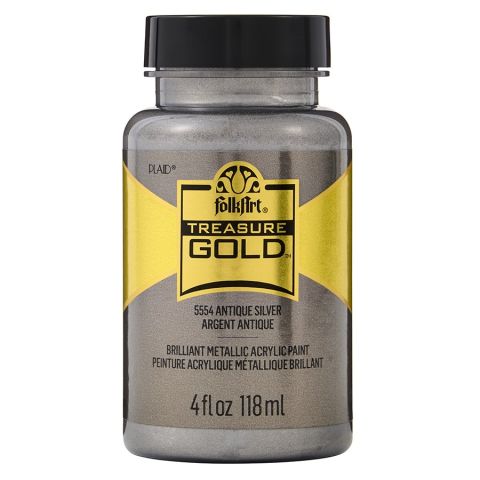
  8. Paint using Treasure Gold in Antique Silver
  9. Allow to dry and paint detailed areas using Treasure Gold in Gold
  10.  Seal using Mod Podge Gloss
  11. Attach Leather Strapping with Adhesive

resources

Related Videos

Mod Podge Tips and Tricks for No Wrinkles

Learn how to get perfect Mod Podge projects everytime!

Watch this Video

Learn how to get perfect Mod Podge projects everytime!

How Mod Podge is Made

Get a behind-the-scenes look at how Mod Podge is made, bottled and shipped to you!

Watch this Video

Get a behind-the-scenes look at how Mod Podge is made, bottled and shipped to you!

Applying Paper to Wood Using Mod Podge

Learn basic steps of applying paper to wood using Mod Podge.

Watch this Video

Learn basic steps of applying paper to wood using Mod Podge.

Related Resources

Free Lesson Plans featuring Mod Podge

Free Lesson Plans featuring Mod Podge

Use these free lesson plans to craft an unforgettable experience in the classroom with one of these

View PDF
Mod Podge Clear Image Transfer FAQs

Mod Podge Clear Image Transfer FAQs

Learn more about Mod Podge Clear Image Transfer Medium by reading the FAQ. 

View PDF
Mod Podge Ultra Frequently Asked Questions

Mod Podge Ultra Frequently Asked Questions

Learn more about Mod Podge Ultra by reading the frequently asked questions. 

View PDF

Related FAQs

Decorated candles using Mod Podge ® or Royal Coat ® Decoupage Finish are meant for decorative purposes and not for illumination. Many of the decorations would catch fire and be hazardous if the candle were burned. However, if you are using a wide pillar candle and the decorations do not go to the top of the candle, it can be burned down slightly to create a well, then a votive candle inserted into the well. A new votive candle can be inserted when the old one is finished. Use extreme caution and good judgment when burning candles that have been decorated.
First check to see if the napkin is 2 ply. If so, separate and lay aside. Brush Mod Podge directly on the your surface. Carefully place the printed napkin on the surface and lightly blot down with a dampened sponge. Start blotting in the center and work to the edge. Once it is in place, let dry. After about 30 minutes lightly apply a top coat of Mod Podge.
  1. Apply a coat of Mod Podge® to the inside of the form and allow to dry slightly. Place the Napkin design where desired and gently rub it flat with your thumb.
  2. Cover the image with a second very thin coat of Mod Podge®, beginning in the center and brushing out. Allow to dry thoroughly.
  3. Add special sponging or spouncing effects, as desired, around the design and let dry.
  4. Paint the whole inside with a light color of FolkArt® Acrylic Colors. If you want to use a darker color inside, first paint around the Napkin design with a light color, let dry and then add the darker color.
Gold Painted Pumpkin
New!
Gold Painted Pumpkin
Painted Pumpkin, Acorn, & Pinecone Decor
New!
Painted Pumpkin, Acorn, & Pinecone Decor
Mermaid Costume Headband
New!
Mermaid Costume Headband
Pumpkin Ice Bucket
New!
Pumpkin Ice Bucket

Disclaimer: The information found in each project is presented in good faith, but no warranty is given, nor results guaranteed, nor is freedom from any patent to be inferred. Since we have no control over physical conditions surrounding the application of information herein contained, Plaid Enterprises, Inc. disclaims any liability for untoward results.

Important: Please be sure to thoroughly read the instructions for all products, paying particular attention to all cautions and warnings shown to ensure the proper and safe use of the product.

Copyright: All Rights Reserved. No part of this Project may be reproduced in any form without permission in writing, except for your personal use, except by reviewer, who may in reviewing this project, quote brief passages in a magazine or newspaper.