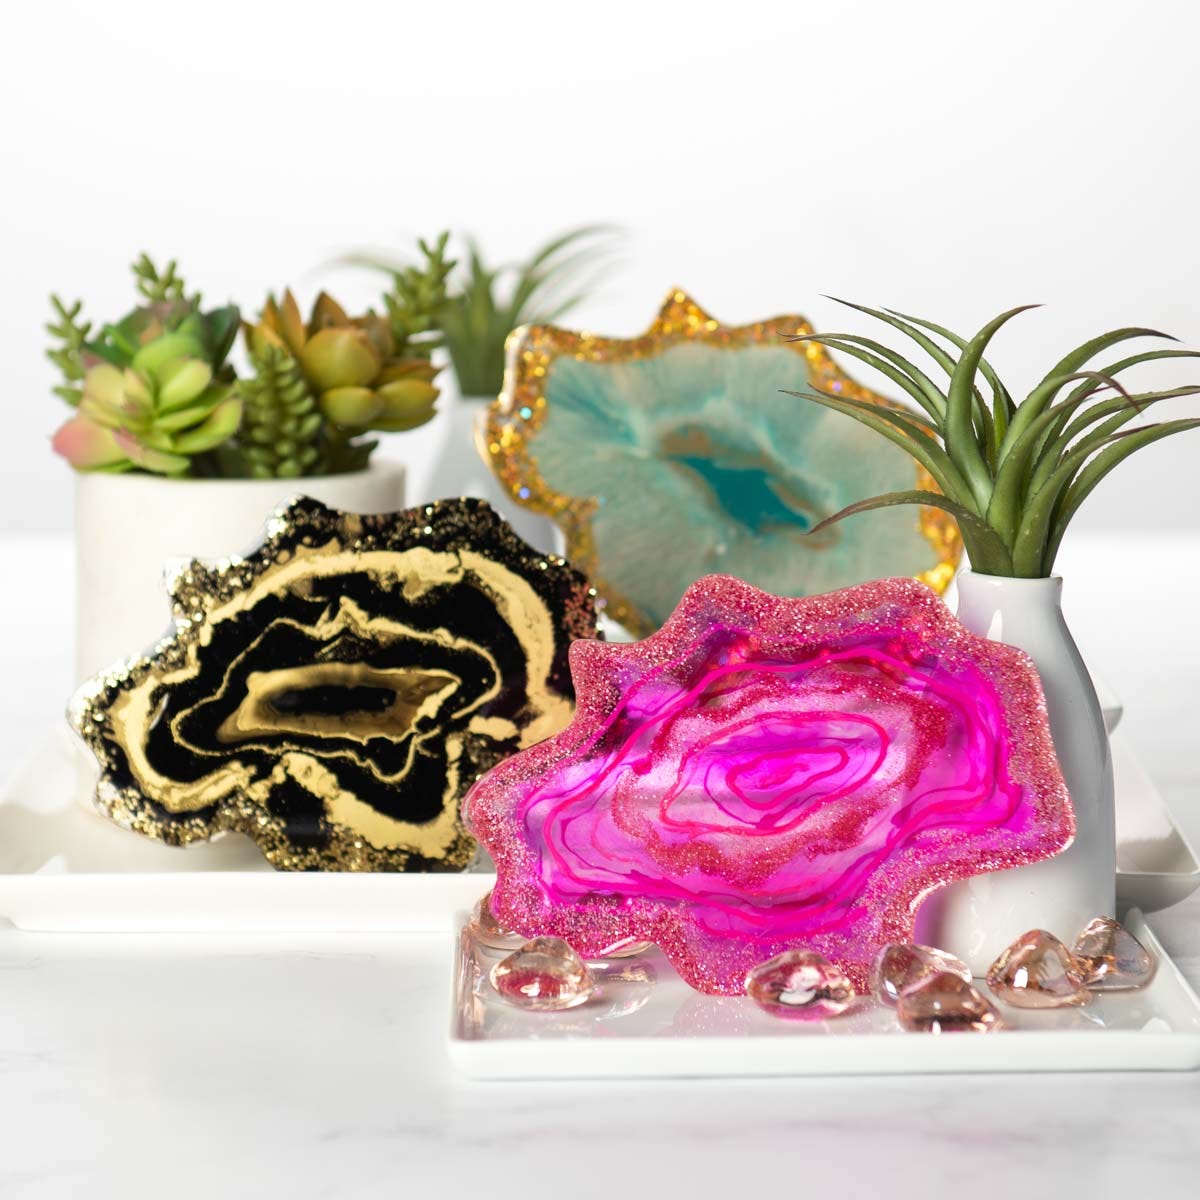
Decorate your dining table with the beauty of colorful geode resin coasters! Use Mod Podge 2-part Resin formula and Mod Podge Alcohol Inks to make your coasters have flowing vivid color. Add glitter for an extra touch of flair!
Instructions
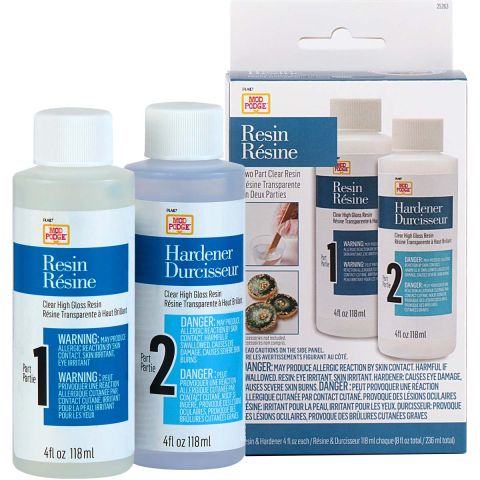
Aqua and Gold Geode Coasters- Mix Mod Podge Resin according to the instructions on plaidonline.com/ModPodgeResin.
- Split the resin into 2 cups. In one cup, mix in two drops of Aqua Mod Podge Alcohol Ink. In the second cup, mix in 2 drops of Gold Mod Podge Alcohol Ink.
- Pour the Aqua resin into the silicone mold in a circular motion, following the shape of the mold. Then, pour the Gold resin in the same way. Continue this, alternating colors, until the mild is filled.
- Using a craft stick, blend the resin together in a “zig zag” motion all around the perimeter of the mold.
- Add gold glitter where desired. See project photo for reference.
- Allow the Mod Podge Resin to cure fully according to the instructions on plaidonline.com/ModPodgeResin.
Black Geode Coaster
- Using painter’s tape, tape around the edge of the wood cookie so that the tape extends at least 1/2” above the surface of the wood- this will create a “wall” for the resin. Run your finger all around the sides of the wood slice to make sure the tape is as flush to the sides of the wood slice as possible.
- Mix the Mod Podge Resin according to the instructions on plaidonline.com/ModPodgeResin.
- Pour 1/4 of the resin into a separate cup. In that cup, mix in 1 tablespoon of gold glitter.
- In the the cup with the larger amount of resin, mix in 2 drops of black Mod Podge Alcohol Ink.
- Poor a thin layer of black resin inside of the tape on the wood slice(s). Start pouring around the edges and continue inward.
- Sprinkle some iridescent glitter in the center of the wood slice(s).
- Using the gold glitter resin, pour a ring of resin around the iridescent glitter in the center. Continue adding black resin, gold glitter resin and loose iridescent glitter to the wood slice (in a circle motion) until you achieve the desired look. See project photo for reference.
- Allow the resin to cure according to the instructions on plaidonline.com/ModPodgeResin.
- When the resin is cured, remove the tape from the wood slice. Using sand paper, remove any inconsistencies (where the tape may have folded, or of the resin overflowed in spots, etc.).
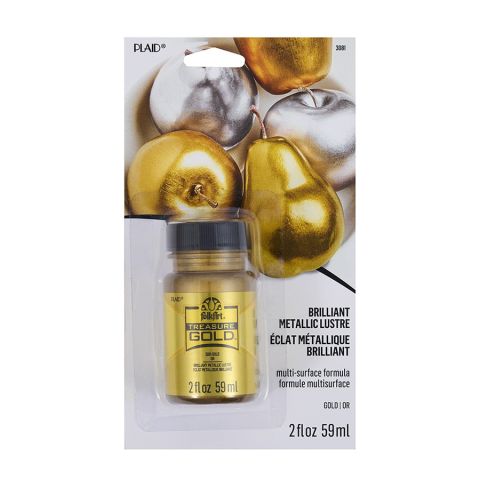
- Using a flat brush, paint Treasure Gold around the edges of the wood slice/resin. This will cause the 2 different materials to look like one and create a “geode” effect. Let dry.
- Mix the resin according to instructions on packaging. Pour a small thin layer of clear resin into the mold. Allow to set for 25 minutes.
- Mix pink ink into resin. Mix dark pink into resin.
- Mix pink glitter into resin.
- Pour the dark pink into the center.
- Pour pink around the dark pink.
- Alternate pouring the two different pink.
- Add pink glitter as shown in photo.
- Use the torch to remove any bubbles.
8.5.7
.jpeg)


