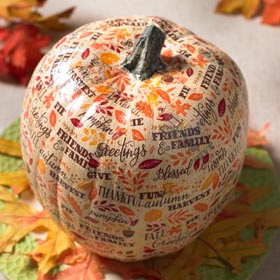
Forget carving a pumpkin...decoupage it! Use napkins with fun fall patterns and Mod Podge to decorate for the harvest season. Your autumn decor will have a unique hand-crafted touch with this easy pumpkin project.

Instructions
- Open the napkins and cut into fourths or cut a motif from the napkin. Separate the plys of the napkins so that you are left with just one decorative layer.
- Begin in the center of the pumpkin. Apply Mod Podge to the pumpkin. Work in small sections. Apply enough to have about a half-inch border around your napkin size. Apply an even coat. Not too thick or thin.
- Position the napkin onto the wet Mod Podge. Use the brush to gently press the napkins into the ridges of the pumpkin. Don’t top-coat at this point.
- Continue adding napkins until the entire pumpkin is covered. Depending on the napkin pattern you might want to overlap them a little bit or just place them right next to each other. For the area around the stem, trim smaller pieces of the napkin and attach in an over lapping pattern.
- Allow the napkins to dry for 1 hour. Then top-coat with Mod Podge Satin in an even up-and-down pattern.
- PROJECT TIP: Separate the napkins so you are only working the 1-ply printed section. Napkins tear easily so don’t over work the napkin.

