Email Signup

Subscribe to the Plaid Crafts Newsletter for craft project ideas, product news, our live events, and more!

25% Bucilla Spring Sale

Save 25% on orders of $60 or more and get free U.S. shipping! Shop new arrivals from Bucilla - Seasonal Felt Stockings & Ornaments! This promotion cannot be combined with other promos. See shipping details. for inspirational ideas. Get free U.S. ground shipping on orders $60+! This promotion cannot be combined with other promos. See shipping details.

Use Code

Sale Ends 4/20/24

Spider Web Canvas Shoes

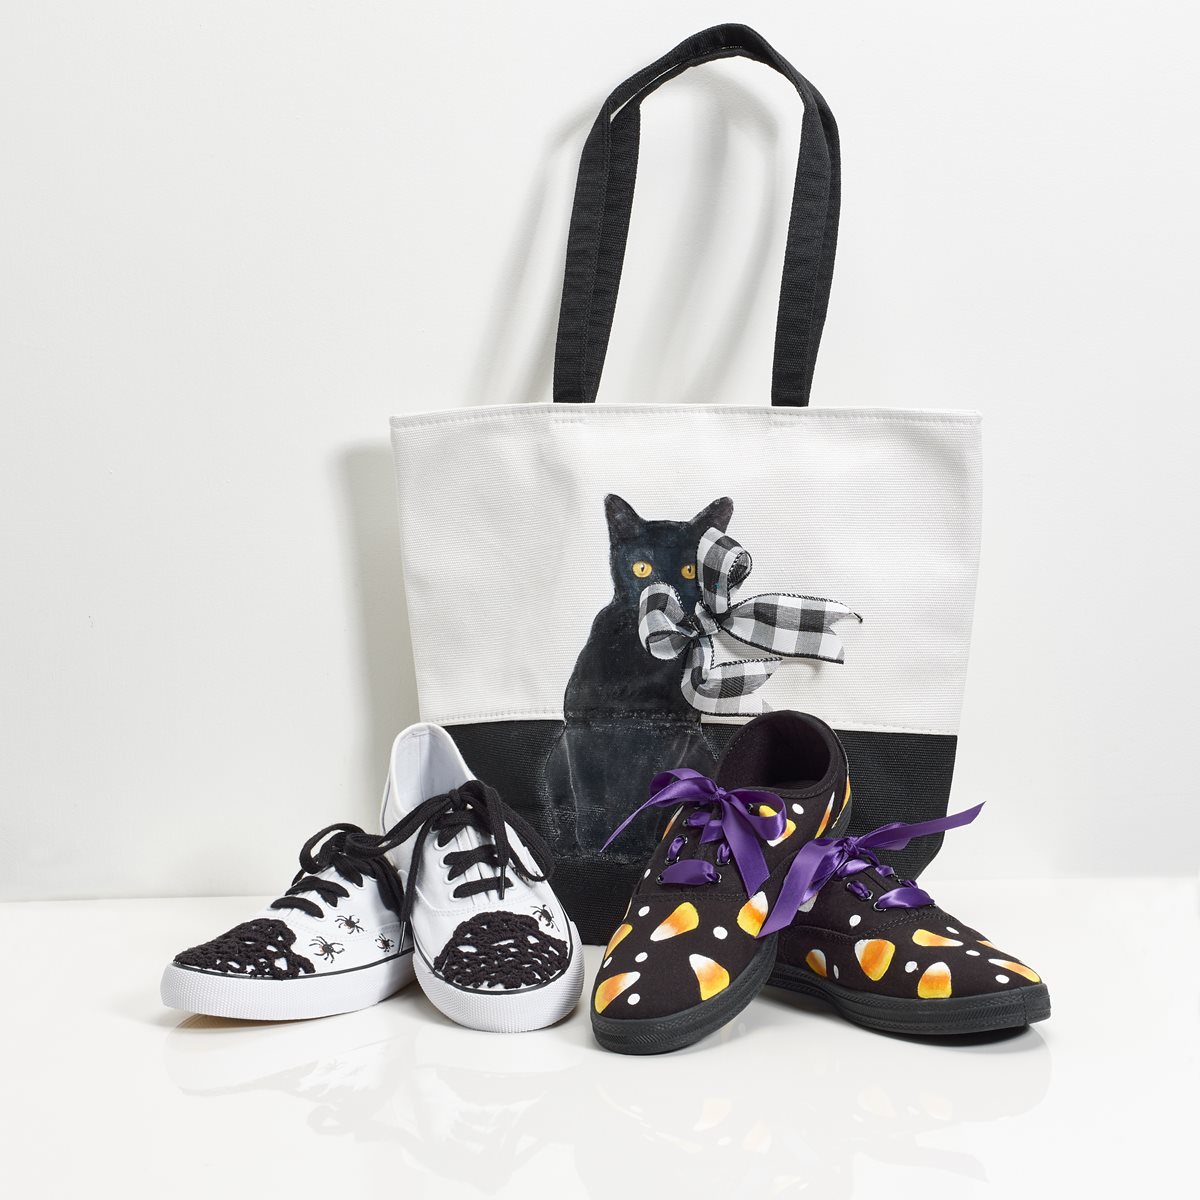
We paint on ALL types of surfaces, why not a pair of canvas shoes? These decoupaged and painted shoes are the perfect accessory for the Halloween season!

This project features these great brands:

  • FolkArt Multi-Surface Paint Logo
  • Mod Podge Decoupage Finishes and Formulas Logo

At a Glance:

Project #16232 Skill Level: Intermediate
supplies

Plaid Supplies

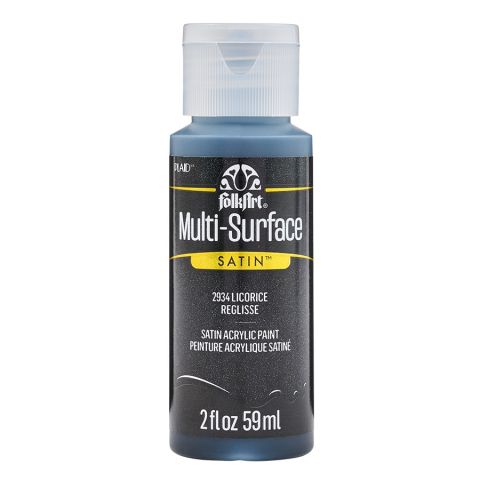
FolkArt ® Multi-Surface Satin Acrylic Paints - Licorice, 2 oz. - 2934

Number Needed: 1 $1.99
Item not for sale on Plaid Online.

FolkArt ® One Stroke™ Brushes - Script Liner, #2 - 1272

Number Needed: 1 $2.99
Item not for sale on Plaid Online.

Mod Podge ® Fabric, 8 oz. - CS11218

Number Needed: 1 $8.99
Item not for sale on Plaid Online.

Other Supplies

  • Canvas Shoes – white
  • Waxed paper palette
  • Paper towels
  • Brush Basin
  • Small black crocheted doily
  • Scissors
  • Black ribbon for shoe strings 


instructions

Preparation:

  1.  Using scissors, cut enough of the black crocheted doily to cover the toe of each canvas shoe.
  2. Apply a liberal amount of Mod Podge Fabric to the backside of each doily section using a medium size flat brush. While still wet, attach Mod Podge side of doily to the toe of each shoe.  Press in place smoothly keeping the cut doily edges covered in Mod Podge while adhering them to each shoe.  Allow to dry.
 
Painting Instructions:
Spiders
  1.  Using a Liner brush loaded with Licorice, paint each spider where desired on the white canvas shoe. Use a medium size circle for the body, a smaller sized circle for the head and then add eight legs! Allow to dry.
Finishing Instructions:
  1. Switch out the “regular” shoestrings and replace with a pair of black shoestrings. Enjoy!

resources

Related Videos

Mod Podge Tips and Tricks for No Wrinkles

Learn how to get perfect Mod Podge projects everytime!

Watch this Video

Learn how to get perfect Mod Podge projects everytime!

How Mod Podge is Made

Get a behind-the-scenes look at how Mod Podge is made, bottled and shipped to you!

Watch this Video

Get a behind-the-scenes look at how Mod Podge is made, bottled and shipped to you!

Applying Paper to Wood Using Mod Podge

Learn basic steps of applying paper to wood using Mod Podge.

Watch this Video

Learn basic steps of applying paper to wood using Mod Podge.

Related Resources

Free Lesson Plans featuring Mod Podge

Free Lesson Plans featuring Mod Podge

Use these free lesson plans to craft an unforgettable experience in the classroom with one of these

View PDF
Mod Podge Clear Image Transfer FAQs

Mod Podge Clear Image Transfer FAQs

Learn more about Mod Podge Clear Image Transfer Medium by reading the FAQ. 

View PDF
Mod Podge Ultra Frequently Asked Questions

Mod Podge Ultra Frequently Asked Questions

Learn more about Mod Podge Ultra by reading the frequently asked questions. 

View PDF

Related FAQs

Decorated candles using Mod Podge ® or Royal Coat ® Decoupage Finish are meant for decorative purposes and not for illumination. Many of the decorations would catch fire and be hazardous if the candle were burned. However, if you are using a wide pillar candle and the decorations do not go to the top of the candle, it can be burned down slightly to create a well, then a votive candle inserted into the well. A new votive candle can be inserted when the old one is finished. Use extreme caution and good judgment when burning candles that have been decorated.
First check to see if the napkin is 2 ply. If so, separate and lay aside. Brush Mod Podge directly on the your surface. Carefully place the printed napkin on the surface and lightly blot down with a dampened sponge. Start blotting in the center and work to the edge. Once it is in place, let dry. After about 30 minutes lightly apply a top coat of Mod Podge.
  1. Apply a coat of Mod Podge® to the inside of the form and allow to dry slightly. Place the Napkin design where desired and gently rub it flat with your thumb.
  2. Cover the image with a second very thin coat of Mod Podge®, beginning in the center and brushing out. Allow to dry thoroughly.
  3. Add special sponging or spouncing effects, as desired, around the design and let dry.
  4. Paint the whole inside with a light color of FolkArt® Acrylic Colors. If you want to use a darker color inside, first paint around the Napkin design with a light color, let dry and then add the darker color.
Summerscape Beach Home Decor
New!
Summerscape Beach Home Decor
"This Is Us" Whitewashed Frame
New!
"This Is Us" Whitewashed Frame
Doggie Treat Jar
New!
Doggie Treat Jar
Murano Swirl Wine Glasses Gold Monogram
New!
Murano Swirl Wine Glasses Gold Monogram

Disclaimer: The information found in each project is presented in good faith, but no warranty is given, nor results guaranteed, nor is freedom from any patent to be inferred. Since we have no control over physical conditions surrounding the application of information herein contained, Plaid Enterprises, Inc. disclaims any liability for untoward results.

Important: Please be sure to thoroughly read the instructions for all products, paying particular attention to all cautions and warnings shown to ensure the proper and safe use of the product.

Copyright: All Rights Reserved. No part of this Project may be reproduced in any form without permission in writing, except for your personal use, except by reviewer, who may in reviewing this project, quote brief passages in a magazine or newspaper.