Take your no-carve pumpkin creations to the next level by crafting a pumpkin from your favorite characters. We are so excited for Halloween and our resident cosplayer Emily Schmidt of Go Big or Go Home Cosplay has compiled nerdy pumpkin designs to get you in the spooky mood this Halloween season.
Today we have gathered 5 no-carve, nerdy pumpkin ideas that we are sure to have you running to the store to get your supplies. Keep reading to learn how to make each of the below pumpkins.
What characters would you create? Share your fandom pumpkins with us using #PlaidFX, you could be featured on our PlaidFX social media channels. And speaking of sharing your creations, did you know you could win something for your uniquely painted pumpkins? Check out the details of our Plaid Pumpkin Party Challenge below!
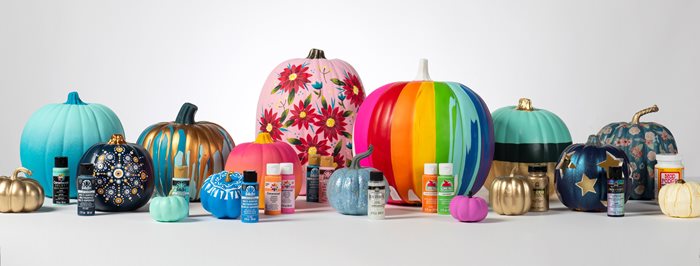 Fall is upon us and we are ready to celebrate! Join us for the #PlaidPumpkinParty and win free Plaid products! We are giving away 55 prizes this year, including five Plaid Crafts prize packs valued at over $50. From painted pumpkins to paintings OF pumpkins, and everything in between – we want to see your creativity shine! The only rule is that you use Plaid products or tools to create your pumpkin art: think Apple Barrel & FolkArt paints, Mod Podge, and our wood burning or photo transfer tools.
ð Make sure you are following @PlaidCrafts on Instagram
ð Tag us & use #PlaidPumpkinParty on each entry.
ð Tell us in the caption what Plaid Crafts tools & formulas you used on your creation.
ð» The first 50 individuals with qualified entries will get “Booed by Plaid” & receive a mini prize. You can enter as many times as you like, but you can only get “Booed by Plaid” once. ð Challenge ends at 11:59pm ET on October 12, 2021. The winners will be announced on Friday, October 15th, via a post here on Instagram. Challenge open to residents of the US only. Profiles must be set to public for entries to be visible.
Click on the tag in the lower left hand corner of each photo for supplies, instructions, patterns, and more!
1. Using a textured fabric is perfect for this project because you can apply dry brushing techniques to bring out all the details.
2. You can make a custom pattern for this project by using kitchen cling wrap and masking tape.
3. Make sure to label all your patterns so you do not mismatch where they go on your pumpkin.
4. When adhering the fabric patterns onto your pumpkin, try not to overlap any seams, feel free to cut away any excess.
5. Use a rotary tool to carve out details on foam bevels is a great way to cover your seams and add another raised detail to the design.
6. To create the horns, you can do this in a number of ways. A 2 in thick EVA Foam mat was used in this example. The thickness of the foam was then carved down and textured.
7. You could also use pink insulation foam for this and coat with Mod Podge, however, this material will not be as durable.
8. Have fun with various dry brushing layers and washes to really bring out all the texture of this project.
9. Take your time and work in small sections, so the paint does not dry too quickly.
10. Finally, attach all the pieces together and you are ready to have a fun Halloween decoration!
TikTok video coming soon...Follow us so you can see how to make this stylish pumpkin.
1. For this project you can create custom newspaper clippings by using Mod Podge Paper and FolkArt Stencils.
2. It is recommended to tape down your parchment or scrapbooking paper to prevent wrinkling.
3. A foam brush is a great way to apply a basecoat evenly on the paper details.
4. Gradually build up pigmentation on the stencils by offloading paint onto a paper towel and applying small amounts of paint in a pouncing motion with a stencil brush.
5. This technique will help prevent paint bleeding from under the stencil.
6. Allow the paint to dry and seal using Mod Podge Paper.
7. After about 20 minutes the Mod Podge will no longer be tacky and you can crumple up the paper.
8. Any loose edges can be secured with hot glue.
9. After basecoating your pumpkin, use a pallet knife to add fun textured details around the bottom.
10. We recommend using hot glue to secure the newspaper onto the pumpkin’s base.
11. Once you have all your pieces together, assemble them onto the pumpkin and embellish using FolkArt Glitterific and decorative ribbon.
12. For fun you can also paint three small faux pumpkins to represent dalmatians
Download pattern HERE.
Download pattern HERE.
Jack Skellington
Download pattern HERE.
How are you going to decorate your pumpkins this year? Show us what you have created using #PlaidFX!
Happy Crafting!
Today we have gathered 5 no-carve, nerdy pumpkin ideas that we are sure to have you running to the store to get your supplies. Keep reading to learn how to make each of the below pumpkins.
What characters would you create? Share your fandom pumpkins with us using #PlaidFX, you could be featured on our PlaidFX social media channels. And speaking of sharing your creations, did you know you could win something for your uniquely painted pumpkins? Check out the details of our Plaid Pumpkin Party Challenge below!
ð Make sure you are following @PlaidCrafts on Instagram
ð Tag us & use #PlaidPumpkinParty on each entry.
ð Tell us in the caption what Plaid Crafts tools & formulas you used on your creation.
ð» The first 50 individuals with qualified entries will get “Booed by Plaid” & receive a mini prize. You can enter as many times as you like, but you can only get “Booed by Plaid” once. ð Challenge ends at 11:59pm ET on October 12, 2021. The winners will be announced on Friday, October 15th, via a post here on Instagram. Challenge open to residents of the US only. Profiles must be set to public for entries to be visible.
Click on the tag in the lower left hand corner of each photo for supplies, instructions, patterns, and more!
Loki Pumpkin

@plaidfx ##Alligatorloki ##pumpkin ##halloween ##loki ##marvel ##tva ##variant ##pumpkins ##diy ##craftproject ##fanart ##treasuregold ##acrylicpaint ##gold
⬠original sound - PlaidFX
1. Using a textured fabric is perfect for this project because you can apply dry brushing techniques to bring out all the details.
2. You can make a custom pattern for this project by using kitchen cling wrap and masking tape.
3. Make sure to label all your patterns so you do not mismatch where they go on your pumpkin.
4. When adhering the fabric patterns onto your pumpkin, try not to overlap any seams, feel free to cut away any excess.
5. Use a rotary tool to carve out details on foam bevels is a great way to cover your seams and add another raised detail to the design.
6. To create the horns, you can do this in a number of ways. A 2 in thick EVA Foam mat was used in this example. The thickness of the foam was then carved down and textured.
7. You could also use pink insulation foam for this and coat with Mod Podge, however, this material will not be as durable.
8. Have fun with various dry brushing layers and washes to really bring out all the texture of this project.
9. Take your time and work in small sections, so the paint does not dry too quickly.
10. Finally, attach all the pieces together and you are ready to have a fun Halloween decoration!
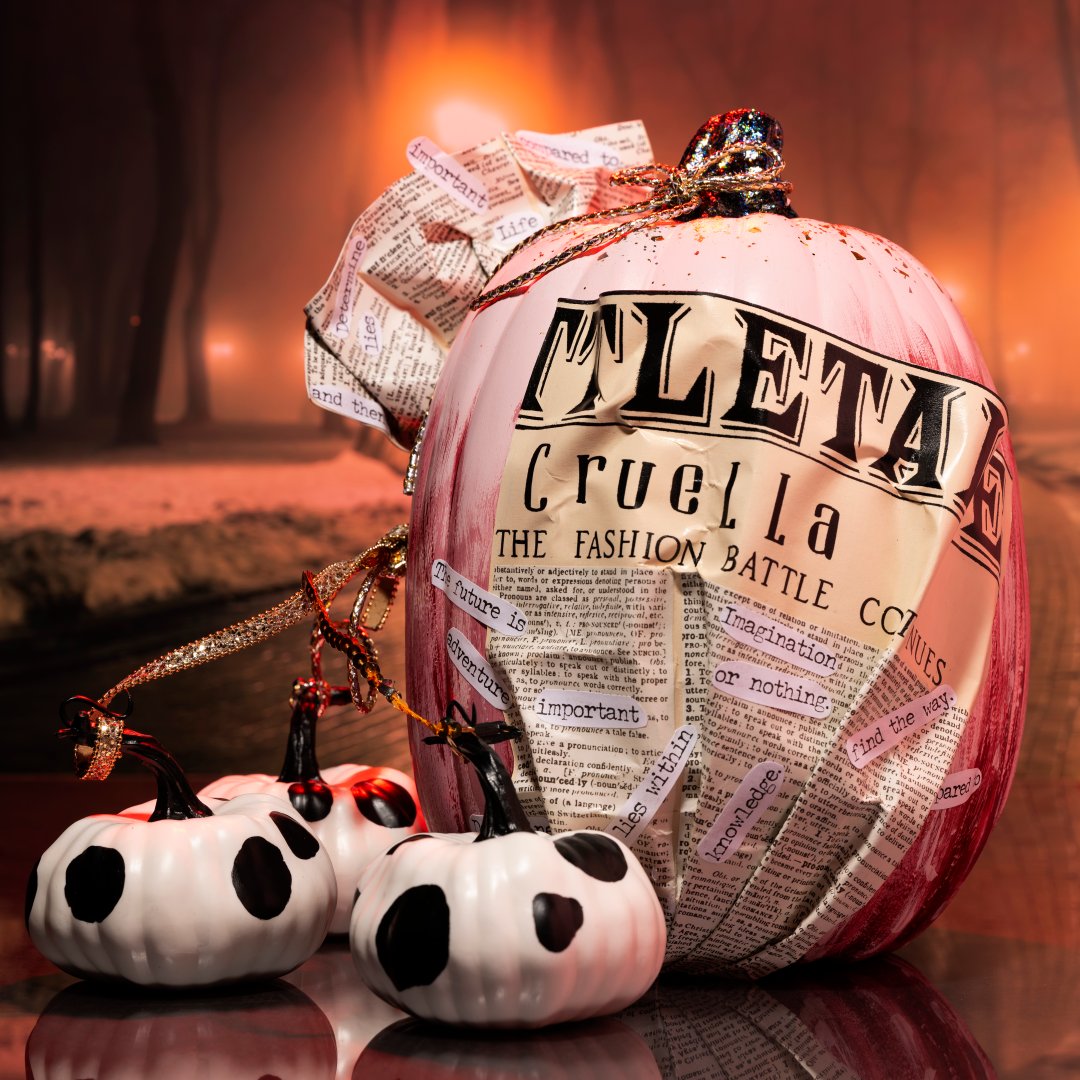
Cruella Pumpkin
TikTok video coming soon...Follow us so you can see how to make this stylish pumpkin.
1. For this project you can create custom newspaper clippings by using Mod Podge Paper and FolkArt Stencils.
2. It is recommended to tape down your parchment or scrapbooking paper to prevent wrinkling.
3. A foam brush is a great way to apply a basecoat evenly on the paper details.
4. Gradually build up pigmentation on the stencils by offloading paint onto a paper towel and applying small amounts of paint in a pouncing motion with a stencil brush.
5. This technique will help prevent paint bleeding from under the stencil.
6. Allow the paint to dry and seal using Mod Podge Paper.
7. After about 20 minutes the Mod Podge will no longer be tacky and you can crumple up the paper.
8. Any loose edges can be secured with hot glue.
9. After basecoating your pumpkin, use a pallet knife to add fun textured details around the bottom.
10. We recommend using hot glue to secure the newspaper onto the pumpkin’s base.
11. Once you have all your pieces together, assemble them onto the pumpkin and embellish using FolkArt Glitterific and decorative ribbon.
12. For fun you can also paint three small faux pumpkins to represent dalmatians
Pikachu and a Poke Ball Pumpkin

@plaidfx Create your own ##Pikachu ##Pokemon ##pumpkin this ##Halloween using ##PlaidFX @plaidcrafts
⬠Pokémon Theme - NateWantsToBattle
Download pattern HERE.
- Paint pumpkin white or start with white pumpkin.
- Paint pumpkin yellow.
- Trace out pattern onto 4mm EVA Foam and cut out.
- Basecoat EVA Foam with Blizzard.
- Paint detail pieces with Smooth Satin paint.
- Paint brown stripes and stem on pumpkin.
- Glue on face details, ears, and tail.
- Paint top section of small pumpkin in Pyro.
- Add Poke Ball details in Carbon.
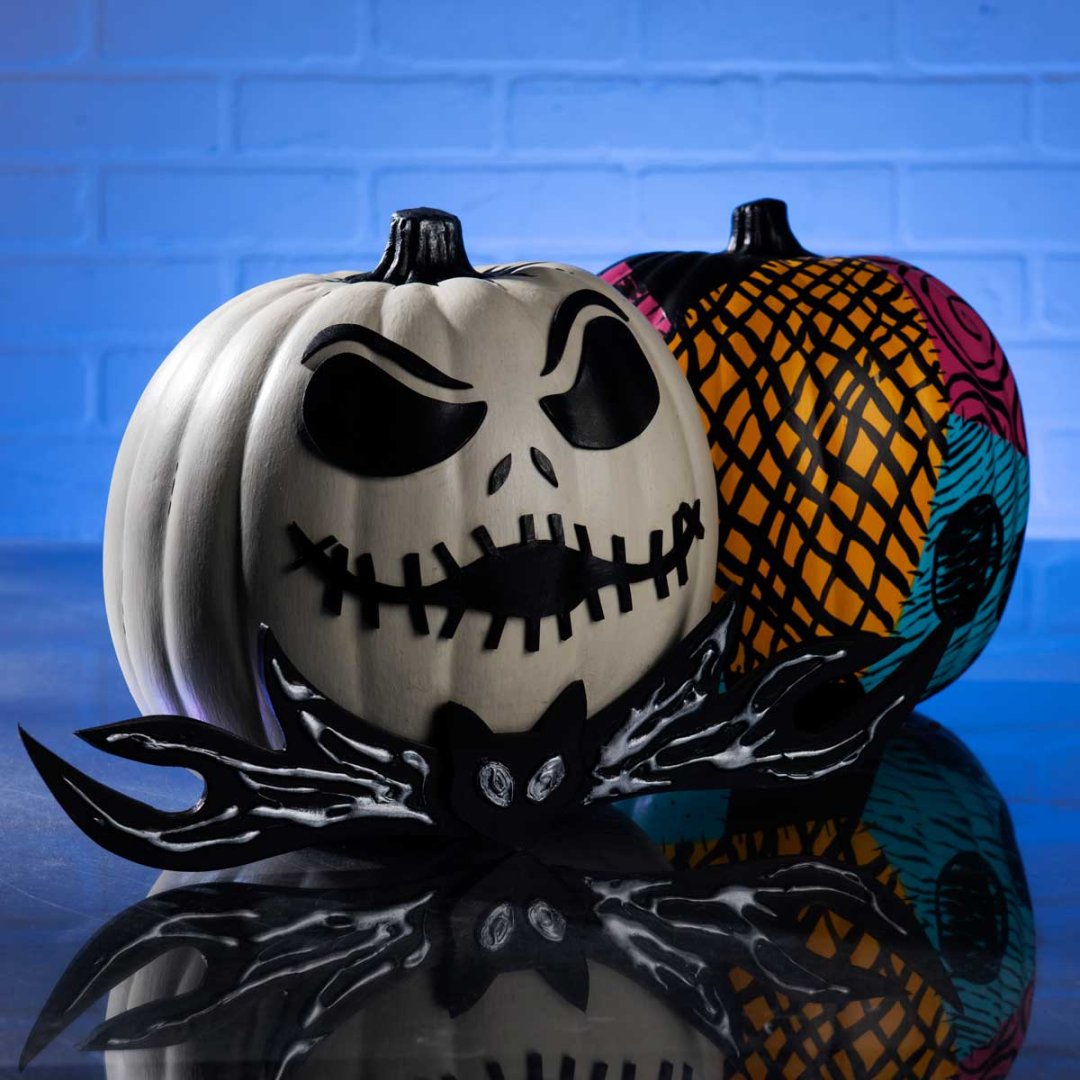
Jack Skellington & Sally Pumpkins
@plaidfx Jack Skellington Pumpkin using PlaidFX ##halloween ##pumpkin ##thenightmarebeforechristmas ##jackskellington ##spooky ##skellington @plaidcrafts
⬠This Is Halloween - TryHardNinja
@plaidfx Sally Skellington Pumpkin using PlaidFX ##halloween ##pumpkin ##sally ##thenightmarebeforechristmas ##painting ##diy ##fyp @plaidcrafts
⬠Nightmare Before Christmas - Main Theme - Luca Facchini DJ
Download pattern HERE.
Jack Skellington
- Paint pumpkin white or start with white pumpkin.
- Paint pumpkin with Nitro Glow (10 layers).
- Trace out face pattern and transfer to 4mm EVA Foam.
- Glue face onto pumpkin.
- Trace out bow tie pattern and transfer to 4mm EVA Foam.
- Add hot glue details.
- Paint bow tie black.
- Add highlights with Armour Metallic in New Liberty.
- Paint stem of pumpkin black.
- Add highlights lightly with Armour Metallic in New Liberty with 7/8” Textured Brush.
- Paint pumpkin white or start with white pumpkin.
- Paint first patch sections in Enchanted.
- Paint second patch sections in Aquarius.
- Paint third patch sections in Fool’s Gold.
- Paint fourth patch sections in Carbon.
- Add line, swirl, and dot details to various patches with Carbon.
- Finish off with stitch marks around patches using Carbon.
Harry Potter Pumpkin
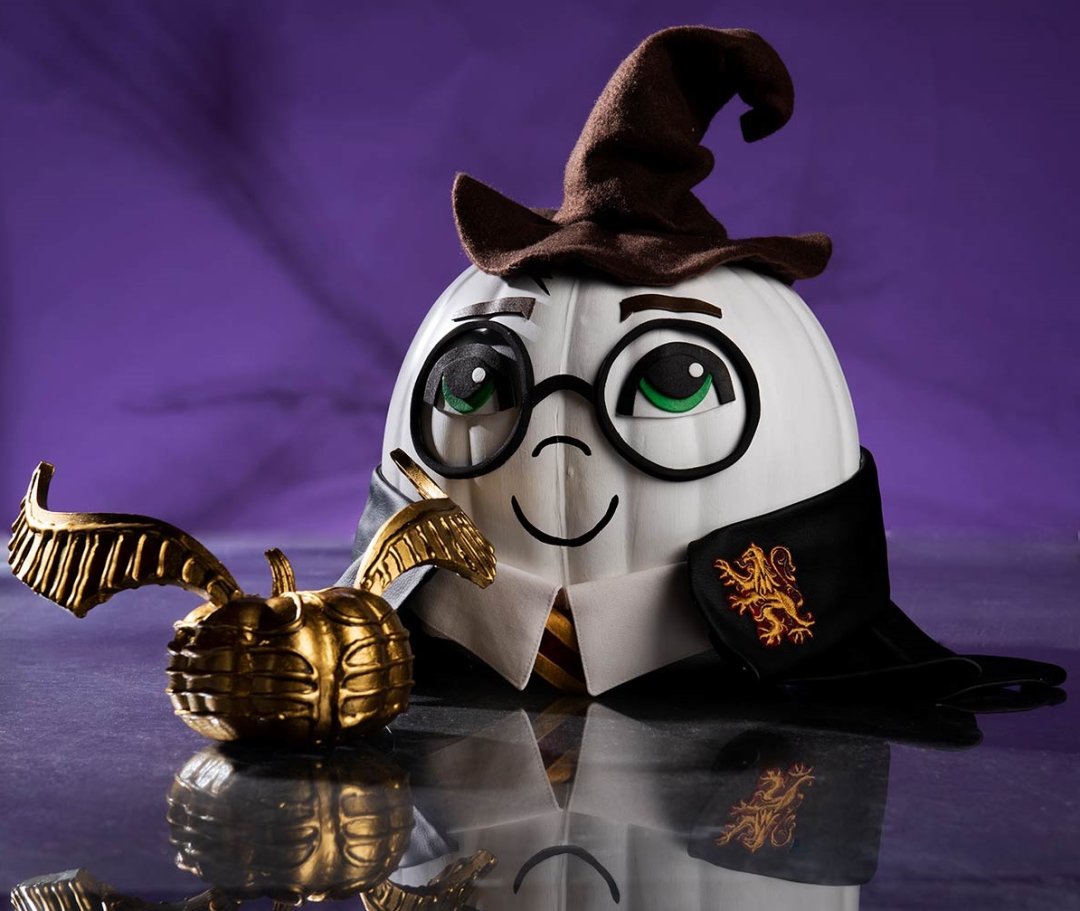
@plaidfx Watch ##HarryPotter and his ##GoldenSnitch come to life using ##PlaidFX. ##Pumpkin ##Halloween ##Magic ##Painting ##diy ##fyp @plaidcrafts
⬠Harry Potter - The Intermezzo Orchestra
Download pattern HERE.
- Paint pumpkin white or start with white pumpkin.
- Trace and transfer face details to Craft Foam.
- Glue/paint face details onto pumpkin.
- Add glasses made out of Craft Foam with Hot Glue
- Add lightning bolt with Smooth Satin in Carbon.
- Cut out hat pattern with scissors and glue seams together with hot glue (Tip: stuff hat with cotton balls to keep shape).
- Make clothing out of fabric, old shirt, and lion patch.
- Glue clothing onto pumpkin with hot glue/super glue.
- Draw snitch detail lines onto small pumpkin and trace with hot glue.
- Paint using Armour Metallic in Gold Coin.
- Trace out Wings onto 4mm EVA Foam and shape with Heat Gun.
- Repeat hot glue/painting steps.
- Attach wings to snitch with hot glue/super glue.
How are you going to decorate your pumpkins this year? Show us what you have created using #PlaidFX!
Happy Crafting!
