Today, we'll be taking a closer look at exactly how Rachel and Annette used Waverly Inspirations coordinating paints, stencils, and fabrics to bring their vision to life!
With nature as the source of inspiration for the party, a green color scheme was a no-brainer. They chose their favorite shades of green from the
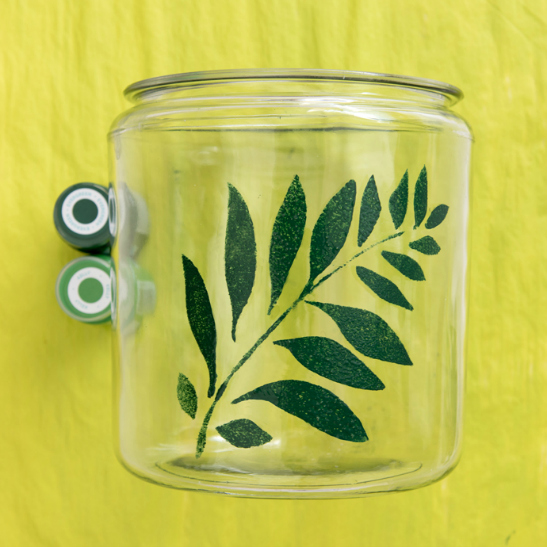
Waverly Inspirations Super-Premium Semi-Gloss Acrylic Paint collection, plus a leafy fern stencil from the
Waverly Inspirations Stencils line. Waverly Inspirations Super Premium Semi-Gloss paints are so versatile that Rachel applied them onto many different surfaces to prepare the table scape, including paper, glass, and wicker. There's no need to switch back and forth between different paints for different surfaces - these Super Premium paints can do it all!

You'll notice that Rachel used this lovely fern stencil for several projects within the party. Whether you're using a stencil on wood, glass, or paper, it's fairly simple but there are a few important tricks to keep in mind to achieve the best possible results. No matter what blank slate you're stenciling onto, it's always a good idea to start with not only a clean surface, but also a clean stencil. If you're using the same stencil repeatedly, the paint will collect quickly like in the image above. This isn't a concern as much as paint leaking under to the bottom of the stencil.
Before reusing a stencil, check the underside to make sure there aren't any wet drops of paint - these will rub off onto your new clean surface and your results will be blotchy. To avoid this, simply use a damp rag to wipe away any wet paint before starting to stencil. Once you're finished with your stencil for the day, it's good practice to rinse the excess paint off with warm soapy water and a sponge/rag to gently scrub any stuck-on paint. This will give your stencil a longer life and ensure the best results on future projects.
We like to use a couple pieces of tape to secure the stencil onto the project. The less the stencil moves, the better! We also recommend using a stencil brush - these brushes utilize high quality bristles designed for stenciling, and will ensure the best results. When beginning to apply paint, dip your
stencil brush into the paint and on a scrap piece of paper, use a vertical dabbing motion to remove any excess paint drops or blobs.
Then, use the same up-down dabbing motion to apply paint onto your project until the full pattern has been transferred. Carefully remove the stencil and let your project dry! We just love the finished look of this sangria jar!
Annette and Rachel also used coordinating Waverly Inspirations fabrics to add even more color to the table. Available exclusively at Walmart, Waverly Inspirations cottons can be used in countless creative ways. Annette used the fabrics for both placemats and napkins - the contrasting patterns and colors sure make for a bright and playful table! To bring some of this playfulness to their freshly painted front door, Rachel and her Handmade Charlotte team make a simple fabric wreath to welcome guests to the party. Did you see the lovely table scape that Rachel and Annette set up for the party? They used the same green patterned Waverly Inspirations cotton fabric to compliment the evergreen door - doesn't it look sharp?
To make the wreath follow these instructions:
1. Cut teardrop shaped leaves out of assorted patterned cotton fabric. We used three: dots, stripes, and solid green. The leaves should be about 3” to 5” long.
2. Cut pieces of floral wire slightly longer than each leaf.
3. On the back of each leaf, apply a line of hot glue vertically down the center. Place the piece of wire into the line of glue so that any excess wire is on the stem-end of the leaf. Let dry.
4. Using a wire wreath form as a base, attach the fabric leaves in place by twisting the wire stem onto the wreath form, and hot gluing in place if desired. Work your way around the wreath alternating colors as you go. Make sure the leaves overlap each other a little bit so that any wire stems are hidden from view.
Don't forget to take a look at
Handmade Charlotte and
Annette Joseph's blog for additional ways to use Waverly Inspirations for crafting your own colorful, stylish, and affordable party! We bet you'll be inspired to craft a party all your own!