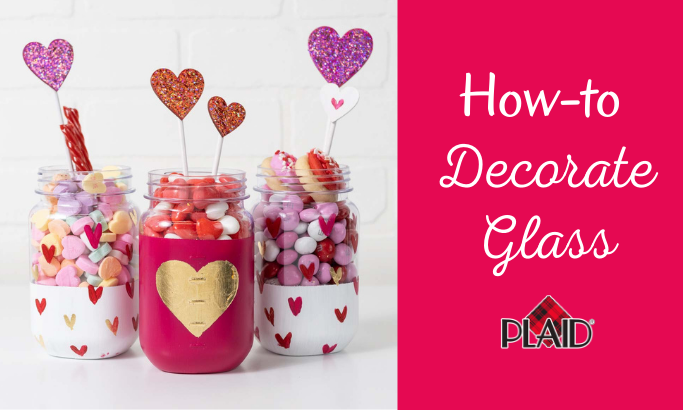
Decorating Glass
Valentine's Day is right around the corner. You don't want to be stuck at the last minute scrambling to get something for your loved one, so start now! Rather than buying something, make something for your sweetheart. While you may be thinking that you aren't very crafty, today we are here to tell you, you can create something that your loved one will love.Today, we want to focus on a specific technique that can make your Valentines's crafting unique and fun. Glass painting is something that some may think is difficult, but here at Plaid we make it easy. Whether you are painting a wine glass or decoupaging a vase full of flowers for your sweetie, we will teach you how to decorate glass with tips and tricks we have learned and tested over the years.
With these glass decorating tips you will be able to create a handmade glass piece of art that is functional and elegant. Celebrate the day of love with something you made that comes from the heart.
Where to Begin?
Surface prepBefore you begin you must prepare your glass. Thoroughly wash your piece in warm, soapy water to remove dirt, dust, and grease film, then rinse in warm water and allow to dry. You can also use rubbing alcohol or white vinegar and wipe stemware to remove any dirt or dust.
Useful Products
When painting or decorating glass it is important to always keep a few products on hand, especially if they are going to be getting wet.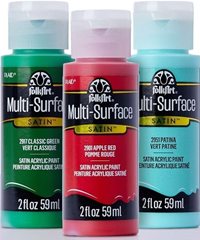
Techniques
Painting Glass

Things to remember when glass painting:
- When using a pattern, place your pattern inside the glass piece, tape in place, and trace.
- Make sure to use an enamel or multi-surface paint to ensure durability
- Paint can be applied using a flat brush, dauber, or spouncer.
- There are a variety of ways to paint on glass such as stencils, tapping off, patterns, and so much more
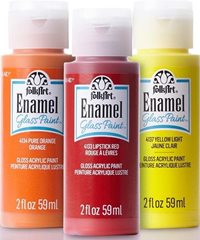
- FolkArt Enamel paints are specially formulated for painting on glass and glazed ceramics and offer performance ideal for strokework and stenciling projects. They are:
- Once bake-cured, top-shelf dishwasher-safe
- Durable, scratch-resistant gloss finish
- Air-dry or bake to cure
- Highly pigmented for opaque coverage
- Water-based enamel, non-toxic
- Made in the USA
- FolkArt Multi-Surface has all the same great benefits as classic FolkArt Acrylic paint with the added value of complete coverage for almost every surface. Its smooth, creamy consistency makes it easy to create endless projects with just one paint. These colors are:
- Dishwasher safe
- Indoor/outdoor
- Water-based, non-toxic
- Made in the USA
- A rule of thumb is any decorated glassware can be washed; however, as with all hand-crafted items, it is best to follow the "handmade, hand-wash" rule.
- When painting on glassware and you want opaque paint coverage, allow the first application of paint to thoroughly dry before applying a second application of paint.
- To reduce streaky brush marks on glassware, select a soft bristled brush, apply less pressure when painting and paint in long, smooth brush strokes rather than short, choppy ones.
Glassware should be thoroughly dry before handling, at least 24 hours.
Curing Options:
Air Dry Method: Air dry the project for 21 days before using.
Bake Method: Place your painted glassware in a cool oven. Set the oven temperature to 350ºF and bake for 30 minutes. Note: Glass must heat gradually with the oven to avoid breakage; DO NOT preheat. Turn the oven off after 30 minutes; let the glass cool completely in the oven. Painted glass should both heat up and cool down in the oven. Set aside for 72 hours.
Care Instructions
- Once your painted stemware has been cured, it can be hand washed in mild soap and water or dishwasher cleaned on top shelf.
- Food and beverages should not come in contact with the paint. Reverse painting on the back of glass plates is recommended if plate is to be used with food.
- Painted glassware is not microwaveable.
- Do not soak painted items in water.
For more glass painting inspiration, check out this painted glass floral decor!
Mod Podge on Glass


Things to remember when using Mod Podge on glass:
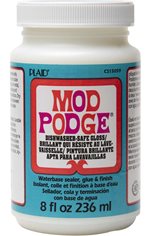
- Mod Podge Dishwasher Safe is top-rack, dishwasher safe and is a multi-purpose, all-in-one glue, sealer, and finish. Use this unique decoupage glue to create personalized coffee mugs, wine glasses, tumblers, and more. Mod Podge Dishwasher Safe dries to a hard, glossy finish and cures in 28 days. Clean glass, ceramics, and metal surfaces with rubbing alcohol.
- Please note that Mod Podge Matte, Gloss, and other formulas should not be submerged in water or exposed to water. If you plan to use any other formula of Mod Podge other than Dishwasher Safe with glass pieces that get wet you will need to use caution.
- No matter what Mod Podge formula you are using there are some basic steps to decoupaging:
- A - Gather all necessary supplies like scrapbook paper, napkins, etc.
- B - Begin by preparing the scrapbook paper to fit the project surface. Either measure with a ruler and mark the shape using a pencil on the desired scrapbook paper, or press along the edges of the surface creating a crease in the paper.
- C - Carefully trim the patterned paper to the desired shape. If using paper appliques, carefully trim around the applique design.
- D - Apply an even coat of Mod Podge formula of choice onto both the backside of the pre-cut paper as well as the front side of the project surface using a Mod Podge gold Taklon bristle brush. TIP: Mod Podge Foam Applicator can also be used, however, fewer brush marks will be created when using light pressure and a Taklon bristle brush.
- E - Carefully, flip the decoupage paper over and position it onto the project surface matching the edges. TIP: It is best to position “glue to glue” when decoupaging as this will ensure the stability of the paper to the surface. It may also provide a moment or two to move the paper into the correct space before it takes hold.
- F - Smooth paper in place using clean hands, a Mod Podge Squeegee or a Mod Podge Brayer. Allow to dry 15–20 minutes. TIP: When smoothing the paper on the project surface, smooth from the center outwards. If excess Mod Podge is squeezed out, quickly wipe to remove the excess using a damp paper towel. TIP: Many crafters also find it easier to work with a sheet of clean waxed paper between the decoupaged paper and the smoothing tool. The squeegee or brayers will easily glide over the waxed paper making it easier to smooth into place. It may also capture the excess Mod Podge squeezed onto the image edges. Carefully lift to remove the wax paper while still wet. Allow decoupaged image 15–20 minutes to dry.
- G - After 20 minutes, brush on a topcoat of desired Mod Podge formula to seal and protect the decoupaged design. Allow to dry. TIP: Dry times may vary depending on the thickness of the Mod Podge applications, humidity and air flow. Be patient and allow the decoupaged area to thoroughly dry before applying additional topcoats.
- H - Once the decoupaged surface is dried and cured, if stickiness remains due to humidity, lightly spray seal the Mod Podged surface using a Mod Podge Spray Clear Acrylic Sealer (formula of choice.)
- A rule of thumb is any decorated glassware can be washed; however, as with all hand-crafted items, it is best to follow the "handmade, hand-wash" rule.
Glitter on Glass

Things to remember when working with glitter:
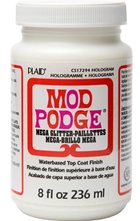
- When working with loose glitter on glass that will be used for drinking or will be washed, make sure to seal with Mod Podge Dishwasher Safe.
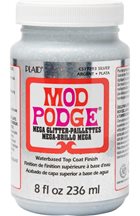
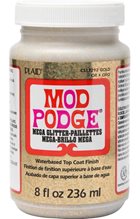
- If you prefer to not work with loose glitter we do offer a variety of Mod Podge Glitter products. Check some of them out below. Please note: that even if you use one of the below Mod Podge Glitter formulas it is still wise to apply a second coat of Mod Podge Dishwasher Safe to protect against water.
- A rule of thumb is any decorated glassware can be washed; however, as with all hand-crafted items, it is best to follow the "handmade, hand-wash" rule.â
- Always clean your glasses with rubbing alcohol.
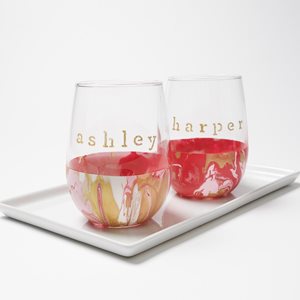
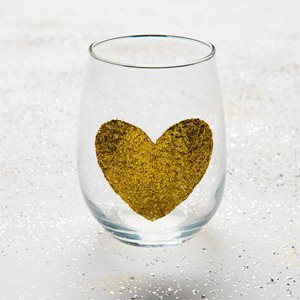
- You use stencils (heart photo above) or the taping-off method (wine glasses photo above) to add glitter to your projects.
- Apply a coat of Mod Podge Dishwasher Safe to the glass. Sprinkle glitter over the Mod Podge and allow to dry. Repeat with a second coat. Top-coat the glitter with Dishwasher Safe Mod Podge.
- Cure for 28 days. Top-rack dishwasher safe.
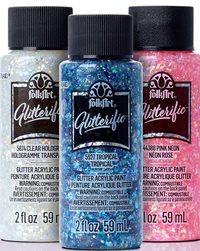
- You can also use a variety of our other glitter paints to decorate your glass, just make sure to seal with Mod Podge Dishwasher Safe. Check out some of the products now!

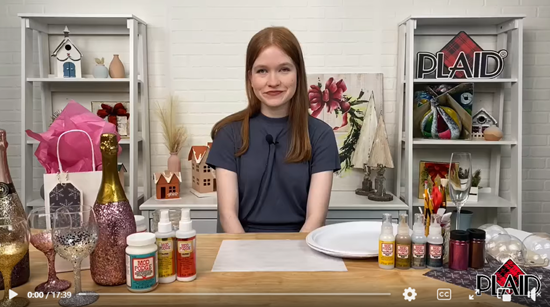
Watch this sparkling Craft Break with Emma as she shows you how to add glitter to wine glasses, wine bottles, and more!
How do you decorate your glass pieces? What will you create for Valentine's Day? Share your creations with us #PlaidCrafts
Happy Crafting!
