.jpg.aspx?width=684&height=577)

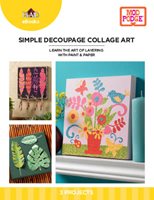
Make paper collage art with this bright and cheerful floral still life project from our new Mod Podge eBook,
Simple Decoupage Collage Art, which contains lots of content including three easy-to-create projects, simple-to-follow written instructions, step-by-step photographs, patterns, and colorful designer papers specific for each project. These designer papers can be easily downloaded and printed from your home printer to create this project and others.
Paper Collage Art Project Idea
.jpg.aspx?width=684&height=577)
This bright and cheerful paper floral still life is not only fun to create, it also is a lesson on color balance and placement! With five different papers to choose from, there are multiple color options. The leaves, as an example, are not all required to be green, try pink, red or blue patterned papers to be creative. Have fun with color choices and placement when designing this imaginative floral still life!
Supplies for Bright and Cheerful Floral Still Life Paper Collage Art Project
Creating the Pattern Papers for Paper Collage Art Project
It is best to print all patterned papers on a dry toner or laser printer to complete each project.
- IMPORTANT: If printing on an inkjet printer, the printed papers should be sealed before working with Mod Podge. Inkjet printers produce prints created from water-based inks and may be susceptible to damage when working with water-based Mod Podge. Inks on the printed images may “re-wet” causing colors to blur slightly. To prevent this from happening with an inkjet-printed paper, lightly spray seal the printed image with a couple light coats of Mod Podge Matte Clear Acrylic Spray before cutting.
- NOTE: When printing from a laser printer, it is not necessary to spray seal the printed paper prior to working with Mod Podge.
Canvas Preparation for Paper Collage Art Project
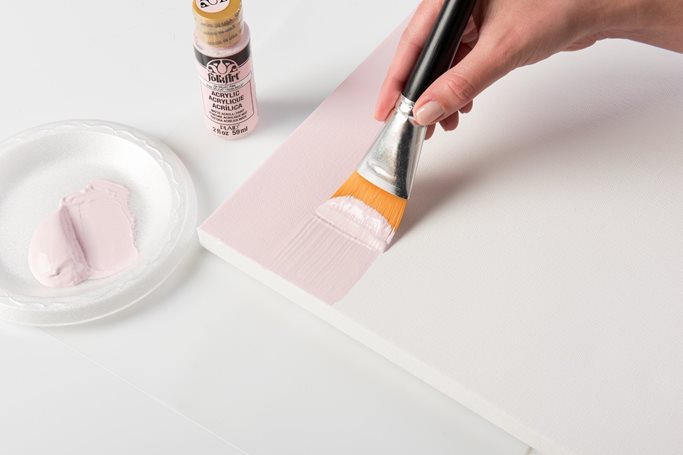
Using a FolkArt Basecoating Brush, apply a smooth, even application of FolkArt Ballet Pink to the entire surface of the canvas, including the gallery wrapped sides. Allow to dry, then reapply a second coat of paint. Let dry.
 Creating the Still Life Composition
- Begin by printing four copies of the patterned papers.
- Reinsert one each of all five patterned papers back into the printer, then print the leaf and butterfly template onto the backside of each patterned paper. Repeat this step for the bird and flower template page as well as the leaf and flower pot template page, printing the template page onto the backside of each patterned paper. This will allow you several color and pattern choices when designing your colorful still life.
- Cut out the desired shapes following the template printed on the backside of each patterned paper. Next, build the desired floral still life composition. Lay each cut shape onto a 12” x 12” sheet of paper as a placeholder. Continue cutting a variety of patterned shapes until the desired still life composition is achieved. NOTE: It is best to keep all the cut patterned pieces on the 12” x 12” sheet of paper until all pieces are decoupaged.
Decoupaging Your Paper Collage Art
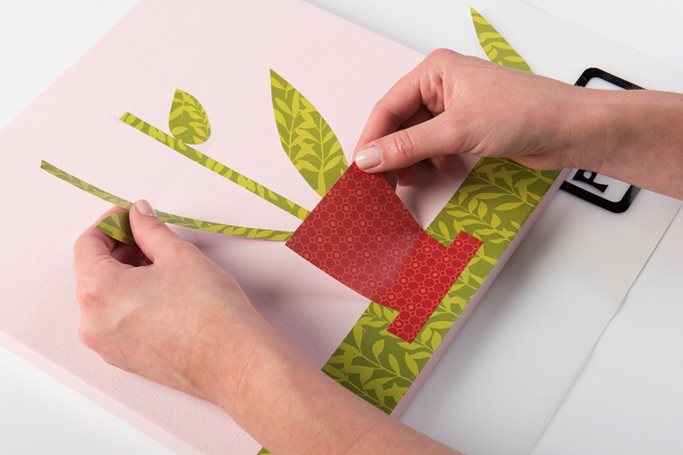
- Use the Mod Podge ¾” flat brush included in the Tool Kit to apply Mod Podge Ultra Matte Chalk to the base of the canvas. Position two patterned table pieces print side down onto the Mod Podge Silicone Mat. Also brush a smooth, even coat of Ultra Matte Chalk to the backside of each “table” pattern piece. Flip the table pieces over and place onto the base of the prepared canvas. NOTE: Use a Mod Podge Brayer or Squeegee to smooth the paper in place, release air pockets and remove excess Mod Podge.
- Using the same decoupage techniques; attach the lower 2” of the flowerpot base onto the table. NOTE: Keeping the flowerpot top unattached at this time will allow you freedom to “build” the floral composition while placing leaf and/or flower stems “inside” the flowerpot as shown below.
- Continue decoupaging one section at a time by adding leaves and flowers. Secure the top of the flowerpot over each leaf and flower stem. Continue collaging, add accents of butterflies and even decoupage a bird where desired. Allow to dry 20 minutes after the last section has been added.

Finishing the Project
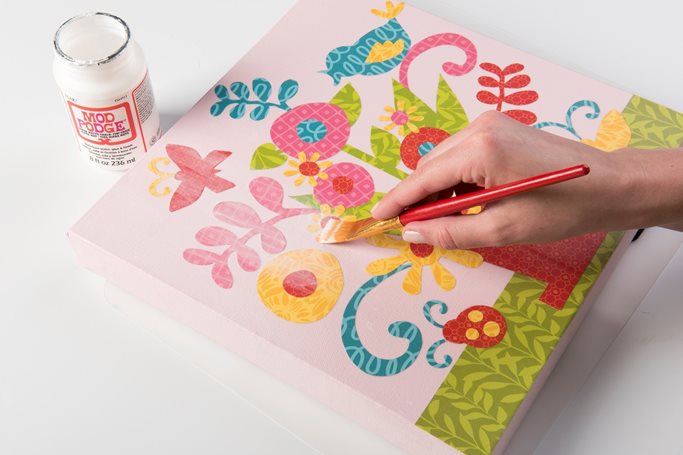
When dry, apply a final topcoat of Mod Podge Ultra Matte Chalk Over the entire canvas including the sides, as shown below. Allow to dry.

Tips for Personalizing Your Paper Collage Art Project
- Although this project is gorgeous completed as a bright and colorful design, try completing it as a tone-on-tone or monochromatic design. As an example, use only the pink and red patterned papers.
- Try accenting some of the decoupaged areas such as flower centers, the dots on the lady bug, or even the bird’s wings with Mod Podge Dimensional Magic for an epoxy-like dimensional clear accent.
Ready to try your hand at creating your own paper collage art project? Check out this and the other two beautiful projects in our new Mod Podge eBook, Simple Decoupage Collage Art!