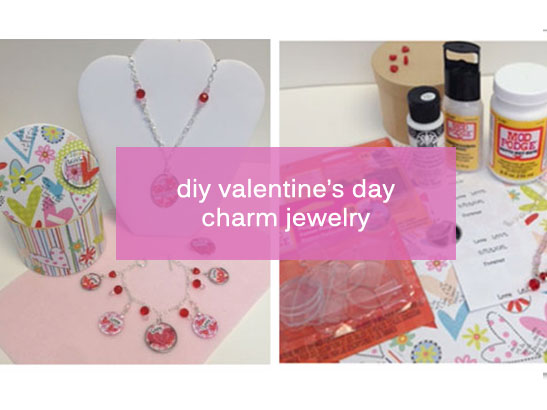
Valentine’s Day is right around the corner and you know it is never too early to begin crafting for this fun holiday. Today, I created a quick Valentine inspired three piece jewelry set, (necklace, bracelet and ring) as well as a fun gift box using Mod Podge products. I want to share with you how cool Mod Podge Dimensional Magic is! Come on … let me show you!

Begin by gathering some supplies: Mod Podge Podgeable Metal Blanks, Mod Podge Podgeable Shapes, Mod Podge Matte, Mod Podge Dimensional Magic, FolkArt Multi-Surface Wicker White, Flat brush, Brush basin or container for water, Paper towels, Scissors, Valentine or heart inspired scrapbook paper, Small paper mache round box, Chain, Chain, Chain, Silver chain, Silver toggle clasp, Silver head pins and eye pins, Select Strands small pink faceted glass beads, Select Strands red glass faceted beads , jewelry tools.

I chose to use the silver metal blanks and a few Podgeable Shapes for my project. Think of each shape as a “blank canvas” to be collaged. Begin cutting small elements from your scrapbook papers creating a layered effect.

Brush a coat of Mod Podge onto the metal blank; also apply Mod Podge to the backside of the paper. Place the background paper in the frame; smooth in place.

Continue adding Mod Podge and layers of cutouts creating your collaged design. If desired, print from your computer text in a fun typeface. I added “Love” and “Love Forever” on a couple of my charms.

Next, I cut paper and Mod Podged it to the backside of each charm. This step is optional, but makes for a nice finished back.
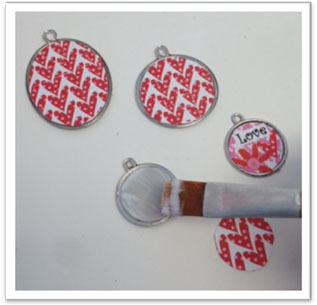
Lay all your completed charms right side up on a small flat surface. Here comes the fun part … I LOVE Dimensional Magic! Remove the cap and invert the bottle. Gently squeeze while directing the nozzle tip. Dimensional Magic will “flow” onto and “fill” the cavity of the metal blank charms. It will dry to an epoxy-like accent! You can also use Dimensional Magic without a frame; it has “stay-put” abilities. I applied it to the words only on the Podgeable Shape charms.

Here is a close up pic of the charms and wet Dimensional Mod Podge. Don’t worry, it will dry clear!

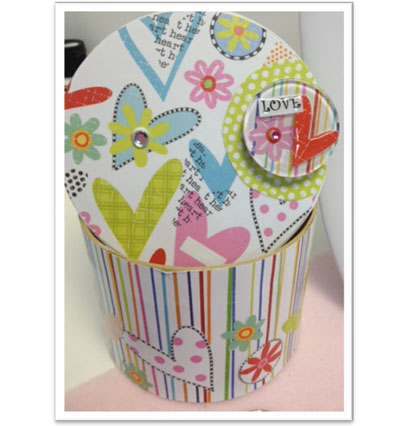
While I waited on the charms to dry, I worked on the gift box. It was fun and easy like all Mod Podge projects. Begin by designing your paper selection and cutting the pattern pieces.

Next, quickly add a coat of FolkArt Multi-Surface Wicker White to the box lid and band. I also painted the box bottom as a finishing touch. When the Wicker White basecoat was thoroughly dry, I decoupaged the paper to the box. I used a multi-heart pattern for the top and a coordinating stripe for the box base.

I then accented the striped area with additional paper heart cutouts. Once all the paper has been Mod Podged to the paper mache box, apply a smooth top coat of Mod Podge to the entire box. Allow to dry.

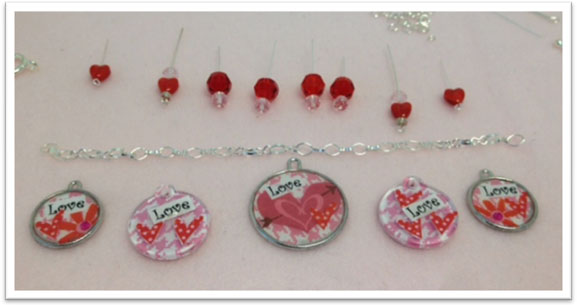
Now that our Dimensional Magic charms are thoroughly dry, let’s quickly assemble our bracelet and necklace, shall we? I like to have all my supplies, chain, charms, beads, etc. together and lay out the pattern before I begin assembling.
Attaching toggle clasps to chain to create a bracelet and adding charms to the bracelet is easier than you may think. Small little rings, called “jump rings” do all the work! You will notice a small split in a jump ring. Using jewelry pliers to hold the jump ring with the split at the top, slowly move one hand towards you and the other hand away from you. You will open the jump ring as you see in the pic below. Once the jump ring is open, add the charm to the bracelet chain. To close the jump ring, simply reverse the direction of the two hands. Voila! It is as easy as that!

Here is a toggle ring attached to one end of the bracelet chain.

To create bead charms, thread either a head pin or an eye pin with desired beads. Fold the remaining pin over 90 degrees.

Using needle nose pliers, create a loop and trim the excess pin.

Once the toggle clasps are added to the chain, begin adding the decoupaged charms and bead charms. Lay out your charm / bead pattern to ensure even placement before you attach them. Let’s take a look at the completed projects … Here is a look at the finished charm bracelet. It definitely looks like Valentine’s Day with hearts and messages of “LOVE” and all in pink and red, don’t you think?

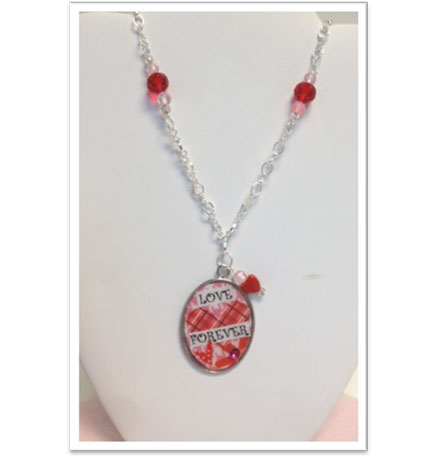
And here is a look at the finished Valentine necklace. I added beaded charms to the necklace chain as spacers. And a closer look will show you I even added a small beaded charm to the decoupaged oval blank!
And what Valentine jewelry ensemble would be complete without a ring? I created a ring using a Podgeable oval shape which was glued to a Mod Podge Podgeable silver ring blank.

Whether you create this Valentine jewelry trio for yourself or to give as a Valentine gift for a loved one or dear friend, you will want to store these beauties in this lovely decorated Valentine box.
I hope that you enjoyed learning about Mod Podge Dimensional Magic, it is such a great product with its stay-put formula, you can add epoxy-like accents and texture to all your craft projects! Just think of the possibilities …. Will your next craft project use Dimensional Magic?